3DOD Thesis Save
3D Object Detection for Autonomous Driving in PyTorch, trained on the KITTI dataset.
3DOD_thesis
3D Object Detection for Autonomous Driving in PyTorch, trained on the KITTI dataset.
- Youtube video of results:
- This work constitutes roughly 50% of the MSc thesis:
-
- Fredrik K. Gustafsson and Erik Linder-Norén
-
-
Master of Science Thesis in Electrical Engineering, Linköping University, 2018
-
Index
- Using a VM on Paperspace
- Used datasets
- Pretrained models
- Training a model on KITTI
- Running a pretrained Frustum-PointNet model on KITTI
- Running a pretrained Extended-Frustum-PointNet model on KITTI
- Running a pretrained Image-Only model on KITTI
- Visualization
- Evaluation
Paperspace:
To train models and to run pretrained models, you can use an Ubuntu 16.04 P4000 VM with 250 GB SSD on Paperspace. Below I have listed what I needed to do in order to get started, and some things I found useful.
-
Install docker-ce:
-
- $ curl -fsSL https://download.docker.com/linux/ubuntu/gpg | sudo apt-key add -
-
- $ sudo add-apt-repository "deb [arch=amd64] https://download.docker.com/linux/ubuntu $(lsb_release -cs) stable"
-
- $ sudo apt-get update
-
- $ sudo apt-get install -y docker-ce
-
Install CUDA drivers:
-
- $ CUDA_REPO_PKG=cuda-repo-ubuntu1604_9.1.85-1_amd64.deb
-
- $ wget -O /tmp/${CUDA_REPO_PKG} http://developer.download.nvidia.com/compute/cuda/repos/ubuntu1604/x86_64/${CUDA_REPO_PKG}
-
- $ sudo dpkg -i /tmp/${CUDA_REPO_PKG}
-
- $ sudo apt-key adv --fetch-keys http://developer.download.nvidia.com/compute/cuda/repos/ubuntu1604/x86_64/7fa2af80.pub
-
- $ rm -f /tmp/${CUDA_REPO_PKG}
-
- $ sudo apt-get update
-
- $ sudo apt-get install cuda-drivers
-
- Reboot the VM.
-
Install nvidia-docker:
-
- $ sudo dpkg -i /tmp/nvidia-docker*.deb && rm /tmp/nvidia-docker*.deb
-
- $ sudo nvidia-docker run --rm nvidia/cuda nvidia-smi
-
Download the PyTorch 0.4 docker image:
-
- $ sudo docker pull pytorch/pytorch:0.4_cuda9_cudnn7
-
Create start_docker_image.sh containing:
#!/bin/bash

# DEFAULT VALUES
GPUIDS="0"
NAME="paperspace_GPU"


NV_GPU="$GPUIDS" nvidia-docker run -it --rm \
        -p 5584:5584 \
        --name "$NAME""$GPUIDS" \
        -v /home/paperspace:/root/ \
        pytorch/pytorch:0.4_cuda9_cudnn7 bash
-
Inside the image, /root/ will now be mapped to /home/paperspace (i.e., $ cd -- takes you to the regular home folder).
-
To start the image:
-
- $ sudo sh start_docker_image.sh
-
To commit changes to the image:
-
- Open a new terminal window.
-
- $ sudo docker commit paperspace_GPU0 pytorch/pytorch:0.4_cuda9_cudnn7
-
To stop the image when it’s running:
-
- $ sudo docker stop paperspace_GPU0
-
To exit the image without killing running code:
-
- Ctrl + P + Q
-
To get back into a running image:
-
- $ sudo docker attach paperspace_GPU0
-
To open more than one terminal window at the same time:
-
- $ sudo docker exec -it paperspace_GPU0 bash
-
To install the needed software inside the docker image:
-
- $ apt-get update
-
- $ apt-get install nano
-
- $ apt-get install sudo
-
- $ apt-get install wget
-
- $ sudo apt install unzip
-
- $ sudo apt-get install libopencv-dev
-
- $ pip install opencv-python
-
- $ python -mpip install matplotlib
-
- Commit changes to the image (otherwise, the installed packages will be removed at exit!)
-
Do the following outside of the docker image:
-
- $ --
-
- $ git clone https://github.com/fregu856/3DOD_thesis.git
-
- Download KITTI object (data_object_image_2.zip, data_object_velodyne.zip, data_object_calib.zip and data_object_label_2.zip) ($ wget the download link that was sent to you in an email).
-
- Unzip all files ($ sudo apt install unzip, and then $ unzip file name).
-
- Place the folders 'training' and 'testing' in 3DOD_thesis/data/kitti/object.
-
- Download KITTI tracking (data_tracking_image_2.zip, data_tracking_velodyne.zip, data_tracking_calib.zip and data_tracking_label_2.zip) ($ wget the download link that was sent to you in an email).
-
- Unzip all files ($ sudo apt install unzip, and then $ unzip file name).
-
- Place the folders 'training' and 'testing' in 3DOD_thesis/data/kitti/tracking.
Used datasets:
-
KITTI train:
-
- 3712 examples (roughly 50%) from the KITTI training set, see thesis for more info.
-
KITTI val:
-
- 3769 examples (roughly 50%) from the KITTI training set, see thesis for more info.
-
KITTI train random:
-
- 6733 examples (random 90% subset) from the KITTI training set.
-
KITTI test:
-
- The KITTI testing set, 7518 examples.
Pretrained models:
-
pretrained_models/model_37_2_epoch_400.pth:
-
- Frustum-PointNet trained for 400 epochs on KITTI train random.
-
pretrained_models/model_32_2_epoch_299.pth:
-
- Frustum-PointNet trained for 299 epochs on SYN train (synthetic dataset, see the thesis for more info).
-
pretrained_models/model_38_2_epoch_400.pth:
-
- Extended-Frustum-PointNet trained for 400 epochs on KITTI train random.
-
pretrained_models/model_10_2_epoch_400.pth:
-
- Image-Only trained for 400 epochs on KITTI train random.
Train Frustum-PointNet model on KITTI train:
- SSH into the paperspace server.
- $ sudo sh start_docker_image.sh
- $ cd --
- $ python 3DOD_thesis/Frustum-PointNet/train_frustum_pointnet.py
Train Extended-Frustum-PointNet model on KITTI train:
- SSH into the paperspace server.
- $ sudo sh start_docker_image.sh
- $ cd --
- $ python 3DOD_thesis/Extended-Frustum-PointNet/train_frustum_pointnet_img.py
Train Image-Only model on KITTI train:
- SSH into the paperspace server.
- $ sudo sh start_docker_image.sh
- $ cd --
- $ python 3DOD_thesis/Image-Only/train_imgnet.py
Run pretrained Frustum-PointNet model on KITTI val:
-
SSH into the paperspace server.
-
$ sudo sh start_docker_image.sh
-
$ cd --
-
$ python 3DOD_thesis/Frustum-PointNet/eval_frustum_pointnet_val.py
-
- Running this script will print a number of losses/metrics:
validation loss: 0.667806
validation TNet loss: 0.0494426
validation InstanceSeg loss: 0.193783
validation BboxNet loss: 0.163053
validation BboxNet size loss: 0.0157994
validation BboxNet center loss: 0.0187426
validation BboxNet heading class loss: 0.096926
validation BboxNet heading regr loss: 0.00315847
validation heading class accuracy: 0.959445
validation corner loss: 0.0261527
validation accuracy: 0.921544
validation precision: 0.887209
validation recall: 0.949744
validation f1: 0.917124
-
- It also creates the file 3DOD_thesis/training_logs/model_Frustum-PointNet_eval_val/eval_dict_val.pkl, containing ground truth and predicted 3Dbbox parameters which can be used for visualization and computing evaluation metrics.
Run pretrained Frustum-PointNet model on a sequence from the KITTI training set:
-
SSH into the paperspace server.
-
$ sudo sh start_docker_image.sh
-
$ cd --
-
$ python 3DOD_thesis/Frustum-PointNet/eval_frustum_pointnet_val_seq.py
-
- Running this script will print a number of losses/metrics:
validation loss: 0.781812
validation TNet loss: 0.0352736
validation InstanceSeg loss: 0.292994
validation BboxNet loss: 0.158156
validation BboxNet size loss: 0.0182432
validation BboxNet center loss: 0.0204534
validation BboxNet heading class loss: 0.0838291
validation BboxNet heading regr loss: 0.00356304
validation heading class accuracy: 0.9675
validation corner loss: 0.0295388
validation accuracy: 0.865405
validation precision: 0.83858
validation recall: 0.924499
validation f1: 0.879015
-
- It also creates the file 3DOD_thesis/training_logs/model_Frustum-PointNet_eval_val_seq/eval_dict_val_seq_{sequence number}.pkl, containing ground truth and predicted 3Dbbox parameters which can be used for visualization.
Run pretrained Frustum-PointNet model on KITTI test:
-
SSH into the paperspace server.
-
$ sudo sh start_docker_image.sh
-
$ cd --
-
$ python 3DOD_thesis/Frustum-PointNet/eval_frustum_pointnet_test.py
-
- Running this script will create the file 3DOD_thesis/training_logs/model_Frustum-PointNet_eval_test/eval_dict_test.pkl, containing predicted 3Dbbox parameters which can be used for visualization and computing evaluation metrics.
-
- When running the model on KITTI test, we take detections from a 2D object detector (implemented in a previous thesis project at Zenuty) as input 2Dbboxes. The 2D detector has the following performance for cars on KITTI val: Easy - 87.8% | Moderate - 77.4% | Hard - 68.1%.
Run pretrained Frustum-PointNet model on sequences from KITTI test:
-
SSH into the paperspace server.
-
$ sudo sh start_docker_image.sh
-
$ cd --
-
$ python 3DOD_thesis/Frustum-PointNet/eval_frustum_pointnet_test_seq.py
-
- Running this script will create the files 3DOD_thesis/training_logs/model_Frustum-PointNet_eval_test_seq/eval_dict_test_seq_{sequence number}.pkl, containing predicted 3Dbbox parameters which can be used for visualization.
-
- When running the model on KITTI test, we take detections from a 2D object detector (implemented in a previous thesis project at Zenuty) as input 2Dbboxes. The 2D detector has the following performance for cars on KITTI val: Easy - 87.8% | Moderate - 77.4% | Hard - 68.1%.
Run pretrained Frustum-PointNet model on KITTI val, with 2D detections as input:
-
SSH into the paperspace server.
-
$ sudo sh start_docker_image.sh
-
$ cd --
-
$ python 3DOD_thesis/Frustum-PointNet/eval_frustum_pointnet_val_2ddetections.py
-
- Running this script will create the file 3DOD_thesis/training_logs/model_Frustum-PointNet_eval_val_2ddetections/eval_dict_val_2ddetections.pkl, containing predicted 3Dbbox parameters which can be used for visualization and computing evaluation metrics.
-
- When running the model, we here take detections from a 2D object detector (implemented by the original Frustum-PointNet authors and made available on github) as input 2Dbboxes. The 2D detector has the following performance for cars on KITTI val: Easy - 96.48% | Moderate - 90.31% | Hard - 87.63%.
Run pretrained Extended-Frustum-PointNet model on KITTI val:
-
SSH into the paperspace server.
-
$ sudo sh start_docker_image.sh
-
$ cd --
-
$ python 3DOD_thesis/Extended-Frustum-PointNet/eval_frustum_pointnet_img_val.py
-
- Running this script will print a number of losses/metrics:
validation loss: 0.418462
validation TNet loss: 0.047026
validation InstanceSeg loss: 0.181566
validation BboxNet loss: 0.0217167
validation BboxNet size loss: 0.0020278
validation BboxNet center loss: 0.0168909
validation BboxNet heading class loss: 0.00148923
validation BboxNet heading regr loss: 0.000130879
validation heading class accuracy: 0.999694
validation corner loss: 0.0168153
validation accuracy: 0.927203
validation precision: 0.893525
validation recall: 0.954732
validation f1: 0.921978
-
- It also creates the file 3DOD_thesis/training_logs/model_Extended-Frustum-PointNet_eval_val/eval_dict_val.pkl, containing ground truth and predicted 3Dbbox parameters which can be used for visualization and computing evaluation metrics.
Run pretrained Extended-Frustum-PointNet model on a sequence from the KITTI training set:
-
SSH into the paperspace server.
-
$ sudo sh start_docker_image.sh
-
$ cd --
-
$ python 3DOD_thesis/Extended-Frustum-PointNet/eval_frustum_pointnet_img_val_seq.py
-
- Running this script will print a number of losses/metrics:
validation loss: 0.499888
validation TNet loss: 0.0294649
validation InstanceSeg loss: 0.281868
validation BboxNet loss: 0.0197038
validation BboxNet size loss: 0.00138443
validation BboxNet center loss: 0.0167136
validation BboxNet heading class loss: 4.17427e-05
validation BboxNet heading regr loss: 0.000156402
validation heading class accuracy: 0.998711
validation corner loss: 0.0168851
validation accuracy: 0.878334
validation precision: 0.848052
validation recall: 0.942269
validation f1: 0.8914
-
- It also creates the file 3DOD_thesis/training_logs/model_Extended-Frustum-PointNet_eval_val_seq/eval_dict_val_seq_{sequence number}.pkl, containing ground truth and predicted 3Dbbox parameters which can be used for visualization.
Run pretrained Extended-Frustum-PointNet model on KITTI test:
-
SSH into the paperspace server.
-
$ sudo sh start_docker_image.sh
-
$ cd --
-
$ python 3DOD_thesis/Extended-Frustum-PointNet/eval_frustum_pointnet_img_test.py
-
- Running this script will create the file 3DOD_thesis/training_logs/model_Extended-Frustum-PointNet_eval_test/eval_dict_test.pkl, containing predicted 3Dbbox parameters which can be used for visualization and computing evaluation metrics.
-
- When running the model on KITTI test, we take detections from a 2D object detector (implemented in a previous thesis project at Zenuty) as input 2Dbboxes. The 2D detector has the following performance for cars on KITTI val: Easy - 87.8% | Moderate - 77.4% | Hard - 68.1%.
Run pretrained Extended-Frustum-PointNet model on sequences from KITTI test:
-
SSH into the paperspace server.
-
$ sudo sh start_docker_image.sh
-
$ cd --
-
$ python 3DOD_thesis/Extended-Frustum-PointNet/eval_frustum_pointnet_img_test_seq.py
-
- Running this script will create the files 3DOD_thesis/training_logs/model_Extended-Frustum-PointNet_eval_test_seq/eval_dict_test_seq_{sequence number}.pkl, containing predicted 3Dbbox parameters which can be used for visualization.
-
- When running the model on KITTI test, we take detections from a 2D object detector (implemented in a previous thesis project at Zenuty) as input 2Dbboxes. The 2D detector has the following performance for cars on KITTI val: Easy - 87.8% | Moderate - 77.4% | Hard - 68.1%.
Run pretrained Extended-Frustum-PointNet model on KITTI val, with 2D detections as input:
-
SSH into the paperspace server.
-
$ sudo sh start_docker_image.sh
-
$ cd --
-
$ python 3DOD_thesis/Extended-Frustum-PointNet/eval_frustum_pointnet_img_val_2ddetections.py
-
- Running this script will create the file 3DOD_thesis/training_logs/model_Extended-Frustum-PointNet_eval_val_2ddetections/eval_dict_val_2ddetections.pkl, containing predicted 3Dbbox parameters which can be used for visualization and computing evaluation metrics.
-
- When running the model, we here take detections from a 2D object detector (implemented by the original Frustum-PointNet authors and made available on github) as input 2Dbboxes. The 2D detector has the following performance for cars on KITTI val: Easy - 96.48% | Moderate - 90.31% | Hard - 87.63%.
Run pretrained Image-Only model on KITTI val:
-
SSH into the paperspace server.
-
$ sudo sh start_docker_image.sh
-
$ cd --
-
$ python 3DOD_thesis/Image-Only/eval_imgnet_val.py
-
- Running this script will print a number of losses/metrics:
val loss: 0.00425181
val size loss: 0.000454653
val keypoints loss: 0.000264362
val distance loss: 0.115353
val 3d size loss: 0.000439736
val 3d center loss: 0.0352361
val 3d r_y loss: 0.0983654
val 3d distance loss: 0.102937
-
- It also creates the file 3DOD_thesis/training_logs/model_Image-Only_eval_val/eval_dict_val.pkl, containing ground truth and predicted 3Dbbox parameters which can be used for visualization and computing evaluation metrics.
Run pretrained Image-Only model on a sequence from the KITTI training set:
-
SSH into the paperspace server.
-
$ sudo sh start_docker_image.sh
-
$ cd --
-
$ python 3DOD_thesis/Image-Only/eval_imgnet_val_seq.py
-
- Running this script will print a number of losses/metrics:
val loss: 0.00529856
val size loss: 0.000539969
val keypoints loss: 0.000351892
val distance loss: 0.123967
val 3d size loss: 0.000526106
val 3d center loss: 0.0398309
val 3d r_y loss: 0.000271052
val 3d distance loss: 0.11471
-
- It also creates the file 3DOD_thesis/training_logs/model_Image-Only_eval_val_seq/eval_dict_val_seq_{sequence number}.pkl, containing ground truth and predicted 3Dbbox parameters which can be used for visualization.
Run pretrained Image-Only model on KITTI test:
-
SSH into the paperspace server.
-
$ sudo sh start_docker_image.sh
-
$ cd --
-
$ python 3DOD_thesis/Image-Only/eval_imgnet_test.py
-
- Running this script will create the file 3DOD_thesis/training_logs/model_Image-Only_eval_test/eval_dict_test.pkl, containing predicted 3Dbbox parameters which can be used for visualization and computing evaluation metrics.
-
- When running the model on KITTI test, we take detections from a 2D object detector (implemented in a previous thesis project at Zenuty) as input 2Dbboxes. The 2D detector has the following performance for cars on KITTI val: Easy - 87.8% | Moderate - 77.4% | Hard - 68.1%.
Run pretrained Image-Only model on sequences from KITTI test:
-
SSH into the paperspace server.
-
$ sudo sh start_docker_image.sh
-
$ cd --
-
$ python 3DOD_thesis/Image-Only/eval_imgnet_test_seq.py
-
- Running this script will create the files 3DOD_thesis/training_logs/model_Image-Only_eval_test_seq/eval_dict_test_seq_{sequence number}.pkl, containing predicted 3Dbbox parameters which can be used for visualization.
-
- When running the model on KITTI test, we take detections from a 2D object detector (implemented in a previous thesis project at Zenuty) as input 2Dbboxes. The 2D detector has the following performance for cars on KITTI val: Easy - 87.8% | Moderate - 77.4% | Hard - 68.1%.
Run pretrained Image-Only model on KITTI val, with 2D detections as input:
-
SSH into the paperspace server.
-
$ sudo sh start_docker_image.sh
-
$ cd --
-
$ python 3DOD_thesis/Image-Only/eval_imgnet_val_2ddetections.py
-
- Running this script will create the file 3DOD_thesis/training_logs/model_Image-Only_eval_val_2ddetections/eval_dict_val_2ddetections.pkl, containing predicted 3Dbbox parameters which can be used for visualization and computing evaluation metrics.
-
- When running the model, we here take detections from a 2D object detector (implemented by the original Frustum-PointNet authors and made available on github) as input 2Dbboxes. The 2D detector has the following performance for cars on KITTI val: Easy - 96.48% | Moderate - 90.31% | Hard - 87.63%.
Visualization
-
For visualization of point clouds and 3Dbboxes in different ways, I have used Open3D on my Ubuntu 16.04 laptop.
-
On my laptop, the 3DOD_thesis folder is located at /home/fregu856/3DOD_thesis, which is reflected in the code.
-
Installing Open3D:
-
- $ cd ~/3DOD_thesis
-
- $ git clone https://github.com/IntelVCL/Open3D
-
- $ cd Open3D
-
- $ scripts/install-deps-ubuntu.sh
-
- $ mkdir build
-
- $ cd build
-
- $ cmake -DPYTHON_EXECUTABLE:FILEPATH=/usr/bin/python ../src (to make sure it uses python 2)
-
- $ make -j
-
Basic Open3D usage:
-
- Click + drag: rotate the 3D world.
-
- Ctrl + click + drag: shift the 3D world.
-
- Scroll: zoom in and out.
visualization/visualize_eval_val.py:
-
Run a pretrained Frustum-PointNet, Extended-Frustum-PointNet or Image-Only model on KITTI val.
-
Place the created eval_dict_val.pkl in the correct location (see line 253 in visualize_eval_val.py).
-
$ cd 3DOD_thesis
-
$ python visualization/visualize_eval_val.py
-
This will:
-
- (1) Open a window in Open3D, visualizing the point cloud and the ground truth 3Dbboxes.
-
- (2) By closing this window, a new window is opened visualizing the point cloud and the predicted 3Dbboxes.
-
- (3) By closing this window, a new window is opened visualizing the point cloud, the ground truth 3Dbboxes and the predicted 3Dbboxes.
-
- (4) By closing this window, step 1 is repeated for the next example.
visualization/visualize_eval_test.py:
-
Run a pretrained Frustum-PointNet, Extended-Frustum-PointNet or Image-Only model on KITTI test.
-
Place the created eval_dict_test.pkl in the correct location (see line 279 in visualize_eval_test.py).
-
$ cd 3DOD_thesis
-
$ python visualization/visualize_eval_test.py
-
This will:
-
- (1) Open a window in Open3D, visualizing the point cloud and the predicted 3Dbboxes.
-
- (2) Create visualization_eval_test.png, visualizing the predicted 3Dbboxes and the input 2Dbboxes in the image plane.
-
- (3) By closing the Open3D window, step 1 is repeated for the next example.
visualization/visualize_eval_val_seq.py:
-
Run a pretrained Frustum-PointNet, Extended-Frustum-PointNet or Image-Only model on a sequence from the KITTI training set.
-
Place the created eval_dict_val_seq_{sequence number}.pkl in the correct location (see line 256 in visualize_eval_val_seq.py).
-
$ cd 3DOD_thesis
-
$ python visualization/visualize_eval_val_seq.py
-
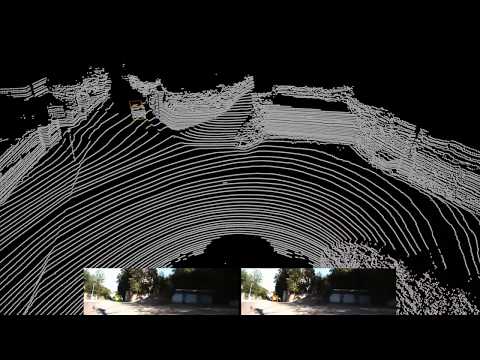
This will create a visualization video of some kind, the type of visualization is specified in the code (see the out-commented sections), but as default this will create a video visualizing both the ground truth and predicted 3Dbboxes in both the point clouds and images. Youtube video (yellow/red bboxes: predicted, pink/blue: ground truth).
visualization/visualize_eval_test_seq.py:
-
Run a pretrained Frustum-PointNet, Extended-Frustum-PointNet or Image-Only model on sequences from KITTI test.
-
Place the created eval_dict_test_seq_{sequence number}.pkl files in the correct location (see line 282 in visualize_eval_test_seq.py).
-
$ cd 3DOD_thesis
-
$ python visualization/visualize_eval_test_seq.py
-
This will create visualization videos of some kind, the type of visualization is specified in the code (see the out-commented sections), but as default this will create a video visualizing the predicted 3Dbboxes in both the point clouds and images, and visualizing the input 2Dbboxes in the images. See Youtube video from the top of the page.
visualization/visualize_eval_val_extra.py:
-
Very similar to visualize_eval_val.py, but also visualizes the results of the intermediate steps in the Frustum-PointNet/Extended-Frustum-PointNet architecture.
-
Run a pretrained Frustum-PointNet or Extended-Frustum-PointNet model on KITTI val and save intermediate results for visualization (uncomment the lines at line 146 in eval_frustum_pointnet_val.py, or line 148 in eval_frustum_pointnet_img_val.py).
-
Place the created eval_dict_val.pkl in the correct location (see line 278 in visualize_eval_val_extra.py).
-
$ cd 3DOD_thesis
-
$ python visualization/visualize_eval_val_extra.py
-
This will:
-
- (1) Open a window in Open3D, visualizing the point cloud and the frustum point cloud (in red) corresponding to the first vehicle in this example.
-
- (2) By closing this window, a new window is opened visualizing the point cloud, the frustum point cloud (in red), the ground truth segmented point cloud (in green) and the ground truth 3Dbbox corresponding to the first vehicle.
-
- (3) By closing this window, a new window is opened visualizing the point cloud, the frustum point cloud (in red), the predicted segmented point cloud (in blue) and the predicted 3Dbbox corresponding to the first vehicle.
-
- (4) By closing this window, a new window is opened visualizing the point cloud, the ground truth 3Dbbox and the predicted 3Dbbox corresponding to the first vehicle.
-
- (5) By closing this window, step 1 is repeated for the next vehicle in the example.
-
When all the vehicles in the current example have been visualized, it continues with the next example.
visualization/visualize_lidar.py:
-
Simple script for visualizing all the point clouds you have located at 3DOD_thesis/data/kitti/object/training/velodyne.
-
$ cd 3DOD_thesis
-
$ python visualization/visualize_lidar.py
-
This will:
-
- (1) Open a window in Open3D, visualizing the first point cloud.
-
- (2) By closing this window, step 1 is repeated for the next point cloud.
Evaluation
-
For computing evaluation metrics, I have used a slightly modified version of eval_kitti on my Ubuntu 16.04 laptop.
-
On my laptop, the 3DOD_thesis folder is located at /home/fregu856/3DOD_thesis, which is reflected in the code.
Computing metrics on KITTI val - constant 3D confidence scores:
-
Run a pretrained Frustum-PointNet, Extended-Frustum-PointNet or Image-Only model on KITTI val, taking ground truth 2Dbboxes as input.
-
Place the created eval_dict_val.pkl in the correct location (see line 78 in create_txt_files_val.py).
-
$ cd 3DOD_thesis
-
$ python evaluation/create_txt_files_val.py
-
$ cd eval_kitti/build
-
$ ./evaluate_object val_Frustum-PointNet_1 val (where "val_Frustum-PointNet_1" is experiment_name, set on line 55 in create_txt_files_val.py)
-
$ cd -
-
$ cd eval_kitti
-
$ python parser.py val_Frustum-PointNet_1 val (where "val_Frustum-PointNet_1 val" should be the same as above)
-
- This will output performance metrics of the following form:
car easy detection 0.842861
car moderate detection 0.811715454545
car hard detection 0.834955454545
----------------
car easy detection_ground 0.884758
car moderate detection_ground 0.815156363636
car hard detection_ground 0.837436363636
----------------
car easy detection_3d 0.707517272727
car moderate detection_3d 0.716832727273
car hard detection_3d 0.679985181818
- When we take the ground truth 2Dbboxes as input, we use a constant 3D detection confidence score of 1.0. This results in constant precision-recall curves (found in 3DOD_thesis/eval_kitti/build/results/val_Frustum-PointNet_1) and somewhat degraded performance metrics.
Computing metrics on KITTI val - 2D confidence scores as 3D confidence scores:
-
Run a pretrained Frustum-PointNet, Extended-Frustum-PointNet or Image-Only model on KITTI val, taking 2D detections as input.
-
Place the created eval_dict_val_2ddetections.pkl in the correct location (see line 78 in create_txt_files_val_2ddetections.py).
-
$ cd 3DOD_thesis
-
$ python evaluation/create_txt_files_val_2ddetections.py
-
$ cd eval_kitti/build
-
$ ./evaluate_object val_2ddetections_Frustum-PointNet_1 val (where "val_2ddetections_Frustum-PointNet_1" is experiment_name, set on line 55 in create_txt_files_val_2ddetections.py)
-
$ cd -
-
$ cd eval_kitti
-
$ python parser.py val_2ddetections_Frustum-PointNet_1 val (where "val_2ddetections_Frustum-PointNet_1 val" should be the same as above)
-
- This will output performance metrics of the following form:
car easy detection 0.890627727273
car moderate detection 0.844203727273
car hard detection 0.756144545455
----------------
car easy detection_ground 0.927797272727
car moderate detection_ground 0.861135272727
car hard detection_ground 0.774095636364
----------------
car easy detection_3d 0.848968818182
car moderate detection_3d 0.736132272727
car hard detection_3d 0.703275272727
- In this case, we use the confidence scores of the 2D detections also as the 3D detection confidence scores. This results in more interesting precision-recall curves (found in 3DOD_thesis/eval_kitti/build/results/val_2ddetections_Frustum-PointNet_1) and generally somewhat improved performance metrics.
Computing metrics on KITTI test (2D confidence scores as 3D confidence scores):
-
Run a pretrained Frustum-PointNet, Extended-Frustum-PointNet or Image-Only model on KITTI test.
-
Place the created eval_dict_test.pkl in the correct location (see line 78 in create_txt_files_test.py).
-
$ cd 3DOD_thesis
-
$ python evaluation/create_txt_files_test.py
-
This will create all the .txt files (placed in 3DOD_thesis/eval_kitti/build/results/test_Frustum-PointNet_1/data) needed to submit to the KITTI 3D object detection leaderboard, see submission instructions.
