Yolact Save
A simple, fully convolutional model for real-time instance segmentation.
You Only Look At CoefficienTs
    ██╗   ██╗ ██████╗ ██╗      █████╗  ██████╗████████╗
    ╚██╗ ██╔╝██╔═══██╗██║     ██╔══██╗██╔════╝╚══██╔══╝
     ╚████╔╝ ██║   ██║██║     ███████║██║        ██║
      ╚██╔╝  ██║   ██║██║     ██╔══██║██║        ██║
       ██║   ╚██████╔╝███████╗██║  ██║╚██████╗   ██║
       ╚═╝    ╚═════╝ ╚══════╝╚═╝  ╚═╝ ╚═════╝   ╚═╝
A simple, fully convolutional model for real-time instance segmentation. This is the code for our papers:
YOLACT++ (v1.2) released! (Changelog)
YOLACT++'s resnet50 model runs at 33.5 fps on a Titan Xp and achieves 34.1 mAP on COCO's test-dev (check out our journal paper here).
In order to use YOLACT++, make sure you compile the DCNv2 code. (See Installation)
For a real-time demo, check out our ICCV video:
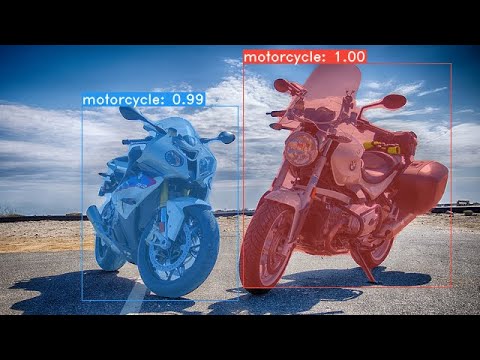
Some examples from our YOLACT base model (33.5 fps on a Titan Xp and 29.8 mAP on COCO's test-dev):


Installation
- Clone this repository and enter it:
git clone https://github.com/dbolya/yolact.git cd yolact - Set up the environment using one of the following methods:
- Using Anaconda
- Run
conda env create -f environment.yml
- Run
- Manually with pip
- Set up a Python3 environment (e.g., using virtenv).
- Install Pytorch 1.0.1 (or higher) and TorchVision.
- Install some other packages:
# Cython needs to be installed before pycocotools
pip install cython
pip install opencv-python pillow pycocotools matplotlib
- Using Anaconda
- If you'd like to train YOLACT, download the COCO dataset and the 2014/2017 annotations. Note that this script will take a while and dump 21gb of files into
./data/coco.sh data/scripts/COCO.sh - If you'd like to evaluate YOLACT on
test-dev, downloadtest-devwith this script.sh data/scripts/COCO_test.sh - If you want to use YOLACT++, compile deformable convolutional layers (from DCNv2).
Make sure you have the latest CUDA toolkit installed from NVidia's Website.
cd external/DCNv2
python setup.py build develop
Evaluation
Here are our YOLACT models (released on April 5th, 2019) along with their FPS on a Titan Xp and mAP on test-dev:
| Image Size | Backbone | FPS | mAP | Weights | |
|---|---|---|---|---|---|
| 550 | Resnet50-FPN | 42.5 | 28.2 | yolact_resnet50_54_800000.pth | Mirror |
| 550 | Darknet53-FPN | 40.0 | 28.7 | yolact_darknet53_54_800000.pth | Mirror |
| 550 | Resnet101-FPN | 33.5 | 29.8 | yolact_base_54_800000.pth | Mirror |
| 700 | Resnet101-FPN | 23.6 | 31.2 | yolact_im700_54_800000.pth | Mirror |
YOLACT++ models (released on December 16th, 2019):
| Image Size | Backbone | FPS | mAP | Weights | |
|---|---|---|---|---|---|
| 550 | Resnet50-FPN | 33.5 | 34.1 | yolact_plus_resnet50_54_800000.pth | Mirror |
| 550 | Resnet101-FPN | 27.3 | 34.6 | yolact_plus_base_54_800000.pth | Mirror |
To evalute the model, put the corresponding weights file in the ./weights directory and run one of the following commands. The name of each config is everything before the numbers in the file name (e.g., yolact_base for yolact_base_54_800000.pth).
Quantitative Results on COCO
# Quantitatively evaluate a trained model on the entire validation set. Make sure you have COCO downloaded as above.
# This should get 29.92 validation mask mAP last time I checked.
python eval.py --trained_model=weights/yolact_base_54_800000.pth

# Output a COCOEval json to submit to the website or to use the run_coco_eval.py script.
# This command will create './results/bbox_detections.json' and './results/mask_detections.json' for detection and instance segmentation respectively.
python eval.py --trained_model=weights/yolact_base_54_800000.pth --output_coco_json

# You can run COCOEval on the files created in the previous command. The performance should match my implementation in eval.py.
python run_coco_eval.py

# To output a coco json file for test-dev, make sure you have test-dev downloaded from above and go
python eval.py --trained_model=weights/yolact_base_54_800000.pth --output_coco_json --dataset=coco2017_testdev_dataset
Qualitative Results on COCO
# Display qualitative results on COCO. From here on I'll use a confidence threshold of 0.15.
python eval.py --trained_model=weights/yolact_base_54_800000.pth --score_threshold=0.15 --top_k=15 --display
Benchmarking on COCO
# Run just the raw model on the first 1k images of the validation set
python eval.py --trained_model=weights/yolact_base_54_800000.pth --benchmark --max_images=1000
Images
# Display qualitative results on the specified image.
python eval.py --trained_model=weights/yolact_base_54_800000.pth --score_threshold=0.15 --top_k=15 --image=my_image.png

# Process an image and save it to another file.
python eval.py --trained_model=weights/yolact_base_54_800000.pth --score_threshold=0.15 --top_k=15 --image=input_image.png:output_image.png

# Process a whole folder of images.
python eval.py --trained_model=weights/yolact_base_54_800000.pth --score_threshold=0.15 --top_k=15 --images=path/to/input/folder:path/to/output/folder
Video
# Display a video in real-time. "--video_multiframe" will process that many frames at once for improved performance.
# If you want, use "--display_fps" to draw the FPS directly on the frame.
python eval.py --trained_model=weights/yolact_base_54_800000.pth --score_threshold=0.15 --top_k=15 --video_multiframe=4 --video=my_video.mp4

# Display a webcam feed in real-time. If you have multiple webcams pass the index of the webcam you want instead of 0.
python eval.py --trained_model=weights/yolact_base_54_800000.pth --score_threshold=0.15 --top_k=15 --video_multiframe=4 --video=0

# Process a video and save it to another file. This uses the same pipeline as the ones above now, so it's fast!
python eval.py --trained_model=weights/yolact_base_54_800000.pth --score_threshold=0.15 --top_k=15 --video_multiframe=4 --video=input_video.mp4:output_video.mp4
As you can tell, eval.py can do a ton of stuff. Run the --help command to see everything it can do.
python eval.py --help
Training
By default, we train on COCO. Make sure to download the entire dataset using the commands above.
- To train, grab an imagenet-pretrained model and put it in
./weights. - Run one of the training commands below.
- Note that you can press ctrl+c while training and it will save an
*_interrupt.pthfile at the current iteration. - All weights are saved in the
./weightsdirectory by default with the file name<config>_<epoch>_<iter>.pth.
- Note that you can press ctrl+c while training and it will save an
# Trains using the base config with a batch size of 8 (the default).
python train.py --config=yolact_base_config

# Trains yolact_base_config with a batch_size of 5. For the 550px models, 1 batch takes up around 1.5 gigs of VRAM, so specify accordingly.
python train.py --config=yolact_base_config --batch_size=5

# Resume training yolact_base with a specific weight file and start from the iteration specified in the weight file's name.
python train.py --config=yolact_base_config --resume=weights/yolact_base_10_32100.pth --start_iter=-1

# Use the help option to see a description of all available command line arguments
python train.py --help
Multi-GPU Support
YOLACT now supports multiple GPUs seamlessly during training:
- Before running any of the scripts, run:
export CUDA_VISIBLE_DEVICES=[gpus]- Where you should replace [gpus] with a comma separated list of the index of each GPU you want to use (e.g., 0,1,2,3).
- You should still do this if only using 1 GPU.
- You can check the indices of your GPUs with
nvidia-smi.
- Then, simply set the batch size to
8*num_gpuswith the training commands above. The training script will automatically scale the hyperparameters to the right values.- If you have memory to spare you can increase the batch size further, but keep it a multiple of the number of GPUs you're using.
- If you want to allocate the images per GPU specific for different GPUs, you can use
--batch_alloc=[alloc]where [alloc] is a comma seprated list containing the number of images on each GPU. This must sum tobatch_size.
Logging
YOLACT now logs training and validation information by default. You can disable this with --no_log. A guide on how to visualize these logs is coming soon, but now you can look at LogVizualizer in utils/logger.py for help.
Pascal SBD
We also include a config for training on Pascal SBD annotations (for rapid experimentation or comparing with other methods). To train on Pascal SBD, proceed with the following steps:
- Download the dataset from here. It's the first link in the top "Overview" section (and the file is called
benchmark.tgz). - Extract the dataset somewhere. In the dataset there should be a folder called
dataset/img. Create the directory./data/sbd(where.is YOLACT's root) and copydataset/imgto./data/sbd/img. - Download the COCO-style annotations from here.
- Extract the annotations into
./data/sbd/. - Now you can train using
--config=yolact_resnet50_pascal_config. Check that config to see how to extend it to other models.
I will automate this all with a script soon, don't worry. Also, if you want the script I used to convert the annotations, I put it in ./scripts/convert_sbd.py, but you'll have to check how it works to be able to use it because I don't actually remember at this point.
If you want to verify our results, you can download our yolact_resnet50_pascal_config weights from here. This model should get 72.3 mask AP_50 and 56.2 mask AP_70. Note that the "all" AP isn't the same as the "vol" AP reported in others papers for pascal (they use an averages of the thresholds from 0.1 - 0.9 in increments of 0.1 instead of what COCO uses).
Custom Datasets
You can also train on your own dataset by following these steps:
- Create a COCO-style Object Detection JSON annotation file for your dataset. The specification for this can be found here. Note that we don't use some fields, so the following may be omitted:
-
info -
liscense - Under
image:license, flickr_url, coco_url, date_captured -
categories(we use our own format for categories, see below)
-
- Create a definition for your dataset under
dataset_baseindata/config.py(see the comments indataset_basefor an explanation of each field):
my_custom_dataset = dataset_base.copy({
    'name': 'My Dataset',

    'train_images': 'path_to_training_images',
    'train_info':   'path_to_training_annotation',

    'valid_images': 'path_to_validation_images',
    'valid_info':   'path_to_validation_annotation',

    'has_gt': True,
    'class_names': ('my_class_id_1', 'my_class_id_2', 'my_class_id_3', ...)
})
- A couple things to note:
- Class IDs in the annotation file should start at 1 and increase sequentially on the order of
class_names. If this isn't the case for your annotation file (like in COCO), see the fieldlabel_mapindataset_base. - If you do not want to create a validation split, use the same image path and annotations file for validation. By default (see
python train.py --help),train.pywill output validation mAP for the first 5000 images in the dataset every 2 epochs.
- Class IDs in the annotation file should start at 1 and increase sequentially on the order of
- Finally, in
yolact_base_configin the same file, change the value for'dataset'to'my_custom_dataset'or whatever you named the config object above. Then you can use any of the training commands in the previous section.
Creating a Custom Dataset from Scratch
See this nice post by @Amit12690 for tips on how to annotate a custom dataset and prepare it for use with YOLACT.
Citation
If you use YOLACT or this code base in your work, please cite
@inproceedings{yolact-iccv2019,
  author    = {Daniel Bolya and Chong Zhou and Fanyi Xiao and Yong Jae Lee},
  title     = {YOLACT: {Real-time} Instance Segmentation},
  booktitle = {ICCV},
  year      = {2019},
}
For YOLACT++, please cite
@article{yolact-plus-tpami2020,
  author  = {Daniel Bolya and Chong Zhou and Fanyi Xiao and Yong Jae Lee},
  journal = {IEEE Transactions on Pattern Analysis and Machine Intelligence},
  title   = {YOLACT++: Better Real-time Instance Segmentation},
  year    = {2020},
}
Contact
For questions about our paper or code, please contact Daniel Bolya.
