Winpatch Save Abandoned
Windows system file patcher
winpatch: Windows system file patcher


![]()
Description
This commandline utility is intended to binary patch protected system files, such as drivers or DLLs, that reside in a Windows system directory.
This is primarily meant to be used to apply necessary fixes to the drivers of a newly created system, such as a Windows To Go drive or a directory where a Windows 10 image has been applied.
Compatibility
Windows 7 or later.
Compilation
Use Visual Studio 2019 and invoke the .sln to compile.
Usage
winpatch [-bhiosvw] FILE [HEXVAL HEXVAL [HEXVAL HEXVAL [...]]
Where HEXVALs are paired values containing the hexadecimal data to search for,
followed by the data you want to replace it with.
HEXVAL can be of any size between 2 and 128 bytes. You can mix and match sizes,
as long the value sizes in each pair are the same. No specific alignment is required
for the HEXVALs, meaning that winpatch can match a word value starting at an odd
address. Values should be provided in big-endian mode i.e. in the same byte order as
the one they appear with in the hex-dump of the file.
Unless you use option -w, winpatch will warn (once) if multiple instances of a
specific HEXVAL pair are patched.
The exit code of winpatch is the number of sections that were successfully patched
(0 if none) or a negative value on error.
Options
-
-h: Show help -
-b: DON'T create a backup before patching the file (DANGEROUS). -
-i: Ignore patch values. Update the digital signature only. -
-o: Overwrite the source with the backup (if any) before patching. -
-s: Silent mode. No output except for errors. -
-v: Slightly more verbose output. -
-w: Don't warn when multiple instances of a patch are applied.
Example
Let's say you want to run Windows 10 ARM64 on a system where xHCI registers must be accessed through two
32-bit accesses (such as the VL805 controller of the Raspberry Pi 4), but the Windows USBXHCI.SYS driver
is enforcing 64-bit accesses, which results in a BSOD when trying to boot from an USB 3.0 drive.
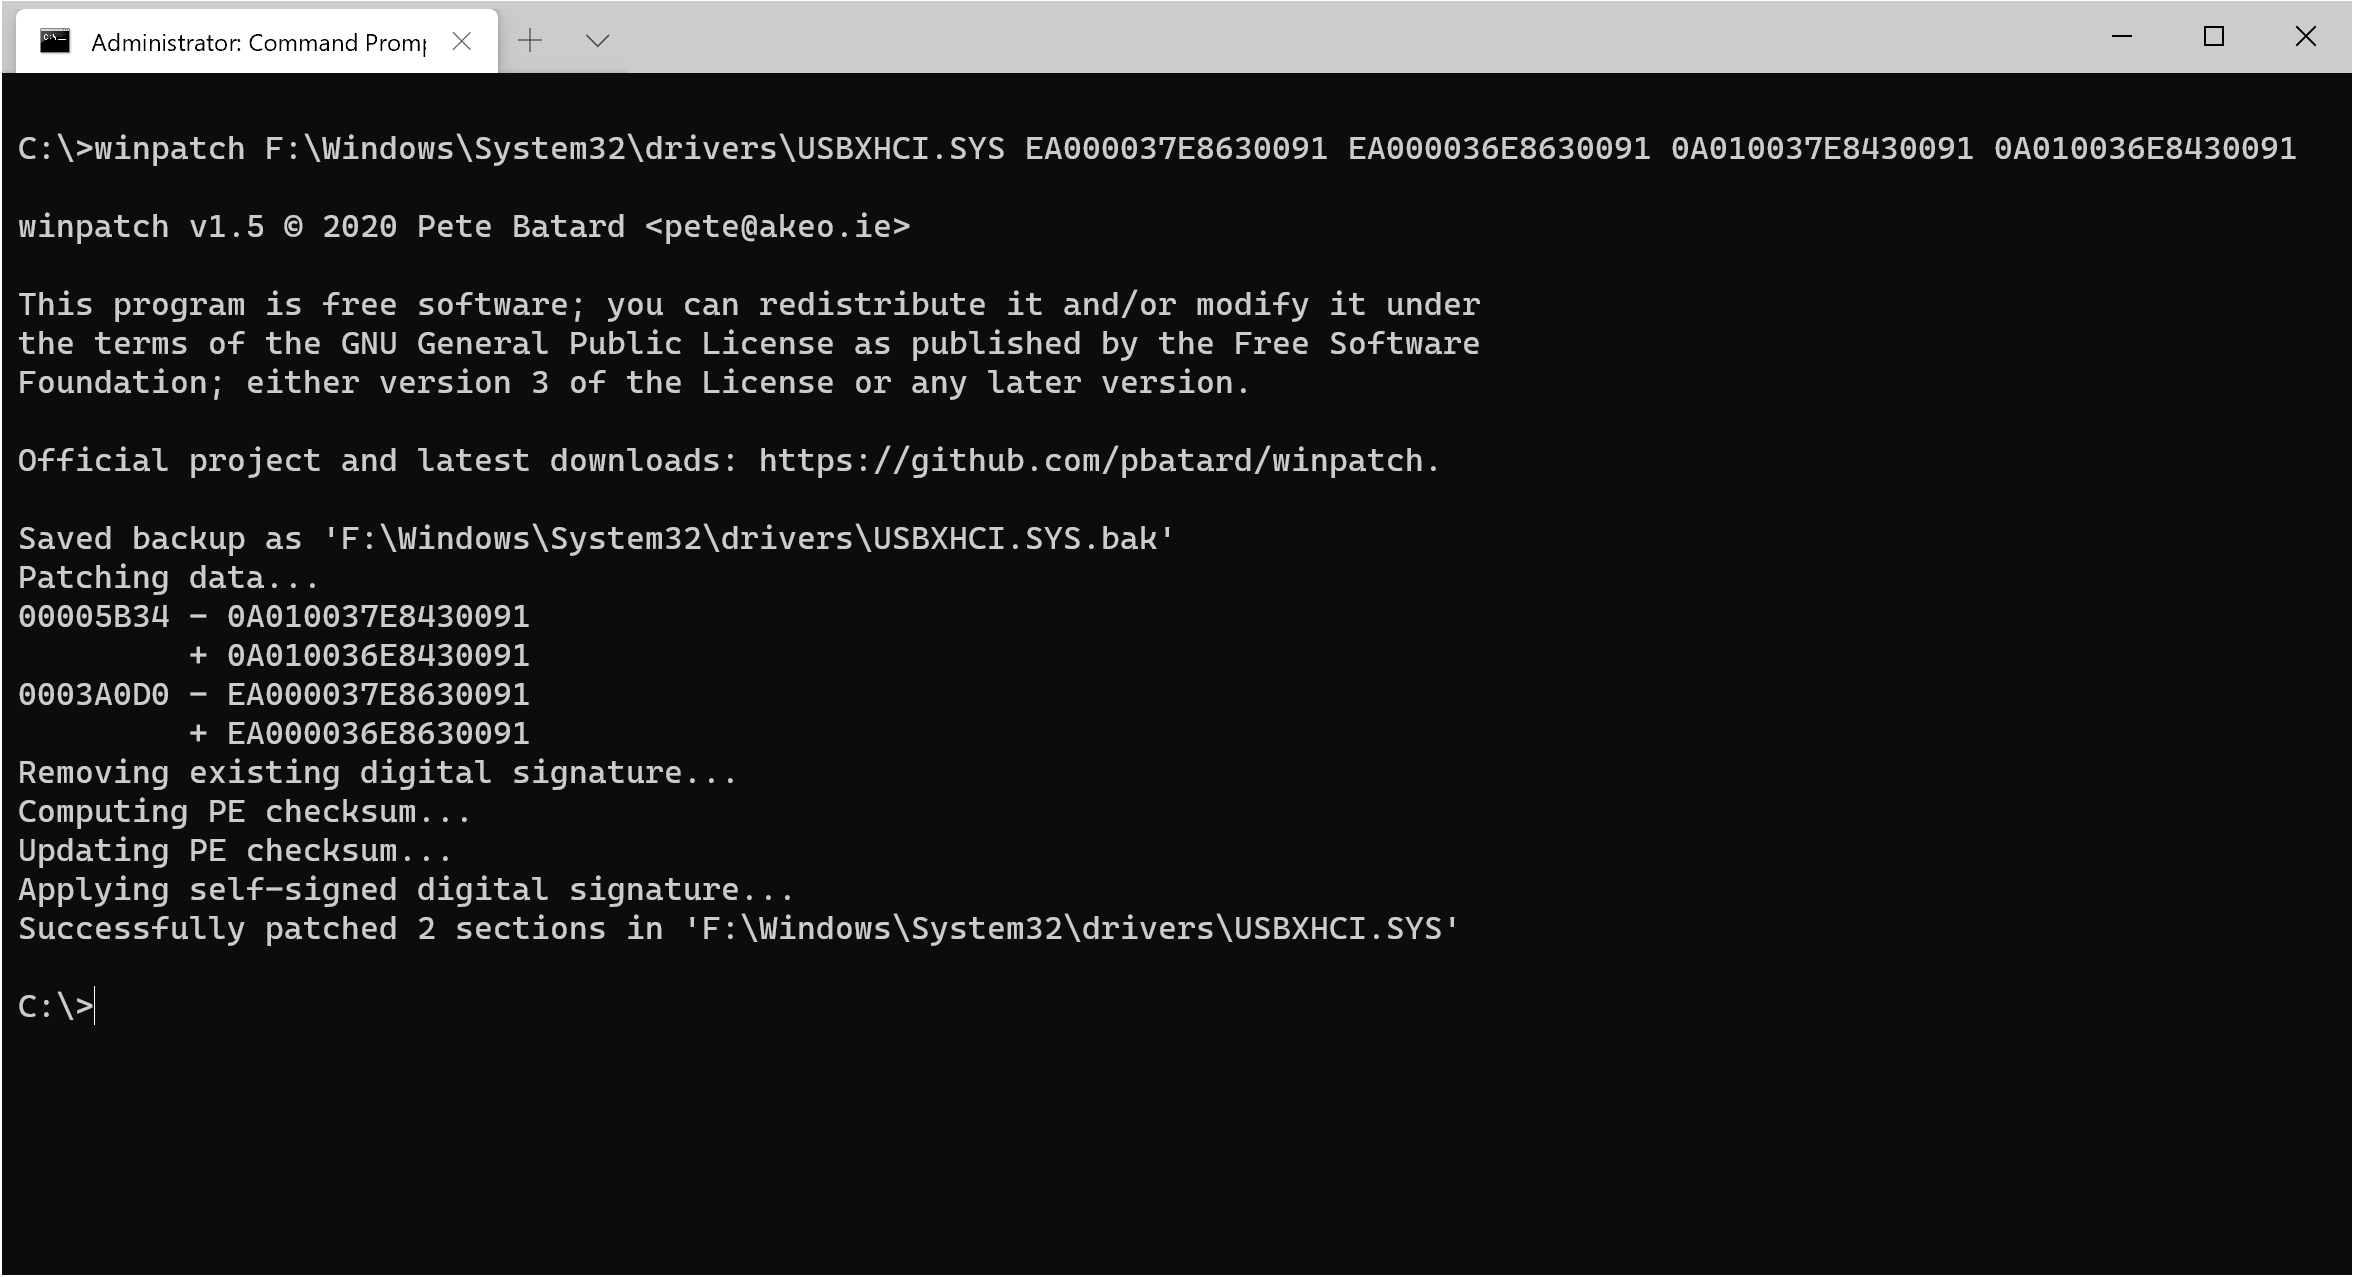
Provided that the driver for the system you want to patch resides in F:\Windows\System32\drivers\, then,
from an elevated command prompt, you can use winpatch as follows:
winpatch F:\Windows\System32\drivers\USBXHCI.SYS EA000037E8630091 EA000036E8630091 0A010037E8430091 0A010036E8430091
Obviously, since you have patched a system file, you also have to disable signature enforcement with
something like (assuming the BCD for that drive resides on an ESP mounted as S:):
bcdedit /store S:\EFI\Microsoft\Boot\BCD /set {default} testsigning on
bcdedit /store S:\EFI\Microsoft\Boot\BCD /set {default} nointegritychecks on
How it works
Besides the patching, winpatch performs the following:
- Take ownership of the system file if needed.
- Delete the existing digital signature, if any.
- Update the PE32 or PE64 checksum after patching.
- Apply a new self-signed digital signature.
Each of these steps is required, because:
- System files are protected by Windows and you cannot alter them without taking ownership.
- If the file was patched, then the existing digital signature has become invalid.
- If you don't update the PE checksum, Windows produces BSODs during boot with error
0xc0000221(STATUS_IMAGE_CHECKSUM_MISMATCH) for the modified driver or DLL. - Even with
testsigningandnointegritychecksactive, if a modified system file is not digitally signed, Windows boots straight into recovery mode, with error code0xc000000ffromwinload.exe.
