Tinyduck Save
The super tiny USB Rubber Ducky
Tinyduck
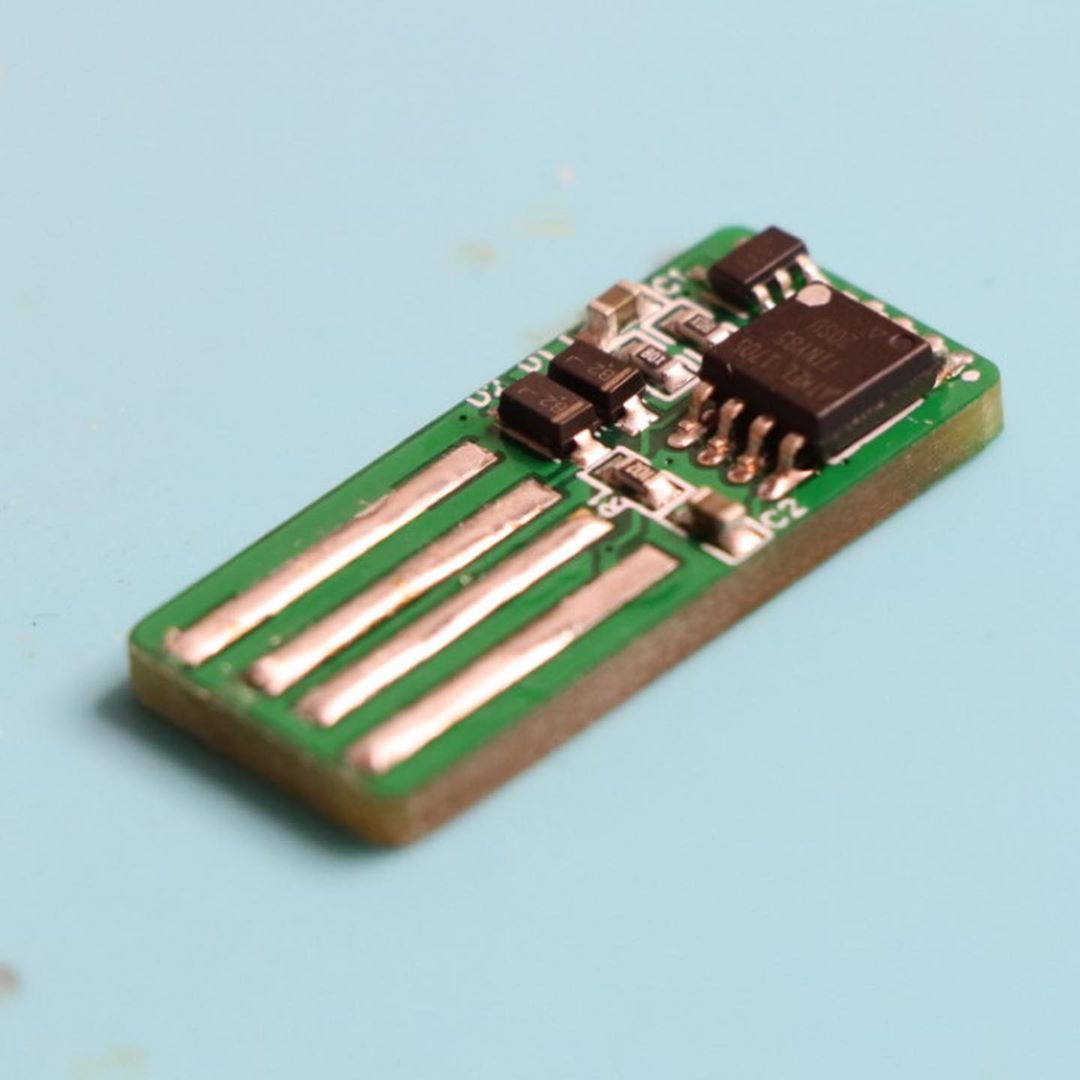
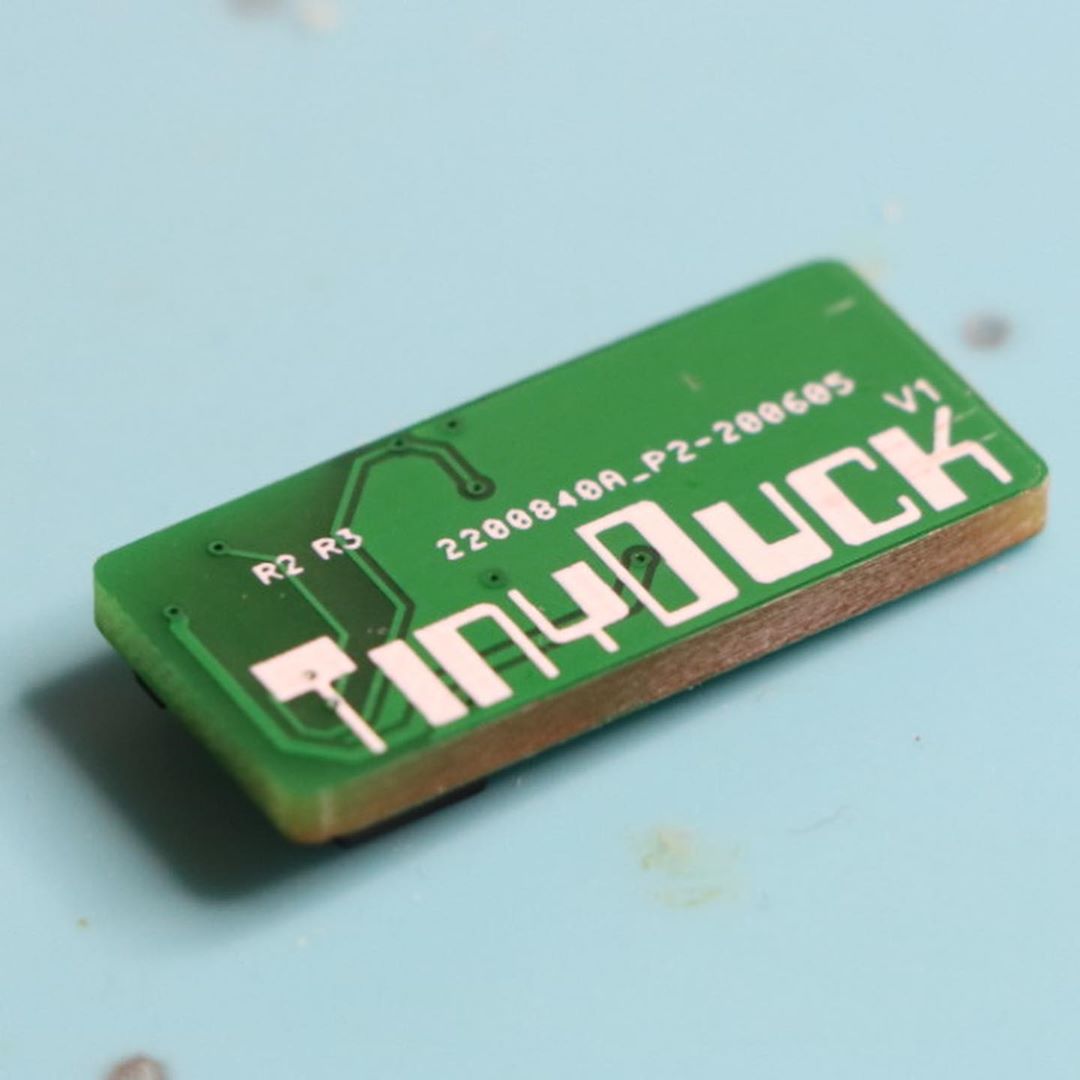
The super tiny USB Rubber Ducky


Catch my live stream on Twitch where I play games, have just chatting sessions to talk tech, and just generally be an ordinary person who can't figure out how to make proper life decisions.
Stream Schedule:
Mon: 1800 - 2000 EST
Wed: 1800 - 2000 EST
Sun: 1200 - 1400 EST
Table of Condemnation
About
If you don't already know about the USB Rubber Ducky, check it out here. Escentially is a keystroke injection tool that comes in the form factor of a USB thumb drive. It will execute a prewritten script of keystrokes on a target computer as though it were a keyboard. If you can do it with a keyboard, you can do it with a USB Rubber Ducky but faster. There are a lot of projects online here, here, and here showing how to create your own USB Rubber ducky using the digispark development board. The whole reason I created the project was to see just how small I could make the device itself. While the firmware and the concept isn't ground breaking, I am proud to have been the one to create a USB Rubber Ducky with a footprint the size of an overgrown fingernail.
Setup
The Tinyduck functions the same way as the digispark attiny85 board right down to the bootloader. If you have already setup your Arduino IDE to work with the digispark and know how to use it, you can skip Flashing Firmware.
Creating Your Own Script
Ducky Script is a very straight forward scripting language used to create keystroke injection binaries to be run on the original USB Rubber Ducky. While this language does not work natively in the Arduino IDE, there are tools that have been created to translate Ducky Script into Arduino code and further translated to work with digispark specific libraries.
- Write your ducky script in any text editor
- Copy the contents of your ducky script in the the first text box of digiQuack
- Click
convert - Copy the Arduino code from the bottom window into your Arduino IDE
Flashing Firmware
If you have used the Arduino IDE before but have not used the digispark or any other ATtiny variants that use the micronucleus bootloader, you will find out about some nuances that tend to confuse newcomers.
Prior to attempting to flash any firmware, you need to follow these instructions to install the digispark boards in your Arduino IDE.
Here is the typical order of operations when booting a microcontroller loaded with micronucleus.
- Microcontroller receives power
- Bootloader executes and waits 5 seconds for USB connection (This is when new firmware is uploaded)
- Main firmware is executed
To upload your new ducky script firmware to Tinyduck, follow the steps below (Assuming you already have digispark compatible ducky code in your Arduino IDE)
- Under
Tools>Boards, selectDigispark (Default - 16.5Mhz) - with Tinyduck unplugged click the upload button
- Wait for the IDE to instruct you to plug in your device then insert Tinyduck
- The firmware should promptly start uploading to Tinyduck
- Unplug Tinyduck as soon as the upload completes to avoid firmware execution
Issues
While the tools used to translate ducky script can be very useful, they have their shortcomings which keep them from being the perfect translator. You may find that some of your translated scripts do not allow the Arduino IDE to compile your firmware and you will need to make some manual adjustments in order to proceed.
For example:
DigiKeyboard.sendKeyStroke(0, MOD_GUI_LEFT,KEY_R); // This will not compile because of too many arguments

DigiKeyboard.sendKeyStroke(KEY_R, MOD_GUI_LEFT); // This WILL compile and accomplish the intended action
Usage
Tinyduck is intended to be a fire and forget device. Once inserted into a computer, Tinyduck will execute its preprogrammed functions without any needed user intervention. Because of the required USB support, Tinyduck will take 5 seconds to run through the micronucleus bootloader before proceeding to its main code execution.
