SwiftySampleProject Save
A starter project for Sample Project in swift 5, Xcode 12.5 (also bridging header included so you could use objective c code in it as well ). For objectiveC version : https://github.com/xeieshan/SampleProject > Supports iOS 15+, Swift 5.x
README
Just like software, this document will rot unless we take care of it. We encourage everyone to help us on that – just open an issue or send a pull request!
Why?
Swift has had a meteoric rise in popularity since its inception in 2014. In 2015, Swift was rated the most loved programming language on Stack Overflow, and it’s currently ranked 17 in the programming language rankings guide of June 2016, according to Redmonk who wrote “there is no debate that Swift is growing faster than anything else we track.”.
A common question for a new iOS developer is — should I be learning Swift or Objective-C? There have been mixed messages from the iOS developer community.
Learning iOS development with Swift doesn’t prevent you from also learning Objective-C at some point in the future. Regardless of the language you’re programming in, the underlying frameworks are mostly identical, with tweaks to syntax. Learning iOS development with Swift isn’t necessarily setting your flag firmly in the Swift camp. You can use Objective C code in your Swift project, or vice versa. Learning Swift is a good place to start, and you’ll find exploring Objective-C easier with iOS experience behind you. For comparison, the following demonstrates the same code in Swift and Objective-C.
Follow this link for 8 Reasons Why You Should Learn Swift.
Project Setup
A common question when beginning an iOS project is whether to write all views in code or use Interface Builder with Storyboards or XIB files. Both are known to occasionally result in working software. However, there are a few considerations:
Xcode Setup
Please follow the url [macbook-for-developers] [macbook-for-developers]:http://martiancraft.com/blog/2015/08/macbook-for-developers/
Why code?
With no GUI tools, handling all custom positioning, animation, etc. programmatically.
- Storyboards are more prone to version conflicts due to their complex XML structure. This makes merging much harder than with code.
- It's easier to structure and reuse views in code, thereby keeping your codebase DRY. We can reuse these codes throughout our project.
- Coding all of your UI elements will give you a sense of control.
- One of the main reason why I dislike using Storyboard is when it becomes cluttered. In Storyboard’s initial phase, this might not seem to be a problem, but once it’s filled with UI elements and controllers, it is very difficult to navigate.
- Merge conflicts is main reason why I refused to use Storyboard.
Why Storyboards?
A visual tool for laying out multiple application views and the transitions between them.
- For the less technically inclined, Storyboards can be a great way to contribute to the project directly, e.g. by tweaking colors or layout constraints. However, this requires a working project setup and some time to learn the basics.
- Iteration is often faster since you can preview certain changes without building the project.
- In Xcode 6, custom fonts and UI elements are finally represented visually in Storyboards, giving you a much better idea of the final appearance while designing.
- Ease of use
A classic beginner’s mistake is to create one massive project-wide Storyboard. A Storyboard is a board with a story to tell. It shouldn't be used to mix unrelated stories into one big volume.
Project Structure
To keep all those hundreds of source files ending up in the same directory, it's a good idea to set up some folder structure depending on your architecture. For instance, you can use the following:
Classes
Application Delegate Category Constant Models Network Manager Shared Manager Utility Function View Controller
Views
StoryBoard.storyboard LaunchScreen.xib
Resources
Slices Fonts Sounds
First, create them as groups (little yellow "folders") within the group with your project's name in Xcode's Project Navigator. Then, for each of the groups, link them to an actual directory in your project path by opening their File Inspector on the right, hitting the little gray folder icon, and creating a new subfolder with the name of the group in your project directory.
CocoaPods
If you're planning on including external dependencies (e.g. third-party libraries) in your project, CocoaPods offers easy and fast integration. Install it like so:
sudo gem install cocoapods
To get started, move inside your iOS project folder and run
pod init
This creates a Podfile, which will hold all your dependencies in one place. After adding your dependencies to the Podfile, you run
pod install
to install the libraries and include them as part of a workspace which also holds your own project. It is generally recommended to commit the installed dependencies to your own repo, instead of relying on having each developer running pod install after a fresh checkout.
Note that from now on, you'll need to open the .xcworkspace file instead of .xcproject, or your code will not compile. The command
pod update
will update all pods to the newest versions permitted by the Podfile. You can use a wealth of operators to specify your exact version requirements.
Constants
The two most common ways of storing constants in Swift are:
Global constant
let someStringConstant = "someStringConstant"
// OR static
static let someStaticStringConstant = "someStaticStringConstant"
This has the advantage of being short. It’s just called in code like:
print(someStringConstant).
*Quick note: Globals are lazy — a.k.a. they will only be initialized when accessed the first time.
Struct (my former preferred method)
In my opinion the best way to deal with global constants is to create a Struct.
struct Constants {
    static let someNotification = "TEST"
}
Then, for example, call it like this in your code:
print(Constants.someNotification)
If you want a better organization I advise you to use segmented sub structs.
struct K {
    struct NotificationKey {
        static let Welcome = "kWelcomeNotif"
    }

    struct Path {
        static let Documents = NSSearchPathForDirectoriesInDomains(.DocumentDirectory, .UserDomainMask, true)[0] as String
        static let Tmp = NSTemporaryDirectory()
    }
}
This method has the advantage of readability. The disadvantage of this method (and my personal hangup) is that these calls can get quite long.
When and where use constants : If a stored value in your code won’t change, always declare it as a constant with the let keyword. Use variables only for storing values that need to be able to change.
Event Patterns
These are the idiomatic ways for components to notify others about things:
- Delegation: (one-to-one) Apple uses this a lot (some would say, too much). Use when you want to communicate stuff back e.g. from a modal view.
- Callback blocks: (one-to-one) Allow for a more loose coupling, while keeping related code sections close to each other. Also scales better than delegation when there are many senders.
- Notification Center: (one-to-many) Possibly the most common way for objects to emit “events” to multiple observers. Very loose coupling — notifications can even be observed globally without reference to the dispatching object.
- Key-Value Observing (KVO): (one-to-many) Does not require the observed object to explicitly “emit events” as long as it is Key-Value Coding (KVC) compliant for the observed keys (properties). Usually not recommended due to its implicit nature and the cumbersome standard library API.
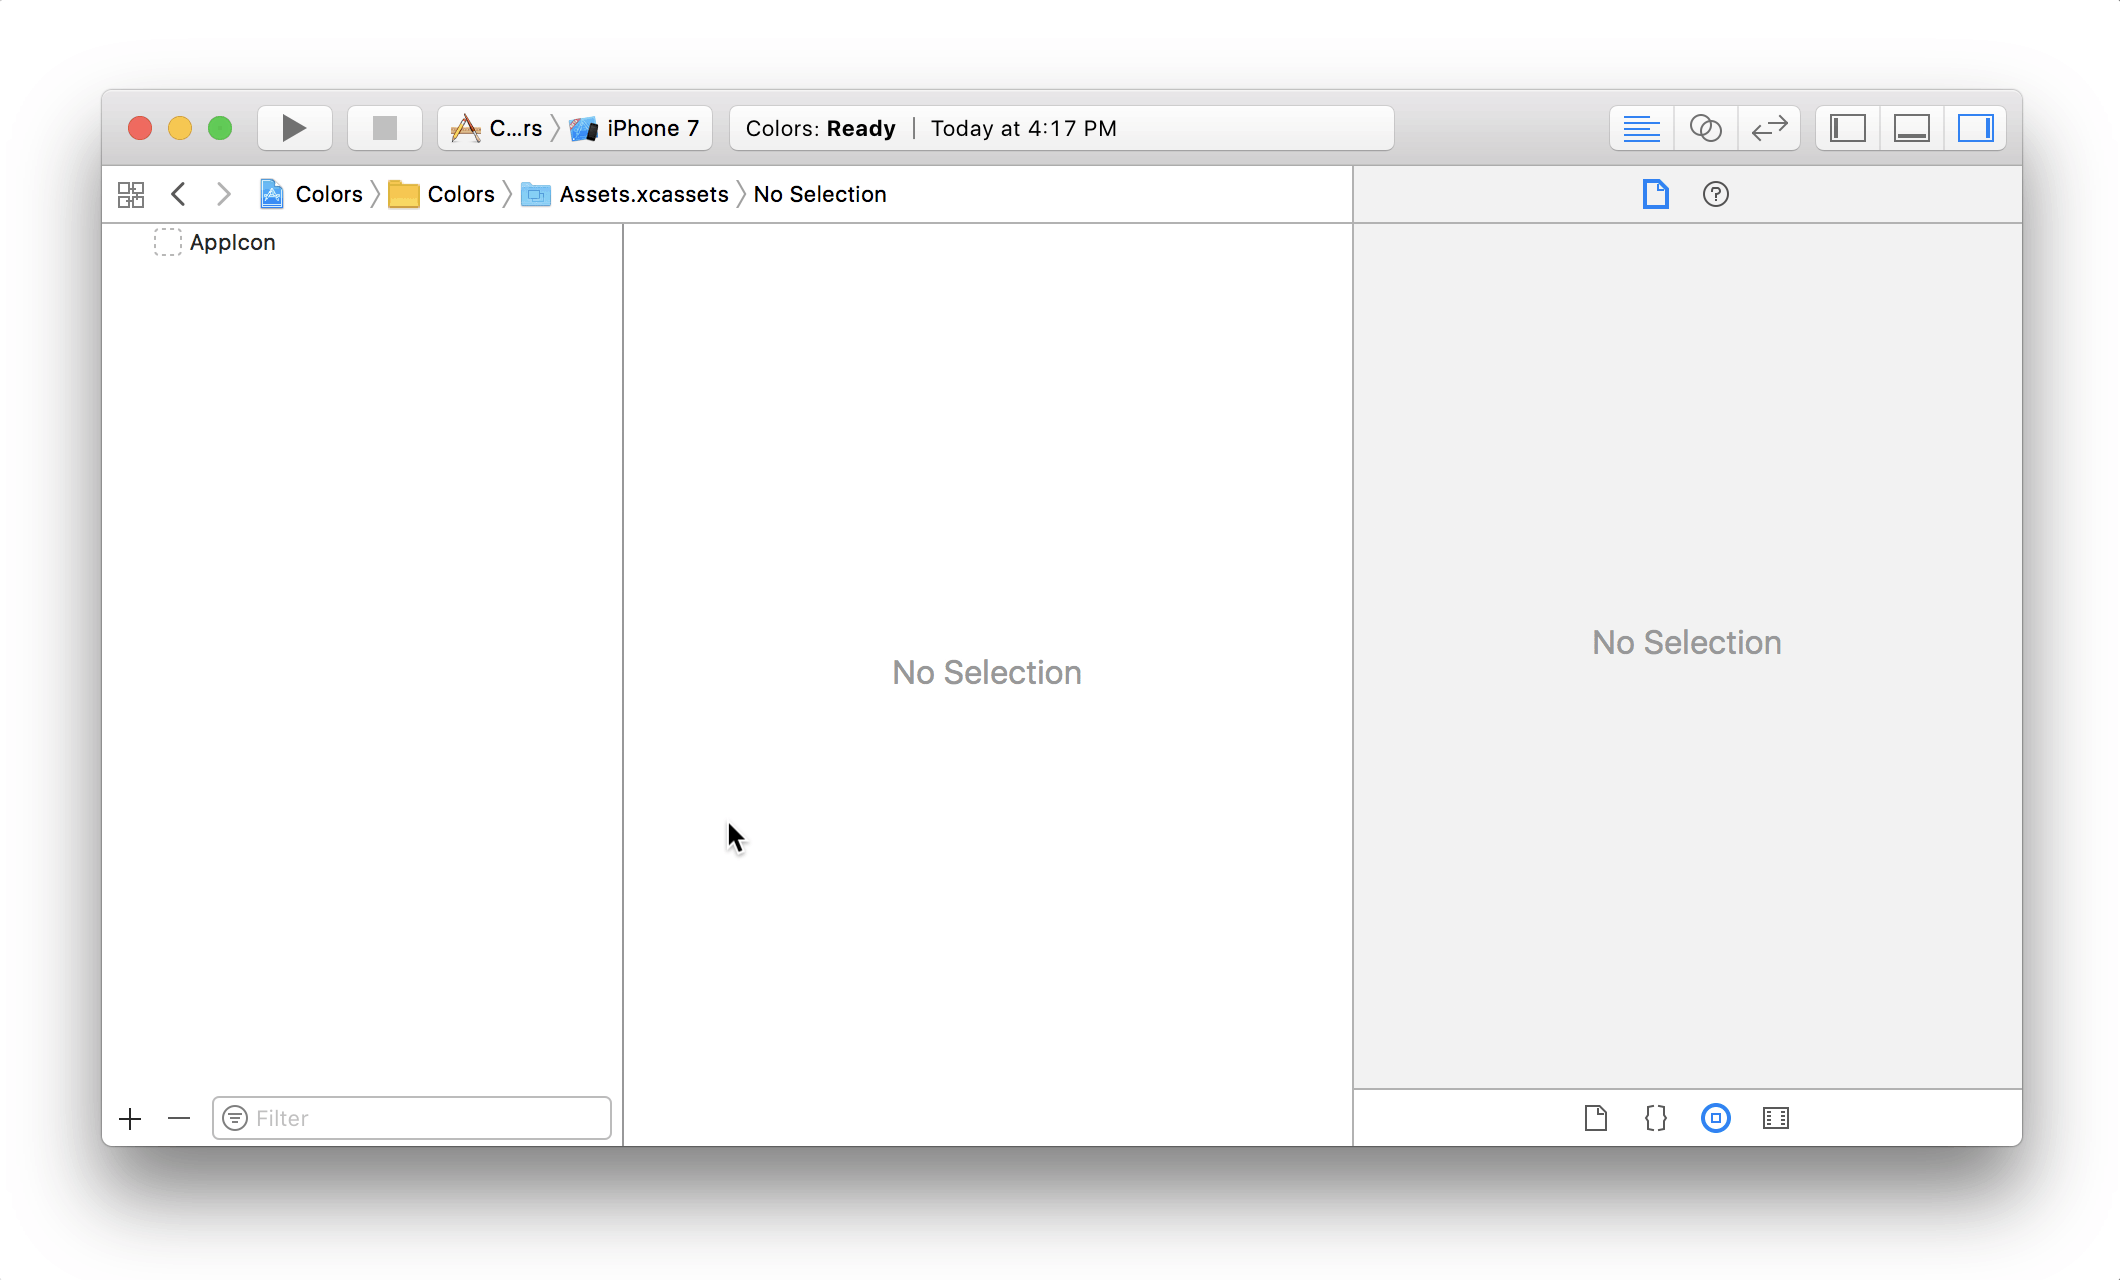
Assets
Asset catalogs are the best way to manage all your project's visual assets. They can hold both universal and device-specific (iPhone 4-inch, iPhone 4.7-inch, iPhone 5.8-inch, iPhone Retina, iPad, etc.) assets and will automatically serve the correct ones for a given name. Teaching your designer(s) how to add and commit things there (Xcode has its own built-in Git client) can save a lot of time that would otherwise be spent copying stuff from emails or other channels to the codebase. It also allows them to instantly try out their changes and iterate if needed.
An asset catalog can contain four types of images:
- App icons
- Launch images
- Images
- OS X icons
Asset catalog colors on Xcode 9
One of most exciting features on Xcode 9 is being able to add colors to an asset catalog, or as known as the .xcassets directory, alongside your images. This feature helps developers save time and avoid mistakes, by organizing project colors in a single location. Much cleaner!
- Adding colors to an asset catalog :
Adding colors to an asset catalog might be hard to discover. After selecting your
.xcassetsdirectory in Xcode, press the plus button on the bottom left and select “New Color Set”.
 Courtesy of : Zeplin Blog
- Using asset catalog colors in Storyboards : Using asset catalog colors in a Storyboard or an Interface Builder file is pretty straightforward. All color fields, including view background colors, label text colors, should display the colors you defined in the asset catalog under the “Named Colors” section.
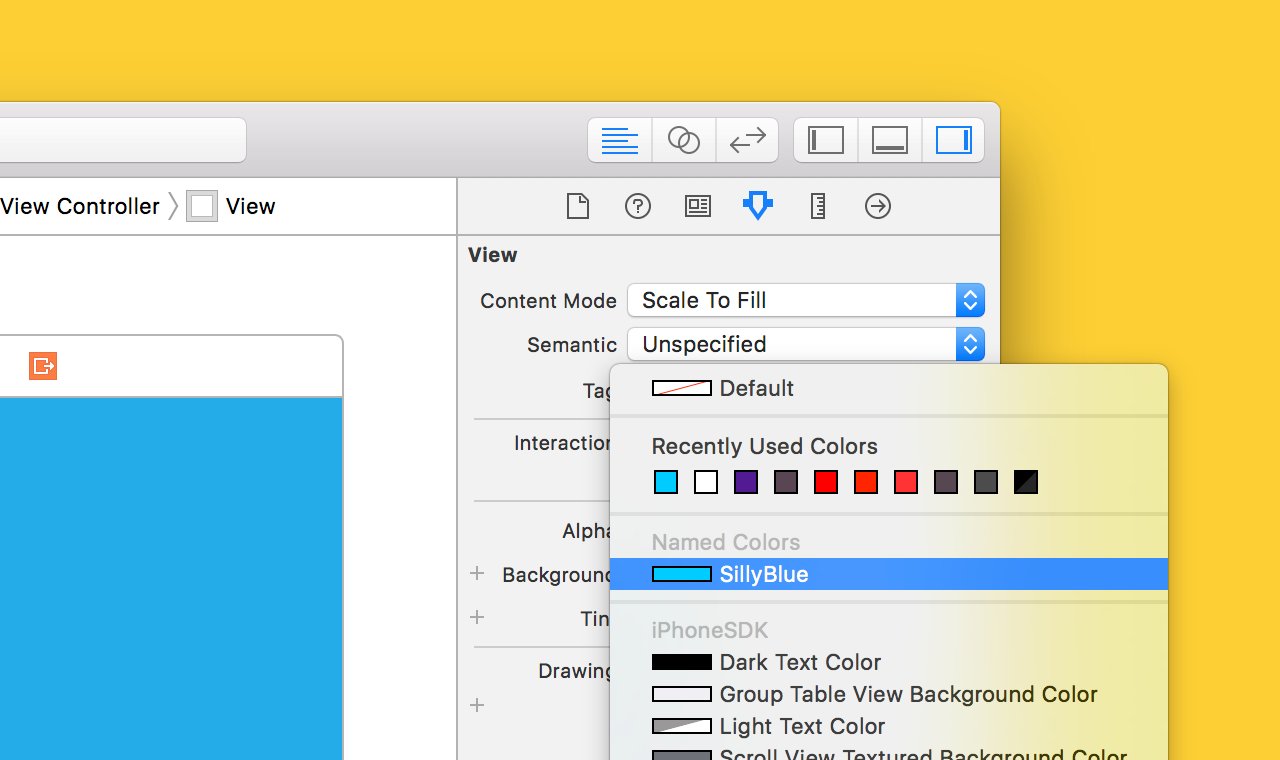
- Using asset catalog colors in code :
Using asset catalog colors in code is not so obvious, yet simple. Both
UIColoron iOS andNSColoron macOS now have a convenience initializer in Swift to access these colors by name:
// iOS
let color = UIColor(named: "SillyBlue")

// macOS
let color = NSColor(named: "SillyBlue")
These methods are only available if you’re targeting iOS 11+ or macOS 10.13+, so you might need to stick to your existing color constants for a while.
Using Bitmap Images
Asset catalogs expose only the names of image sets, abstracting away the actual file names within the set. This nicely prevents asset name conflicts, as files such as [email protected] are now namespaced inside their image sets. However, some discipline when naming assets can make life easier:
IconCheckmarkHighlighted.png // Universal, non-Retina
[email protected] // Universal @2x, Retina
[email protected] // Universal @3x, Retina (@3x is only on iPhone as of now!)
IconCheckmarkHighlighted~iphone.png // iPhone, non-Retina
IconCheckmarkHighlighted@2x~iphone.png // iPhone, Retina
IconCheckmarkHighlighted-568h@2x~iphone.png // iPhone, Retina, 4-inch
IconCheckmarkHighlighted~ipad.png // iPad, non-Retina
IconCheckmarkHighlighted@2x~ipad.png // iPad, Retina
The modifiers -568h, @2x, ~iphone and ~ipad are not required per se, but having them in the file name when dragging the file to an image set will automatically place them in the right "slot", thereby preventing assignment mistakes that can be hard to hunt down.
Developers work with point values, so it is important to understand the difference with pixels. When the iPhone was first introduced, the two units were the same: 1pt equals 1px. Then when retina screens came along, 1pt became 2px. So think of points as the values in the original iPhone, and pixels as the real values depending on the pixel density (iPhone 4,5,6 = @2x, iPhone 6 Plus, iPhoneX = @3x).
Using Vector Images
You can include the original vector graphics (PDFs) produced by designers into the asset catalogs, and have Xcode automatically generate the bitmaps from that. This reduces the complexity of your project (the number of files to manage.)
Coding Style
Naming
Apple pays great attention to keeping naming consistent, if sometimes a bit verbose, throughout their APIs. When developing for Cocoa, you make it much easier for new people to join the project if you follow Apple's naming conventions.
Descriptive and consistent naming makes software easier to read and understand. Use the Swift naming conventions described in the API Design Guidelines. Some key takeaways include:
- striving for clarity at the call site
- prioritizing clarity over brevity
- using camel case (not snake case)
- using uppercase for types (and protocols), lowercase for everything else
- including all needed words while omitting needless words
- using names based on roles, not types
- sometimes compensating for weak type information
- striving for fluent usage
- beginning factory methods with
make - naming methods for their side effects
- verb methods follow the -ed, -ing rule for the non-mutating version
- noun methods follow the formX rule for the mutating version
- boolean types should read like assertions
- protocols that describe what something is should read as nouns
- protocols that describe a capability should end in -able or -ible
- using terms that don't surprise experts or confuse beginners
- generally avoiding abbreviations
- using precedent for names
- preferring methods and properties to free functions
- casing acronyms and initialisms uniformly up or down
- giving the same base name to methods that share the same meaning
- avoiding overloads on return type
- choosing good parameter names that serve as documentation
- labeling closure and tuple parameters
- taking advantage of default parameters
Prose
When referring to methods in prose, being unambiguous is critical. To refer to a method name, use the simplest form possible.
- Write the method name with no parameters. Example: Next, you need to call the method
addTarget. - Write the method name with argument labels. Example: Next, you need to call the method
addTarget(_:action:). - Write the full method name with argument labels and types. Example: Next, you need to call the method
addTarget(_: Any?, action: Selector?).
For the above example using UIGestureRecognizer, 1 is unambiguous and preferred.
Pro Tip: You can use Xcode's jump bar to lookup methods with argument labels.

Class Prefixes
Swift types are automatically namespaced by the module that contains them and you should not add a class prefix such as RW. If two names from different modules collide you can disambiguate by prefixing the type name with the module name. However, only specify the module name when there is possibility for confusion which should be rare.
import SomeModule

let myClass = MyModule.UsefulClass()
Delegates
When creating custom delegate methods, an unnamed first parameter should be the delegate source. (UIKit contains numerous examples of this.)
Preferred:
func namePickerView(_ namePickerView: NamePickerView, didSelectName name: String)
func namePickerViewShouldReload(_ namePickerView: NamePickerView) -> Bool
Not Preferred:
func didSelectName(namePicker: NamePickerViewController, name: String)
func namePickerShouldReload() -> Bool
Use Type Inferred Context
Use compiler inferred context to write shorter, clear code. (Also see Type Inference.)
Preferred:
let selector = #selector(viewDidLoad)
view.backgroundColor = .red
let toView = context.view(forKey: .to)
let view = UIView(frame: .zero)
Not Preferred:
let selector = #selector(ViewController.viewDidLoad)
view.backgroundColor = UIColor.red
let toView = context.view(forKey: UITransitionContextViewKey.to)
let view = UIView(frame: CGRect.zero)
Generics
Generic type parameters should be descriptive, upper camel case names. When a type name doesn't have a meaningful relationship or role, use a traditional single uppercase letter such as T, U, or V.
Preferred:
struct Stack<Element> { ... }
func write<Target: OutputStream>(to target: inout Target)
func swap<T>(_ a: inout T, _ b: inout T)
Not Preferred:
struct Stack<T> { ... }
func write<target: OutputStream>(to target: inout target)
func swap<Thing>(_ a: inout Thing, _ b: inout Thing)
Language
Use US English spelling to match Apple's API.
Preferred:
let color = "red"
Not Preferred:
let colour = "red"
Code Organization
Use extensions to organize your code into logical blocks of functionality. Each extension should be set off with a // MARK: - comment to keep things well-organized.
Protocol Conformance
In particular, when adding protocol conformance to a model, prefer adding a separate extension for the protocol methods. This keeps the related methods grouped together with the protocol and can simplify instructions to add a protocol to a class with its associated methods.
Preferred:
class MyViewController: UIViewController {
  // class stuff here
}

// MARK: - UITableViewDataSource
extension MyViewController: UITableViewDataSource {
  // table view data source methods
}

// MARK: - UIScrollViewDelegate
extension MyViewController: UIScrollViewDelegate {
  // scroll view delegate methods
}
Not Preferred:
class MyViewController: UIViewController, UITableViewDataSource, UIScrollViewDelegate {
  // all methods
}
Since the compiler does not allow you to re-declare protocol conformance in a derived class, it is not always required to replicate the extension groups of the base class. This is especially true if the derived class is a terminal class and a small number of methods are being overridden. When to preserve the extension groups is left to the discretion of the author.
For UIKit view controllers, consider grouping lifecycle, custom accessors, and IBAction in separate class extensions.
Building
Build Configurations
Even simple apps can be built in different ways. The most basic separation that Xcode gives you is that between debug and release builds. For the latter, there is a lot more optimization going on at compile time, at the expense of debugging possibilities. Apple suggests that you use the debug build configuration for development, and create your App Store packages using the release build configuration. This is codified in the default scheme (the dropdown next to the Play and Stop buttons in Xcode), which commands that debug be used for Run and release for Archive.
However, this is a bit too simple for real-world applications. You might – no, should! – have different environments for testing, staging and other activities related to your service. Each might have its own base URL, log level, bundle identifier (so you can install them side-by-side), provisioning profile and so on. Therefore a simple debug/release distinction won't cut it. You can add more build configurations on the "Info" tab of your project settings in Xcode.
xcconfig files for build settings
Typically build settings are specified in the Xcode GUI, but you can also use configuration settings files (“.xcconfig files”) for them. The benefits of using these are:
- You can add comments to explain things
- You can
#includeother build settings files, which helps you avoid repeating yourself:- If you have some settings that apply to all build configurations, add a
Common.xcconfigand#includeit in all the other files - If you e.g. want to have a “Debug” build configuration that enables compiler optimizations, you can just
#include "MyApp_Debug.xcconfig"and override one of the settings
- If you have some settings that apply to all build configurations, add a
- Conflict resolution and merging becomes easier
Find more information about this topic in these presentation slides.
Step 1 — Create a new configuration
Go to the file viewer in Xcode & click on your project file. On the topish left of the view that just opened (underneath the back/forward arrows), check to make sure you have the project file selected.
https://cdn-images-1.medium.com/max/800/1*lA3mqihAHt6AbErXfXwVAg.png
Select the Info tab if it’s not already selected. Under the Configurations section, press the + button. Select Duplicate Debug Configuration.
https://cdn-images-1.medium.com/max/800/1*ybOgk8Ma8cNZGhmHg6TuVw.png
Name your new configuration Staging Debug Create another configuration, but this time Duplicate “Release” Configuration and name it Staging Release
Step 2 — Assign settings to the new configuration
We’re going to create a configuration variable that will allow your configurations to have different values at run time. Go back to the topish left where I told you to select your project file from in step 1, but this time select your apps demo target under Targets Select the Build Settings tab
If you scroll down to the very bottom of the build settings, there is a section called User-Defined. This is where your configuration variables will be added and set. Click the + towards the top of the view and add select Add User Defined Setting
Name this setting SERVER_URL Click the arrow to the left of your newly added build setting variable and you’ll see the four configurations. Set the value for Staging Debug to https://www.stagingserverurl.com Set the value for Staging Release to https://www.stagingserverurl.com Yes, they’re the same. Leave Debug & Release blank
The reason we create a Debug and Release version for the staging environment is because Debug and Release do different things at build time.
Step 3 — Create a scheme for the new configuration
Schemes are Xcode’s way of allowing you to select the configuration you want to run by the click of a button. Let’s create a Staging scheme. Click the Scheme drop down and select Manage Schemes
Click the + button to the lower left of the popup. Create a Scheme with your app’s target selected. Name it Staging. After it’s created, make sure to check the Shared checkbox in the right most column of your new Staging scheme. Also, if you want, you can uncheck the Show column of all of the other schemes, which won’t delete them, but will cause them to shockingly not show up.
Close the manage schemes popup, and now when you click the scheme selection you’ll see your new Staging scheme.
Now we need to assign the staging configurations to this new scheme. Select the staging scheme, and then open the scheme selection dropdown again. This time press Edit Scheme…
Click the Run step and change the build configuration to Staging Debug Change the build configuration for Test & Analyze to Staging Debug Change the build configuration for Profile & Archive to Staging Release
At this point, when you run the Staging scheme it takes a lot longer to build, and when the build finishes, your debug tools are gone! We will address this now.
Targets
A target resides conceptually below the project level, i.e. a project can have several targets that may override its project settings. Roughly, each target corresponds to "an app" within the context of your codebase. For instance, you could have country-specific apps (built from the same codebase) for different countries' App Stores. Each of these will need development/staging/release builds, so it's better to handle those through build configurations, not targets. It's not uncommon at all for an app to only have a single target.
Schemes
Schemes tell Xcode what should happen when you hit the Run, Test, Profile, Analyze or Archive action. Basically, they map each of these actions to a target and a build configuration. You can also pass launch arguments, such as the language the app should run in (handy for testing your localizations!) or set some diagnostic flags for debugging.
A suggested naming convention for schemes is MyApp (<Language>) [Environment]:
MyApp (English) [Development]
MyApp (German) [Development]
MyApp [Testing]
MyApp [Staging]
MyApp [App Store]
For most environments the language is not needed, as the app will probably be installed through other means than Xcode, e.g. TestFlight, and the launch argument thus be ignored anyway. In that case, the device language should be set manually to test localization.
Deployment
Deploying software on iOS devices isn't exactly straightforward. That being said, here are some central concepts that, once understood, will help you tremendously with it.
Signing
Whenever you want to run software on an actual device (as opposed to the simulator), you will need to sign your build with a certificate issued by Apple. Each certificate is linked to a private/public keypair, the private half of which resides in your Mac's Keychain. There are two types of certificates:
-
Development certificate: Every developer on a team has their own, and it is generated upon request. Xcode might do this for you, but it's better not to press the magic "Fix issue" button and understand what is actually going on. This certificate is needed to deploy development builds to devices. Naming Convention : CERT_DEV_XXX.p12
-
Distribution certificate: There can be several, but it's best to keep it to one per organization, and share its associated key through some internal channel. This certificate is needed to ship to the App Store, or your organization's internal "enterprise app store". Naming Convention : CERT_DIST_XXX.p12
Provisioning
Besides certificates, there are also provisioning profiles, which are basically the missing link between devices and certificates. Again, there are two types to distinguish between development and distribution purposes:
-
Development provisioning profile: It contains a list of all devices that are authorized to install and run the software. It is also linked to one or more development certificates, one for each developer that is allowed to use the profile. The profile can be tied to a specific app or use a wildcard App ID (*). The latter is discouraged, because Xcode is notoriously bad at picking the correct files for signing unless guided in the right direction. Also, certain capabilities like Push Notifications or App Groups require an explicit App ID. Naming Convention : PP_DEV_XXX.provisioningprofile
-
Distribution provisioning profile: There are three different ways of distribution, each for a different use case. Each distribution profile is linked to a distribution certificate, and will be invalid when the certificate expires.
- Ad-Hoc: Just like development profiles, it contains a whitelist of devices the app can be installed to. This type of profile can be used for beta testing on 100 devices per year. For a smoother experience and up to 1000 distinct users, you can use Apple's newly acquired TestFlight service. Supertop offers a good summary of its advantages and issues.
- App Store: This profile has no list of allowed devices, as anyone can install it through Apple's official distribution channel. This profile is required for all App Store releases.
- Enterprise: Just like App Store, there is no device whitelist, and the app can be installed by anyone with access to the enterprise's internal "app store", which can be just a website with links. This profile is available only on Enterprise accounts. Naming Convention : PP_DIST_XXX.provisioningprofile
To sync all certificates and profiles to your machine, go to Accounts in Xcode's Preferences, add your Apple ID if needed, and double-click your team name. There is a refresh button at the bottom, but sometimes you just need to restart Xcode to make everything show up.
Debugging Provisioning
Sometimes you need to debug a provisioning issue. For instance, Xcode may refuse to install the build to an attached device, because the latter is not on the (development or ad-hoc) profile's device list. In those cases, you can use Craig Hockenberry's excellent Provisioning plugin by browsing to ~/Library/MobileDevice/Provisioning Profiles, selecting a .mobileprovision file and hitting Space to launch Finder's Quick Look feature. It will show you a wealth of information such as devices, entitlements, certificates, and the App ID.
Use iPhone Configuration Utility
Uploading
iTunes Connect is Apple's portal for managing your apps on the App Store. To upload a build, Xcode 6 requires an Apple ID that is part of the developer account used for signing. This can make things tricky when you are part of several developer accounts and want to upload their apps, as for mysterious reasons any given Apple ID can only be associated with a single iTunes Connect account. One workaround is to create a new Apple ID for each iTunes Connect account you need to be part of, and use Application Loader instead of Xcode to upload the builds. That effectively decouples the building and signing process from the upload of the resulting .app file.
After uploading the build, be patient as it can take up to an hour for it to show up under the Builds section of your app version. When it appears, you can link it to the app version and submit your app for review.
Making iPA From Xcode project
Use following steps to make a signed ipa :
- Select Target: Select your SampleProject in your xcode(left-hand side as shown) Then select Product option, in which you could select Archive option. Click it.
- Select Archive: It will take you to Window > Organizer You can see your recent Archive files. Select your archive file and right click > Click Show in finder. You can now get the location of archive file
- Terminal cd: Open Terminal and change your directory to current xcodeArchive folder cd /Users/macpro/Library/Developer/Xcode/Archives/2015-07-22/
- Export Archive: Now run this command : xcodebuild -exportArchive -exportFormat ipa -archivePath "SampleProject.xcarchive" -exportPath "SampleProject_22July.ipa" -exportProvisioningProfile "<#Project Name#> Development Profile"
- Get Exported ipa: If Export is succeeded then you will have an IPA in /Users/macpro/Library/Developer/Xcode/Archives/2015-07-22/ folder.
Xcode Plugins :
Following are the plugins that I suggest you to use :
- Alcatraz : Alcatraz is an open-source package manager for Xcode 5+. It lets you discover and install plugins, templates and color schemes without the need for manually cloning or copying files. It installs itself as a part of Xcode and it feels like home. [alcatraz] [alcatraz]: https://github.com/supermarin/Alcatraz
New Xcode Plugin support :
To Give plugin support to any new Xcode version you need to know its application name. Follow these steps and you can enable all plugins on the new Xcode version. Write this command in terminal and tell me.
* find ~/Library/Application\ Support/Developer/Shared/Xcode/Plug-ins -name Info.plist -maxdepth 3 | xargs -I{} defaults write {} DVTPlugInCompatibilityUUIDs -array-add defaults read /Applications/Xcode.app/Contents/Info DVTPlugInCompatibilityUUID
Step by step SWIFT integration for Xcode Objc-based project:
Following the link StackOverFlow
- 1: Create new *.swift file (in Xcode) or add it by using Finder
- 2: Add swift bridging empty header if Xcode have not done this before (see 4 below)
- 3: Implement your Swift class by using @ objc attribute: #import UIKit @ objc class Hello : NSObject { func sayHello () { println("Hi there!") } }
- 4 :Open Build Settings and check this parameters:
- Product Module Name : myproject
- Defines Module : YES
- Embedded Content Contains Swift : YES
- Install Objective-C Compatibility Header : YES
- Objective-C Bridging Header : $(SRCROOT)/Sources/SwiftBridging.h
- 5: Import header (which is auto generated by Xcode) in your *.m file (#import "myproject-Swift.h")
- 6: Clean and rebuild your Xcode project
- 7: Profit!
Change Project name,Class Prefix and Organization Name :
- On the left side expand Targets
- Click on SampleProject in left pane and Edit it.
- Double click on your target and then select build tab in the newly opened window
- on the top right under Identity & Type - edit - Project Name
- on the top right under Project document edit - Organisation and Class Prefix
- Change it and clean rebuild, your new app name should be changed by now.
Integrate GoogleMapsHelper
https://github.com/xeieshan/GoogleMapsHelper
Read Me in Russian : http://gargo.of.by/googlemapshelper/
A GOOGLE MAPS Helper that help you do multiple tasks like
HOW TO USE
// using AFNetworking ```objective-c [[AFGoogleMapsHelper sharedAFGoogleMapsHelper] geocodeAddressString:@"Arsenal Emirates" components:@{} completionHandler:^(MOGoogleGeocodeList *googleGeoCodeList, SPGoogleGeoCoderResponse responseCode, NSString *message) {
}];

CLLocationCoordinate2D emiratesStadium = { 51.555747, -0.108309};
CLLocationCoordinate2D stamfordBridge = { 51.481690, -0.190999 };

[[AFGoogleMapsHelper sharedAFGoogleMapsHelper] reverseGeocodeCoordinate:(emiratesStadium) resultTypes:@[] locationTypes:@[] completionHandler:^(MOGoogleGeocodeList *googleGeoCodeList, SPGoogleGeoCoderResponse responseCode, NSString *message) {

}];

[[AFGoogleMapsHelper sharedAFGoogleMapsHelper] getAutoCompleteFromGoogle:@"Arsenal Emirates Stadium, london" andAutoComplete:^(MOGoogleAutoCompleteList *googleAutocompleteList, SPGoogleGeoCoderResponse responseCode, NSString *message) {

}];

[[AFGoogleMapsHelper sharedAFGoogleMapsHelper] getDirections:emiratesStadium andCoordinateDestination:stamfordBridge andDrawPoints:^{

} andPlaceMarks:^(MKPolyline *polyLine, NSString *distance, NSString *duration, NSString *startAddress, NSString *endAddress, NSMutableArray *polyLineSetArray, NSMutableArray *directionsSetArray, NSMutableArray *distanceSetArray) {

}];

// Using SVHTTPClient

[[SVGoogleMapsHelper sharedGoogleMapHelper] geocodeAddressString:@"Arsenal Emirates" components:@{} completionHandler:^(MOGoogleGeocodeList *googleGeoCodeList, SPGoogleGeoCoderResponse responseCode, NSString *message) {

}];


[[SVGoogleMapsHelper sharedGoogleMapHelper] reverseGeocodeCoordinate:(emiratesStadium) resultTypes:@[] locationTypes:@[] completionHandler:^(MOGoogleGeocodeList *googleGeoCodeList, SPGoogleGeoCoderResponse responseCode, NSString *message) {

}];

[[SVGoogleMapsHelper sharedGoogleMapHelper] getAutoCompleteFromGoogle:@"Arsenal Emirates Stadium, london" andAutoComplete:^(MOGoogleAutoCompleteList *googleAutocompleteList, SPGoogleGeoCoderResponse responseCode, NSString *message) {

}];

[[SVGoogleMapsHelper sharedGoogleMapHelper] getDirections:emiratesStadium andCoordinateDestination:stamfordBridge andDrawPoints:^{

} andPlaceMarks:^(MKPolyline *polyLine, NSString *distance, NSString *duration, NSString *startAddress, NSString *endAddress, NSMutableArray *polyLineSetArray, NSMutableArray *directionsSetArray, NSMutableArray *distanceSetArray) {

}];
```
1- Geocode
It returns all these items :
- MOGoogleGeocodeList *googleGeoCodeList
- SPGoogleGeoCoderResponse responseCode
- NSString *message
I Geocode @"Arsenal Emirates" and I got Printing description of googleGeoCodeList->_results->[0]:
{   "formatted_address" = "Hornsey Rd, London N7 7AJ, UK";
    geometry =     {
        bounds =         {
        };
        location =         {
            lat = "51.5548885";
            lng = "-0.108438";
        };
        "location_type" = APPROXIMATE;
        viewport =         {
            northeast =             {
                lat = "51.55623748029149";
                lng = "-0.107089019708498";
            };
            southwest =             {
                lat = "51.5535395197085";
                lng = "-0.109786980291502";
            };
        };
    };
    kMOGoogleGeocodePlacemarksAddressComponents =     (
                {
            kMOAddressComponentsTypes =             (
                route
            );
            "long_name" = "Hornsey Road";
            "short_name" = "Hornsey Rd";
        },
                {
            kMOAddressComponentsTypes =             (
                "postal_town"
            );
            "long_name" = London;
            "short_name" = London;
        },
                {
            kMOAddressComponentsTypes =             (
                "administrative_area_level_2",
                political
            );
            "long_name" = "Greater London";
            "short_name" = "Greater London";
        },
                {
            kMOAddressComponentsTypes =             (
                "administrative_area_level_1",
                political
            );
            "long_name" = England;
            "short_name" = England;
        },
                {
            kMOAddressComponentsTypes =             (
                country,
                political
            );
            "long_name" = "United Kingdom";
            "short_name" = GB;
        },
                {
            kMOAddressComponentsTypes =             (
                "postal_code"
            );
            "long_name" = "N7 7AJ";
            "short_name" = "N7 7AJ";
        }
    );
    kMOGoogleGeocodePlacemarksTypes =     (
        establishment,
        "point_of_interest",
        stadium
    );
    "place_id" = "ChIJO14pRXYbdkgRkM-CgzxxADY";
}
2- Reverse Geocode
It returns all these items :
- MOGoogleGeocodeList *googleGeoCodeList
- SPGoogleGeoCoderResponse responseCode
- NSString *message
Printing description for first item :
({
    "formatted_address" = "Emirates Stadium, London, UK";
    geometry =     {
        bounds =         {
            northeast =             {
                lat = "51.5561569";
                lng = "-0.1069905";
            };
            southwest =             {
                lat = "51.5539356";
                lng = "-0.1098853";
            };
        };
        location =         {
            lat = "51.55572979999999";
            lng = "-0.1083118";
        };
        "location_type" = ROOFTOP;
        viewport =         {
            northeast =             {
                lat = "51.5563952302915";
                lng = "-0.1069905";
            };
            southwest =             {
                lat = "51.5536972697085";
                lng = "-0.1098853";
            };
        };
    };
    kMOGoogleGeocodePlacemarksAddressComponents =     (
                {
            kMOAddressComponentsTypes =             (
                premise
            );
            "long_name" = "Emirates Stadium";
            "short_name" = "Emirates Stadium";
        },
                {
            kMOAddressComponentsTypes =             (
                locality,
                political
            );
            "long_name" = London;
            "short_name" = London;
        },
                {
            kMOAddressComponentsTypes =             (
                "postal_town"
            );
            "long_name" = London;
            "short_name" = London;
        },
                {
            kMOAddressComponentsTypes =             (
                "administrative_area_level_2",
                political
            );
            "long_name" = "Greater London";
            "short_name" = "Greater London";
        },
                {
            kMOAddressComponentsTypes =             (
                "administrative_area_level_1",
                political
            );
            "long_name" = England;
            "short_name" = England;
        },
                {
            kMOAddressComponentsTypes =             (
                country,
                political
            );
            "long_name" = "United Kingdom";
            "short_name" = GB;
        }
    );
    kMOGoogleGeocodePlacemarksTypes =     (
        premise
    );
    "place_id" = ChIJuaX4rXcbdkgRX7nJ4iCVzT0;
}}
)
3- Autocomplete
It Returns all of these items :
- MOGoogleAutoCompleteList *googleAutocompleteList
- SPGoogleGeoCoderResponse responseCode
- NSString *message
I wanted to search @"Arsenal Emirates Stadium, london" and I got following 2 results, I am showing first item Printing description of ((MOPredictions *)0x0000600000282b70):
{
    description = "Arsenal Football Club, Emirates Stadium, Hornsey Road, London, United Kingdom";
    id = 695fdbc199ef136a3674dc5c3946d0901be24cf2;
    kMOPredictionsMatchedSubstrings =     (
                {
            length = 7;
            offset = 0;
        },
                {
            length = 16;
            offset = 23;
        },
                {
            length = 6;
            offset = 55;
        }
    );
    kMOPredictionsTerms =     (
                {
            offset = 0;
            value = "Arsenal Football Club";
        },
                {
            offset = 23;
            value = "Emirates Stadium";
        },
                {
            offset = 41;
            value = "Hornsey Road";
        },
                {
            offset = 55;
            value = London;
        },
                {
            offset = 63;
            value = "United Kingdom";
        }
    );
    kMOPredictionsTypes =     (
        establishment
    );
    "place_id" = ChIJq3Y4mXYbdkgRinA5RgGR5tA;
    reference = "CmRcAAAA3_03PcjmlvYYAMB56q1NSPHAa6o4s5OZlZzmqKWVzl6m8wQu8kIAHqSFzY8M_fJC6tbdt5vQSOylmlp6vu8hMJ0areyjFCiETtOb2e1qkM9a8TbnHRoIGK83-h0iy9EaEhCgUDC5ODRWWeKhZZmXh3wHGhRRAUwm4UFKR6a689AJXsADrqKFNA";
}
4- Directions
It Returns All these Items :
- MKPolyline *polyLine
- NSString *distance
- NSString *duration
- NSString *startAddress
- NSString *endAddress
- NSMutableArray *polyLineSetArray
- NSMutableArray *directionsSetArray
- NSMutableArray *distanceSetArray
in a block. I found directions between following CLLocationCoordinate2D's
CLLocationCoordinate2D emiratesStadium = { 51.555747, -0.108309};
CLLocationCoordinate2D stamfordBridge = { 51.481690, -0.190999 };
Printing description of duration:
42 mins
Printing description of distance:
16.6 km
Printing description of startAddress:
Citizen Rd, London N7, UK
Printing description of endAddress:
19 Billing Pl, London SW10 9UN, UK
Plus Polyline object to be used in MKMapView
It also tells you Guidance strings which you can use :
- Head southwest on Citizen Rd toward Hornsey Rd/A103,
- Turn right onto Hornsey Rd/A103,
- Turn left onto Tollington Rd/A503Continue to follow A503,
- Continue straight onto Camden Rd/A503,
- Turn left onto Camden St/A400Continue to follow A400,
- Turn left onto Hampstead Rd/A400Continue to follow A400,
- Turn right onto Euston Rd,
- Merge onto Euston Rd/A501 via the ramp to Ring Road/A41/A40/KilburnContinue to follow A501,
- Keep right to continue on Marylebone Flyover/A40Continue to follow A40,
- Take the A3220 ramp to Hammersmith/Shepherd's Bush/White City/Earls Court,
- At the roundabout, take the 1st exit onto W Cross Rte/A3220,
- At the roundabout, take the 2nd exit onto Holland Rd/A3220Continue to follow A3220,
- Keep right to continue on Warwick Gardens/A3220,
- Turn left onto Pembroke Rd/A3220Continue to follow A3220,
- Continue straight onto Earls Ct Rd/A3220Continue to follow A3220,
- Turn right onto Fulham Rd/A308Continue to follow Fulham Rd,
- Turn right,
- Turn right,
- Turn left
- Destination will be on the left
Make sure you integrate AFNetworking, SVProgressHUD, SVHTTPClient
I was using CocoaPods so I used :
- pod 'SVHTTPRequest', '~> 0.5'
- pod 'AFNetworking', '~> 3.0'
- pod 'SVProgressHUD'
Dont forget to add condition in info.plist :
- App Transport > Arbitrary loads allow : YES
