Subscribie Save
Collect recurring payments online - subscription payments collection automation

![]()
![]()
![]()
![]()
![]()
![]()
![]()
![]()
![]()
Subscribie - Collect recurring payments easily
Subscribie helps you automatically collect money from your customers, clients and members, without the hassle of manual payments. Save time by having people signup themselves, and easily track payments.
You don't need to be technical, and can integrate it with your existing business by creating your account.
https://user-images.githubusercontent.com/1718624/196006904-3f00f852-3b86-4ecc-b940-85e3357c275b.mp4
Open Source subscription billing and management
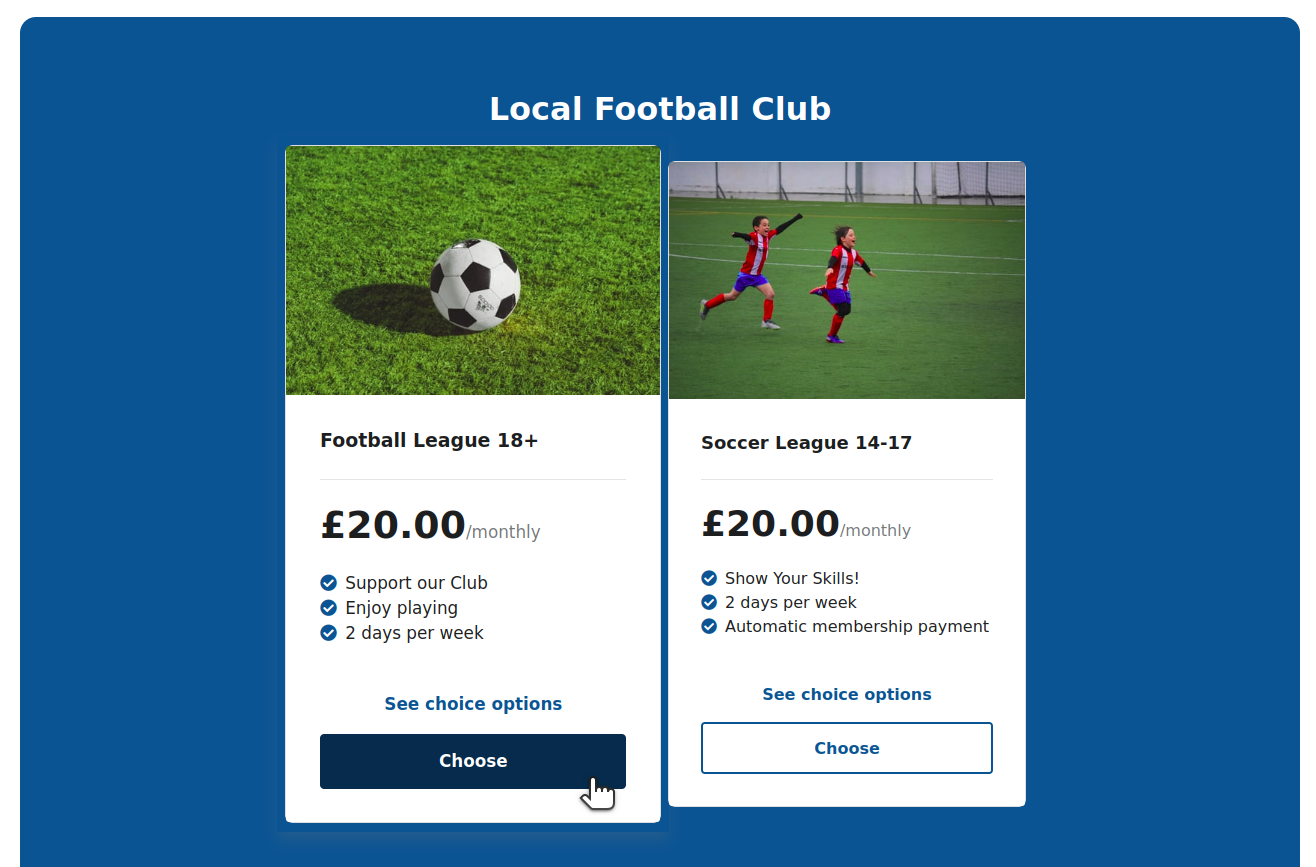
Demo
https://footballclub.subscriby.shop/
Video Demos 📹 😎
View video demos
subscriber-Ordering-recurring-plan
https://user-images.githubusercontent.com/1718624/162085566-eff392b1-ae9e-4ff1-a3f7-2c5a2e2b7c5a.mp4
What does this project do?
Use Subscribie to collect recurring payments online.
Quickly build a subscription based website, taking weekly/monthly/yearly payments- including one-off charges.
- You have subscription service(s) to sell (plans)
- Each of your plans have unique selling points (USPs)
- Each have a different recurring price, and/or an up-front charge
Demo & Hosting
Don't want/know how to code? Pay for the hosted service.
Developer Quickstart
Quickly run Subscribie from a container:
If you use podman:
podman run -p 8082:80 ghcr.io/subscribie/subscribie/subscribie:latest
Or, if you prefer Docker:
docker run -p 8082:80 ghcr.io/subscribie/subscribie/subscribie:latest
Then visit: http://127.0.0.1:8082/auth/login
Username: [email protected]
Password: password
Why is this project useful?
A lot of the hard work has been done for you. If you're a devloper, you can impress your clients quickly, if you're a small business owner, you might want to try the subscription website hosting service but you can always host it yourself too.
- Low risk (not very expensive)
- No coding required
- Simple: Just enter your plans & prices
- Upload a picture
- Uses Stripe for subscriptions & one-off payments
Contributing & Help finding things: Where do I find x? Where is file y?
See CONTRIBUTING.md and quickstart below.
Quickstart (without Docker)
git clone https://github.com/Subscribie/subscribie.git
cd subscribie
cp .env.example .env # Copy default .env settings (read it)
# Read the .env file so you're familiar with the env variables
(Optional) Set database path. Edit .env and set DB_FULL_PATH and SQLALCHEMY_DATABASE_URI. (optional but recommended- do not store data.db in /tmp).
Notice that
sqlite:///starts with three forward slashes. So, if you want to store the database in/home/sam/data.dbthen, you should putsqlite:////home/sam/data.db(note four/'s)
# Open the .env file, and change the database path to store somewhere else (e.g. your `/home/Documents/data.db` folder):

DB_FULL_PATH="/tmp/data.db"
SQLALCHEMY_DATABASE_URI="sqlite:////tmp/data.db"
Create python environment and run flask:
python3 -m venv venv # Create a python3.x virtual environment
. venv/bin/activate # Activate the virtualenv
# If you are on Windows, use: . venv/Scripts/Activate
pip install -r requirements.txt # Install requirements
export FLASK_APP=subscribie
export FLASK_DEBUG=1
flask db upgrade
flask initdb # (recommended- gives you some example data)
The database file is called data.db. Note,
flask initdb inserts pretend data into your database for testing.
Set Stripe API key
You need a Stripe api key.
- Create a stripe account
- Go to api keys https://dashboard.stripe.com/test/apikeys (test mode)
- Copy
Publishable keyandSecret key - Paste the keys into your
.envfile:
Edit your .env file
STRIPE_TEST_PUBLISHABLE_KEY=pk_test_<your-Publishable-key>
STRIPE_TEST_SECRET_KEY=sk_test_<your-Secret-key>
Start Subscribie
export FLASK_APP=subscribie
export FLASK_DEBUG=1
flask run
Now visit http://127.0.0.1:5000
Quickstart (with Docker)
If you like to use docker-compose workflow for local development:
git clone https://github.com/Subscribie/subscribie.git
cd subscribie
cp .env.example .env
export COMPOSE_DOCKER_CLI_BUILD=1
export DOCKER_BUILDKIT=1

# Start the container
docker-compose up

# Wait for it to build...
Then visit http://127.0.0.1:5000
To go inside the container, you can do: docker-compose exec web /bin/bash
from the project root directory.
Logging & Debugging - How to change the logLevel
Quick: edit your .env file and set PYTHON_LOG_LEVEL=DEBUG.
E.g. to reduce the amount of logs, to WARNING or CRITICAL.
The default log level is DEBUG which means show as much logging
information as possible.
The possible values are DEBUG, INFO, WARNING, ERROR, CRITICAL See https://docs.python.org/3/howto/logging.html
Flask does need to be restarted for the log level to change.
How to change theme (theme development)
How to change from the default jesmond theme to the builder theme.
- Edit your
.envfile
Change:
-
THEME_NAME="jesmond"toTHEME_NAME="builder" -
(optional) change
TEMPLATE_BASE_DIRif you want to store themes in a different directory.
-
Stop & start subscribie
-
Complete. The other theme will now load
Create a new theme
If you're creating a new theme, then change TEMPLATE_BASE_DIR to a directory outside of
subscribie root project.
API based authentication with jwt token
Locally
Locally you'll need to create public/private keys for secure jwt authentication.
- Generate public/private keys automatically
# Use the commands below to automaticaly create 'private.pem' file and key
openssl genrsa -out private.pem 2048
# Use this command to automatically generate your public.pem
openssl rsa -in private.pem -pubout > public.pem
- Update .env file with PRIVATE_KEY and PUBLIC_KEY
PRIVATE_KEY="/path/to/private.pem"
PUBLIC_KEY="/path/to/public.pem"
Logging in via jwt or basic auth
Provide the username & password in a POST request, and a jwt token is returned for use in further requests.
API Basics
Oauth style login:
curl -v -d "[email protected]" -d "password=password" http://127.0.0.1:5000/auth/jwt-login
Http Basic auth login:
curl -v --user "fred:password" http://127.0.0.1:5000/auth/jwt-login
Then use the bearer token in a request to a protect path. e.g.
curl -v -H "Authorization: Bearer <token>" http://127.0.0.1:5000/auth/protected
Get all plans
curl -v -H "Content-Type: application/json" -H "Authorization: Bearer <token> " http://127.0.0.1:5000/api/plans
Create Plan
Example POST request:
    curl -v -H "Content-Type: application/json"
    -H "Authorization: Bearer <token>" -d '
    {
      "interval_unit": "monthly",
      "interval_amount": "599",
      "sell_price": 0,
      "title": "My title",
      "requirements": {
        "instant_payment": false,
        "subscription": true,
        "note_to_seller_required": false
      },
      "selling_points": [
        {"point":"Quality"}
      ]
    }' http://127.0.0.1:5000/api/plan
Update Plan
Example PUT request:
    curl -v -H 'Content-Type: application/json' -X PUT
    -d '
    {
      "title":"Coffee",
      "interval_unit": "monthly",
      "selling_points": [
        {"point":"Quality"},
        {"point": "Unique blend"}
      ],
      "interval_amount":888,
      "requirements": {
        "instant_payment": false,
        "subscription": true,
        "note_to_seller_required": false}
    }'
    http://127.0.0.1:5000/api/plan/229
Delete Plan
Example DELETE request:
curl -v -X DELETE -H "Authorization: Bearer <token>" http://127.0.0.1:5000/api/plan/229
Database
The database store is SQL based.
Database Migrations
Adding new database field example
The general steps are:
- Update
model.pywith new field - Run
flask db migrate -m 'added column title to plan model'- which generates a new migration file The migration file will be in./migrations/versions/<hash>_added_column_title_to.py - Update the migration , check it is correct (we generally dont add a
downmigration, see other migration files for an example). Warning: It is likley the generation migratino will have more/less infromatino than needed- edit it to be correct Note: We used to have to useop.batch_alter_tablehowever that is no longer needed (thanks sqlalchemy!) - Apply the migration to your local database:
flask db upgrade - Test (+write test), commit and push
How new shops are created
- New shop owner submits a form to create a new shop which hits
/start-buildingendpoint - Shop is created and a new shop is started (Shop owner sees "Please wait")
- New Shop is ready
- Shop owner is automatically redirected to the new shop, loged in using automated one-time login
Saas Deployment
Architecture
Subscribie shop
Every shop owner gets a deployed flask application, with its own database.
stripe-connect-account-announcer
If a Subscribie shop connects to Stripe (it does not have to), then the shop will announce it's Stripe connect id to the stripe-connect-account-announcer.
The stripe-connect-account-announcer stores the Stripe connect id, so that when Stripe webhook events
arrive, the stripe-connect-webhook-endpoint-router knows which shop to send the events to.
stripe-connect-webhook-endpoint-router
A Stripe webhook endpoint. Receives Stripe webhook events, which,
- Inspects the Stripe connect id from the webhook request
- Looks up the Stripe connect id (which has been stored by the
stripe-connect-account-announcer) - Forwards the webhook event (e.g. checkout-session-completed) to the correct Subscribie
shop - The
shopverifies the webhook from Stripe, and processes the event.
Note, in previous implementations there was one webhook endpoint per shop- this isn't compatible with Stripe when using Stripe Connect because there's a limmit on the number of webhooks, and connect events need to be routed based on their Stripe connect id anyway, hence the
stripe-connect-webhook-endpoint-routerperforms this role.
Failure modes:
If the stripe-connect-account-announcer suffers an outage, this means new shops can't announce their Stripe account to stripe-connect-webhook-endpoint-router meaning, when a new Stripe event arrives from Stripe, then, Subscribie's stripe-connect-webhook-endpoint-router would not know which shop to send it to. Stripe automatically retries the delivery of events which allows time for the system to recover in an outage.
Application server: uwsgi
uWSGI is used to run the application services.
Subscribie Saas uses the following key compoent of uwsgi: Emperor mode.
uWSGI Emperor mode starts and manages all running Subscribie shops as uWSGI vassals.
"If the emperor dies, all the vassals die."
-Emperor mode
uWSGI - Emperor
- When a new shop is created, the emperor notices a new shop, and starts it as a vassal. - Every Subscribie shop is a vassal of the emperoruWSGI - vassal-template
- A vassal template is injected into every new shop by the emporor. - This avoids having to copy and paste the same config for every new shop. - It also means vassal config is in one place.Systemd services
subscribie
The uWSGI emperor and the vassals it sawns is defined as a single systemd service called `subscribie`.subscribie-deployer
Responsible for listening for new Shop requests, and creating the Shop config which uWSGI needs to spawn a new Shop (aka uwsgi vassal).Optimisation
Problem: Every shop uses ~45mb of RAM. With lots of Shops the RAM usage can be high. Since shops are not receiving web traffic all the time we can stop them to reduce RAM usage.
Solution: uWSGI vassals are configured to be OnDemandVassals see OnDemandVassals
and also socket-activated (note that's two different things):
Result: A reduction of > 17Gb of ram observed on a busy node.
- OnDemandVassals: The application is not started until the first request is received.
- Socket-activation: If running idle with no requests after x secconds, the shop is stoped- but is re-activated when a request comes in for the shop
Socker activation is enabled by using the uWSGI feature emperor-on-demand-extension = .socket in the emperor.ini config.
OnDemandVassals is enable by using the following config in the injected vassal config for every shop:
# idle time in seconds
idle = 60
# kill the application after idle time is reached
die-on-idle = true
See: Combining on demand vassals with --idle and --die-on-idle
Subscribie Saas other services
Needed components / services. Check the .env.example for each of them.
- A redis instance, listening on localhost only (unless protected with iptables)
- A subscribie site with the Builder module installed. The builder module submits new sites for building
-
Subscribie deployer is an endpoint which listens for
POSTrequests of new sites to be created. The Builder module submits to this endpoint. The server requires uwsgi to be installed. There is an example config in the README. - Stripe connect account announcer Each shop announces its stripe connect account id to a redis endpoing (key is the account id, value is the shop url)
- Stripe webhook router which routes webhooks to the correct shop
Checklist
- A Redis hostname is set
- Redis is configured with password authentication
- Iptables are configured for redis
- Hostname is setup for stripe-connect-webhook-endpoint-router
- Hostname is setup for stripe-connect-account-announcer (listening on port 8001 by default)
Where can I get more help, if I need it?
- Read through all these docs
- Submit a detailed issue
Docker help
How do I rebuild the container?
Sometimes you need to rebuild the container if you've made changes to the Dockerfile.
docker-compose up --build --force-recreate
