Scriptable States Save
Scriptable Objects based FSM for Unity
Scriptable States


What is this?
Scriptable States is a ScriptableObject based implementaton of a Finite State Machine.
It's main purpose is to create reusable behaviour bits like the ScriptableAction and the ScriptableCondition, and be able to create and edit a ScriptableState using those actions and sequencing those states with a ScriptableStateMachine setting transitions with those conditions to create unique behaviour through the editor.
Installation:
On Unity 2018.4:
Download this package to your disk. Open the package manager on Window > Package Manager and select the + button and click on the Add package from disk... option and then add the ScriptableStates package.
On Unity 2019.1 and above:
Open the project manifest file under the Packages folder and add these lines to the dependencies:
"dependencies": {
  ...
    "com.loophouse.scriptable-states":"https://github.com/luisoliveiras/scriptable-states.git#v0.4.0",
  ...
}
On Unity 2019.3 and above:
Open the package manager on Window > Package Manager and select the + button and click on the Add package from git URL... option and then add the ScriptableStates package link:
https://github.com/luisoliveiras/scriptable-states.git#v0.4.0
* You can also add it from disk if you want, just follow the steps from 2018.4 install guide.
** You can can choose another version of the tool by changing the end of the link (#v0.4.0) for the version you want. Versions under v0.4.0 have a dependency on the reorderable list package.
How to Use
Setting up a State:
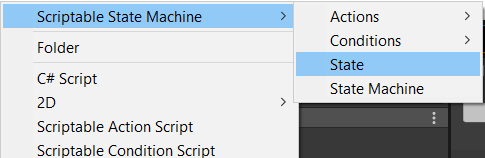
Access Create > Scriptable State Machine > State like the image below.
Select a name for your state and you should be ready to use it. The image below is what you should get from creating a state asset.
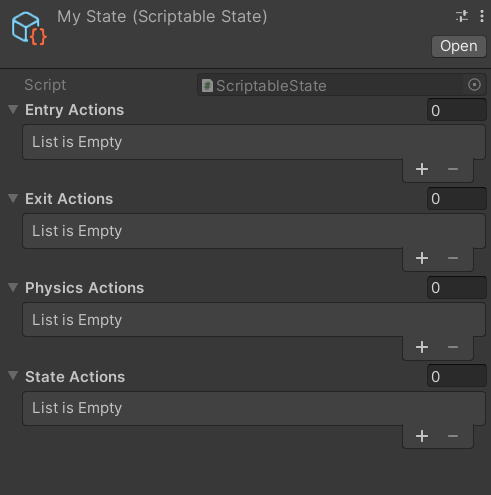
As you can see from the image, a state contains five lists: Entry Actions, Exit Actions, Physics Actions and State Actions.
- Entry Actions are excecuted only once, when there is a transition to the state.
- Exit Actions are executed only once, when there is a transition from the state.
-
Physics Actions are executed in the
FixedUpdate()method. -
State Actions are executed in the
Update()method.
Creating a State Machine
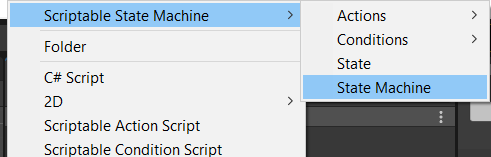
Access Create > Scriptable State Machine > State Machine like the image below.
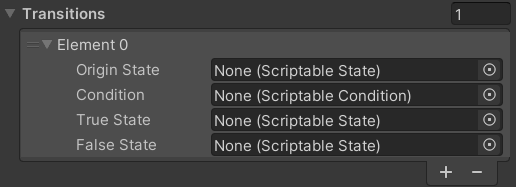
To set up a State Machine you will need an Initial State, from where your state machine will start, an Empty State reference, which will be used when comparing the transitions responses and a list of all possible Transitions for that state machine.
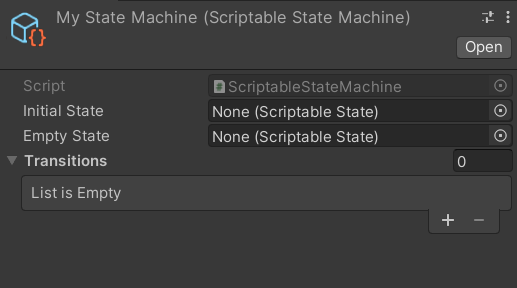
Transitions are executed in the LateUpdate() method of the StateComponent, where based on the current state of the state machine a condition will be tested, triggering a move (or not) to the next state. A Transition contains a Origin State that will be compared to the current state, a ScriptableCondition that will be tested, a True State, achieved when the condition is met, and a False State when not.
Creating Actions
Create a C# script inheriting from ScriptableAction and add a CreateMenu attribute to it like in the example below:
[CreateAssetMenu(menuName = "Scriptable State Machine/Actions/MyAction", fileName = "new MyAction")]
public class MyAction : ScriptableAction
{
    //Add some variables here to setup your action
	public override void Act(StateComponent stateComponent)
	{
        // put your code here
        // You can use the stateComponent to get other components in your game object
	}
}
With this done, you're ready to create some action from the Create > Scriptable State Machine > Actions menu. By adding variables to your action and making them visible in the inspector, you can create variations for that action, like a MoveAction with different values for speed.
Creating Conditions
Create a C# script inheriting from ScriptableCondition and add a CreateMenu attribute to it like in the example below:
[CreateAssetMenu(menuName = "Scriptable State Machine/Conditions/MyCondition", fileName = "new MyCondition")]
public class MyCondition : ScriptableCondition
{
    //Add some variables here to setup your condition
	public override bool Verify(StateComponent stateComponent)
	{
        // put your code here
        // You can use the stateComponent to get other components in your game object
	}
}
With this step completed, it is now possible to create a condition from the Create > Scriptable State Machine > Conditions menu and start setting up your states' transitions. The states transitions uses the value returned from the condition's Verify method to determine if should go to the state referenced in the True State or False State. You can add variables and set them visible in the inspector to create variations of that condition, like a DetectionCondition that uses a float to determine the detection radius.
Creating the State Component
Create the GameObject that will driven by the state machine, in the Inspector, click in Add Component and search for StateComponent and add it to your game object.

To set up this component, add a ScriptableStateMachine on the State Machine field. By doing this, the StateComponent will start on the Initial State set on the State Machine, running its actions while testing the State Machine's transitions for new states. While in play mode, the Current State will show the current state of this component in green and if something go wrong with your states or if it is not in play mode, it will show "None" in red.
Following this steps you should not have problems setting up your states machines.
* When creating your actions and conditions, remember that they can be used by more then one object, and you should not change the values of the variables added to them in runtime, or you'll change the value for all the objects using them, unless that's your expected behaviour. Think of the values you expose in the actions and conditions editor as constants for that behaviour piece.
Samples
Script Templates:
What: It adds create menu options to make it easier to create a ScriptableAction or ScriptableCondition script by adding them to the Create menu with all the information they need.
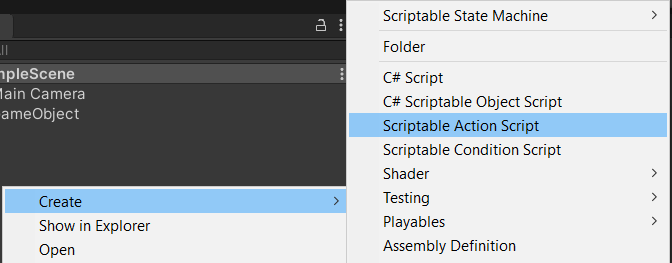
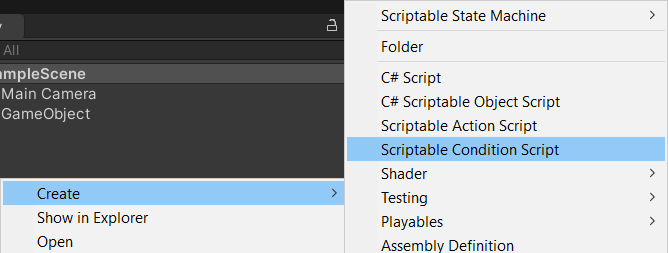
How: Move the ScriptTemplates folder from Samples to your Assets folder (root) and restart the editor. The "Scriptable Action Script" and "Scriptable Condition Script" options will be available under the Create menu options. If you already have a ScriptTemplates folder in your project, just move the assets inside the Samples/ScriptTemplates folder to it and restart the editor.
Follow Behavior Example:
What: A Simple implementation of movement, stamina and follow behaviour using scriptable states, scriptable state machines, actions and conditions.
How: Install the sample from the Package Manager UI. Open the FollowBehaviourExample scene inside the Follow Behaviour Example folder added to your project's Assets folder and you're ready to go.
* This sample requires the new unity Input System to work.
