Raycaster Go Save
Golang raycaster engine using the Ebitengine 2D Game Library
raycaster-go
Golang raycasting engine using the Ebitengine 2D Game Library to render a 3-Dimensional perspective in a 2-Dimensional view. It was originally converted from the C# based OwlRaycastEngine, which in turn was created based on a raycasting tutorial.
To see it in action visit the YouTube playlist.
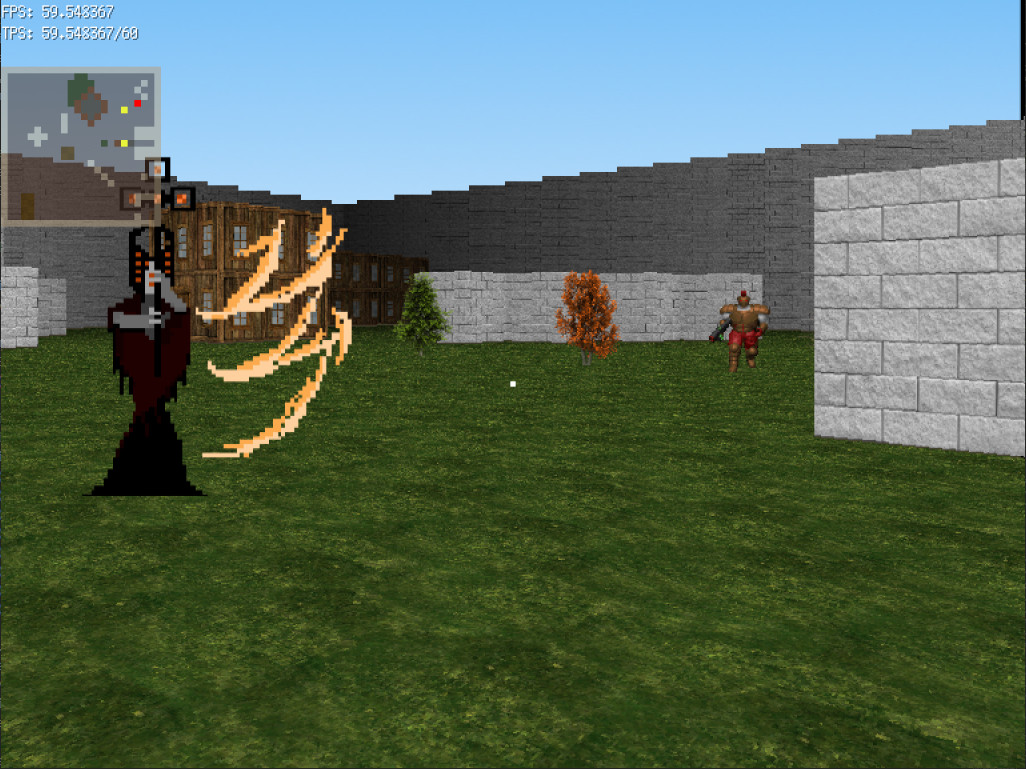
Demo
The raycaster-go-demo project is available as an example of how to use the raycaster-go engine as a module.
Developer setup
To get started with your own project using the raycaster-go engine as a Go module:
- Download, install, and setup Golang https://golang.org/dl/
- Setup your project to use go modules:
go mod init github.com/yourname/yourgame - Download the raycaster-go module:
go get github.com/harbdog/raycaster-go
NOTE: Depending on the OS, the Ebitengine game library may have additional dependencies to install.
Creating your own raycaster project
You will first want to become familiar with how to use the Ebitengine 2D Game Library. It has all of the APIs needed to render images on a 2D canvas, handle inputs from the player, and even play sounds. The raycaster-go-demo is available for reference.
Ebitengine interfaces
Just like any other Ebitengine game, there are a few game interface functions required from your game implementation:
-
Update -
Draw -
Layout
Refer to the Ebitengine tour pages for detailed explanation about the usage of these interface functions needed for basic game flow.
Raycaster-go interfaces
There are additional raycaster-go specific interfaces that will be required to render the map levels, wall textures, and sprites.
Map interfaces
Interface functions required to provide layout of wall positions on the 2-dimensional array representing the game map.
Level(levelNum int) [][]int
-
Needs to return the 2-dimensional array map of a given level index.
-
The first order array is used as the X-axis, and the second as the Y-axis.
-
The
intvalue at each X/Y array index pair represents whether a wall is present at that map coordinate.> 0: indicates presence of a wall at that map coordinate.<= 0: indicates absence of walls at that map coordinate. -
Length of X and Y arrays do not need to match within a level, can be square or rectangle map layout.
-
Each level of the map must have arrays of the same size.
NumLevels() int
- Needs to return the number of vertical/elevation levels.
TextureHandler interfaces
Interface functions required for rendering texture images for the walls and floor.
TextureAt(x, y, levelNum, side int) *ebiten.Image
- Needs to return an ebiten.Image as the wall texture found at the indicated X/Y map coordinate and level number.
-
sideis currently provided as either1or0indicating the texture viewed from the X or Y direction, respectively. This value can be used, if desired, to have a different texture image representing alternate sides of the wall. - The size of the texture image returned will need to match the texture size (
texSize) provided to theNewCamerafunction. For exampletexSize: 256requires all wall textures to be256x256pixels in size.
FloorTextureAt(x, y int) *image.RGBA
- Used to return an image.RGBA to be used as the repeating floor texture at the indicated X/Y map coordinate.
- It can also return
nilto only render the non-repeating floor texture provided to thecamera.SetFloorTexturefunction.
Sprite interfaces
Interface functions required to determine sprite images and positions to render in game.
Pos() *geom.Vector2
- Needs to return a geom.Vector2 containing the X/Y map position of the sprite.
PosZ() float64
- Needs to return the Z-position of the sprite.
- A value of
0.0represents the very bottom of the floor on the first elevation level. - The
VerticalAnchor()value will be used to determine rendered sprite orientation about the Z-position.
VerticalAnchor() raycaster.SpriteAnchor
- Needs to return the vertical anchor for positioning a sprite image.
-
raycaster.AnchorBottom: makes an image shift to the bottom of its Z-position. -
raycaster.AnchorCenter: keeps an image centered to its Z-position. -
raycaster.AnchorTop: makes an image shift to the top of its Z-position.
Scale() float64
- Needs to return the scale factor of the sprite.
- A value of
1.0indicates no scaling. - Note that scaling below or above
1.0will likely requireVerticalAnchor()to return desired position since the centered scaling point is at the vertical center of the screen.
Texture() *ebiten.Image
- Needs to return the current image to render.
- Called during the
camera.Updatefunction call. - Calls to your own update functions will be responsible for changing the image pointer returned each tick if animations or other sprite image changes are desired.
TextureRect() image.Rectangle
-
Needs to return an image.Rectangle representing the texture sheet position and area to render for the image currently returned by
Texture(). -
If the image source only contains a single image, just set to origin position along with the width and height of the image:
return image.Rect(0, 0, imageWidth, imageHeight)
SetScreenRect(rect *image.Rectangle)
- Needs to accept an *image.Rectangle pointer representing the screen position that the sprite will be getting rendered at.
- If the sprite is off-camera or completely obscured by a wall, it will be provided as
nil. - Can be useful for rendering custom user interfaces at raycasted sprite positions.
Illumination() float64
- Needs to return a value representing additional illumination provided by the sprite.
- A value of
0.0is used for normal sprite illumination. - A high positive value, for example
5000.0, can be used to have a sprite illuminate itself even in dark environments. - Currently, it does not illuminate anything around the sprite, just the sprite itself.
IsFocusable() bool
- Needs to return
trueonly if the Sprite object needs to be converged upon by the center point (used withcamera.GetConvergenceDistance()andcamera.GetConvergencePoint()).
Raycaster-go camera
After implementing all required interface functions, the last step is to initialize an instance of raycaster.Camera
and make the function calls needed to update and draw during your game loop.
func NewCamera(width int, height int, texSize int, mapObj Map, tex TextureHandler) *Camera
-
width,height: the window/viewport size. -
texSize: the pixel width and height of all textures. -
mapObj: struct implementing all required Map interfaces. -
tex: struct implementing all required TextureHandler interfaces.
camera.SetPosition(pos *geom.Vector2)
- Sets the camera X/Y map position as geom.Vector2.
camera.SetPositionZ
- Sets the camera Z position (where
0.5represents the middle of the first elevation level).
camera.SetHeadingAngle
- Sets the camera heading angle (in radians, where
0.0is in the positive X-axis with no Y-axis direction).
camera.SetPitchAngle
- Sets the camera pitch angle (in radians, where
0.0is looking straight ahead).
camera.SetFloorTexture(floor *ebiten.Image)
- Sets the non-repeating simple floor texture.
- Only shown when
TextureHandler.FloorTexture()interface returnsnil, and for areas outside of map bounds.
camera.SetSkyTexture(sky *ebiten.Image)
- Sets the non-repeating simple skybox texture.
camera.Update(sprites []Sprite)
-
sprites: an array of structs implementing all required Sprite interfaces. - Called during your game's implementation of
Draw(screen *ebiten.Image)to perform raycasting updates. - Must be called before
camera.Draw.
camera.Draw(screen *ebiten.Image)
- Called during your game's implementation of
Draw(screen *ebiten.Image)to render the raycasted levels and sprites. - Must be called after
camera.Update.
Optional camera functions
camera.SetRenderDistance(distance float64)
- Sets maximum distance to render raycasted floors, walls, and objects (-1 for practically inf)
- Default:
-1
camera.SetLightFalloff(falloff float64)
- Sets value that simulates "torch" light, lower values make torch dimmer.
- Default:
-100
camera.SetGlobalIllumination(illumination float64)
- Sets illumination value for whole level ("sun" brightness).
- Default:
300
camera.SetLightRGB(min, max color.NRGBA)
- Sets the min/max color tinting of the textures when fully shadowed (min) or lighted (max).
- Default: min=NRGBA{0, 0, 0}, max=NRGBA{255, 255, 255}
camera.GetConvergencePoint() *geom3d.Vector3
- Gets the point of convergence to a raycasted point from where the center of the camera screen is located.
camera.GetConvergenceDistance() float64
- Gets the distance to the point of convergence from where the center of the camera screen is located.
camera.GetConvergenceSprite() Sprite
- Gets the Sprite at the point of convergence from where the center of the camera screen is located.
- Returns
nilif the point of convergence is not a Sprite but wall, floor, or ceiling.
camera.SetAlwaysSetSpriteScreenRect(b bool)
- Set true to always set the sprite screen rect bounds even if behind a wall or beyond camera draw distance.
Limitations
- Raycasting is not raytracing.
- Raycasting draws 2D textures and sprites using a semi-3D technique, not using 3D models.
- The raycasting technique used in this project is more like early raycaster games such as Wolfenstein 3D, as opposed to later games such as Doom - it does not support stairs, sloped walls, or differing heights in elevation levels.
- Multiple elevation levels can be rendered, however camera and sprite positions need to be limited
to the ground level (Z-position
> 0.0 && <= 1.0). - Ceiling textures are not currently implemented. Skybox texture is currently the only option, so going indoors from outdoors in the same map is not currently possible. Feel free to help figure it out and contribute as a Pull Request!
- Thin walls, doors, and secret push walls are not currently implemented, feel free to help figure them out and contribute as a Pull Request!
- Translucent sprites are not currently implemented, feel free to contribute as a Pull Request!
