PiKey Save

Synopsis
PiKey is Physical Penetration Testing device used for the extraction and reuse of credentials on locked Microsoft Windows 7 systems. It is designed to work against corporate domain-joined machines, but may also work against home machines.
Based on the Raspberry Pi Zero W, the PiKey builds upon the Credential stealing attacks by Mubix in 2016 (https://room362.com/post/2016/snagging-creds-from-locked-machines/) and attempts to use stolen credentials to unlock machines. It typically takes one to three minutes to unlock a machine.
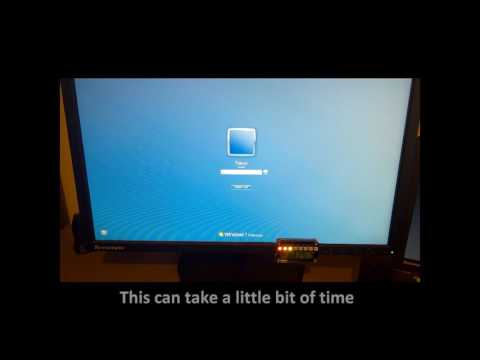
The PiKey is due to be demonstrated at the BSidesLondon 2017 conference, a video of it in action can be found below.
How does it Work?
When first inserted into a machine, the PiKey emulates a known network adaptor (so all Windows 7 machines should load drivers for it without needing to download from Windows Update). Windows then prioritises this interface over any pre-existing ones, meaning it starts to send traffic through it. This then allows the device to use the amazing Responder to capture credentials.
Once credentials have been obtained, the PiKey sends them off to a remote server to perform password cracking against them. If credentials are cracked then the cleartext versions of those credentials are then sent back to the PiKey.
The PiKey then removes the network adaptor emulation and starts to emulate a HID Keyboard. The cleartext credentials are then typed back into the machine, thus unlocking it.
Hardware and Software Required
The following hardware is required for the PiKey to work
- A Pi Zero W with appropriate SDcard storage
- A Male header for the Pi Zero W (optional - but needed for LEDs)
- If you feel like soldering (https://shop.pimoroni.com/products/male-40-pin-2x20-hat-header)
- If you prefer to use a hammer - these are great!! (https://shop.pimoroni.com/products/gpio-hammer-header)
- One of the following LEDs for user feedback (optional)
- Pimoroni Blinkt (https://shop.pimoroni.com/products/blinkt)
- Pimoroni ScrollPhat (https://shop.pimoroni.com/products/scroll-phat)
- A case for the Pi Zero W (Optional) - One used in image (https://thepihut.com/products/zebra-zero-for-raspberry-pi-zero-black-ice)
- MicroUSB cable to connect the Pi Zero W to a victim computer
The following software is required for the PiKey to work
- A wireless gateway for the Pi Zero W to be able to connect to the internet (typically this would be a smart phone with HotSpot)
- A copy of Kali Linux which is internet accessable on port 22, to act as a password cracking machine
How to Play
Once the PiKey and Kali Linux have been setup correctly, the following process can be used to use the PiKey:
- Activate the previously created hotspot/wireless gateway so the PiKey has something to communicate with
- Plug the PiKey into a victim machine. So far, only Corporate Domain-Joined Windows 7 Professional machines have been tested
- The PiKey will take around 30 seconds to boot, at this stage only the LEDs on the Pi Zero will blink
- Once the PiKey is booted and the PiKey script has kicked in, the first stage of LEDs will be lit
- Once the PiKey has established internet connectivity through the hotspot/gateway, the second stage of LEDs will be lit
- Once the Responder tool has started, the third stage of LEDs will be lit
- The PiKey will now be listening for credentials. Typically the process of obtaining credentials takes between 30 seconds to 3 minutes. Once credentials have been obtained, the fourth stage of LEDs will be lit and the credentials will be sent to the server for cracking
- The server will now spend 20 seconds cracking the password. If the server cracks the credentials passed, the fifth stage of LEDs will be lit
- The PiKey will now unload the network kernel modules and replace them with HID Keyboard modules. Once the modules are loaded the sixth stage of LEDs will be lit
- The PiKey will then send a CTRL-ALT-DELETE command to the victim machine, and light the seventh stage of LEDs.
- The PiKey will then type in the cracked credentials to the victim machine and turn off the LEDs
- The PiKey will then shutdown the Pi Zero. This typically takes 30 seconds so don't disconnect the device until then to ensure no corruption occurs
Set up Order
Setup of the PiKey is broken into two stages, the client (PiKey device) and the server (Kali Linux). Setup of the client should be completed first and then the server second, as the SSH keys used for secure communication will be created on the PiKey and then the public key should be pasted into the server.
Client Setup
-
Download the latest version of Jessie Lite (https://downloads.raspberrypi.org/raspbian_lite_latest)
-
Follow the guidance here for step by step installation (https://www.raspberrypi.org/documentation/installation/installing-images/README.md) …but in short:
- Extract the image file from the downloaded ZIP
- Plug in the MicroSD card into your PC - for Windows, use Win32DiskImager to install the image file onto the card.
- Done!
-
Plug the MicroSD card into your Pi Zero. It also makes sense at this point to plug in a monitor and a keyboard. Apply some power and wait for it to boot.
-
Login with username: pi and password: raspberry
-
Now is a good time to connect to your wifi so you can download the rest of the pre-requisites. Steps for connecting to Wifi for the non-Linux savy amoung us are below.
-
Edit the network interfaces file
udo nano /etc/network/interfaces -
Find the entry for wlan0 and modifiy it with the text below. If it isn't there, then add the following to the bottom of the file (Ctrl+X) to exit
llow-hotplug wlan0 face wlan0 inet dhcp wpa-conf /etc/wpa_supplicant/wpa_supplicant.conf metric 10 -
Edit the wpa_supplicant file
udo nano /etc/wpa_supplicant/wpa_supplicant.conf -
Add the following to the bottom of the file (Ctrl+X) to exit
etwork={ ssid="your network name" psk="your network key" key_mgmt=WPA-PSK -
At this point you can do the following to verify it connects to your Wifi ok.
udo ifdown wlan0
udo ifup wlan0
-
!!NOTE!! - After the intial install, it might be wise to change these setting to a wifi hotspot on your phone or similar, as this is typically what you will use away from home. If you forget this step, then no hashes will get cracked!!
-
Configure SSH to startup on boot:
udo touch /boot/ssh -
Reboot (with the screen connected as this will print the DHCP IP address for the wireless adapter). Log back in via SSH.
-
Run the setup script as the non-root user.
ash <(curl -s https://raw.githubusercontent.com/SecurityJon/PiKey/master/client/install.sh) -
When prompted with the public key, wait until the Server has been built to reboot the device, as you'll need to paste this into the server setup script.
Server Setup
-
Get a copy of Kali Linux up and running, with internet connectivity and port 22 forwarded from the internet
-
Make note of the URL/IP address of the internet facing side of the device
-
Run the setup script as root (or a user with sudo permissions)
ash <(curl -s https://raw.githubusercontent.com/SecurityJon/PiKey/master/server/install.sh) -
All hashes captured by the Server can be seen with the following command:
at /home/pikeyuser/PiKey/PiKey_CapturedHashes.txt
Q&A
- I'm going to be using the PiKey for Penetration Testing engagements, how do I know the client's data is secure?
During the setup process the PiKey creates a set of Public/Private keys. The private key is always kept on the PiKey and the public key is copied into the server setup script. All credentials passed between PiKey and Server are passed through a SSH connection between the two components which is protectecd by those keys
- I need to expose my Server to the Internet on Port 22. How do I know my server is protected against malicous logins if the PiKey is lost or taken by a client?
Within the Server setup script a line is inserted into the authorized_keys file for the PiKey user which prevents any commands being run on the server apart from password cracking of passed credentials
- What if the PiKey is taken from me during an engagement, or lost during an engagement, won't all of the stolen credentials now be accessable?
The PiKey itself doesn't store any obtained or cracked credentials on it, so if it is lost or taken the credentials won't be exposed to risk. The server however stores all of the credentials passed to it, so even if they're not cracked during an engagement they can be attacked again at a later date.
Images
Blinkt LED Version


ScrollPhat LED Version

Copyright
PiKey Created by Jon Aubrey (@SecurityJon) and Trevor Shingles (@_tshingles), 2017
This program is free software: you can redistribute it and/or modify it under the terms of the GNU General Public License as published by the Free Software Foundation, either version 3 of the License, or (at your option) any later version.
This program is distributed in the hope that it will be useful, but WITHOUT ANY WARRANTY; without even the implied warranty of MERCHANTABILITY or FITNESS FOR A PARTICULAR PURPOSE. See the GNU General Public License for more details.
Thanks
Thanks for the following individuals for help on this project:
Mark Stone for the great name
James Parish for the inital PiKey logo
