PicoLCD Save
Example code for interfacing with a LCD with a Raspberry Pi Pico
picoLCD
About picoLCD
picoLCD is a collection of functions to make interfacing with HD44780 (and other pin & instruction compatible chips such as the Sitronix ST7066) based LCD screens easier on the Raspberry Pi Pico. Rather than reading through data sheets to figure out the correct set of instructions to send to the screen, picoLCD attempts to make it a simpler process, while still being extremely versatile. It's as simple as copying the .c & .h files to your project, add some #includes, set some pins and off you go!
This is still very much a work in progress. This is known to work on the following LCD sizes in 8-bit mode:
(HD44780)
(HD44780)
(ST7066)
4-bit operation is also on the way once more progress is done on the current version.
Basic Instructions are below, with more detailed function documentation in 'picoLCD/FUNCTIONS.md'
Demo .uf2 files can be found at picoLCD/demos.
Current Version = 0.5.0
Changelog can be found at picoLCD/CHANGELOG.md.
Wiring the pico
The Pico should be wired to the LCD as follows for 8-bit operation, with the Pico being plugged into USB:
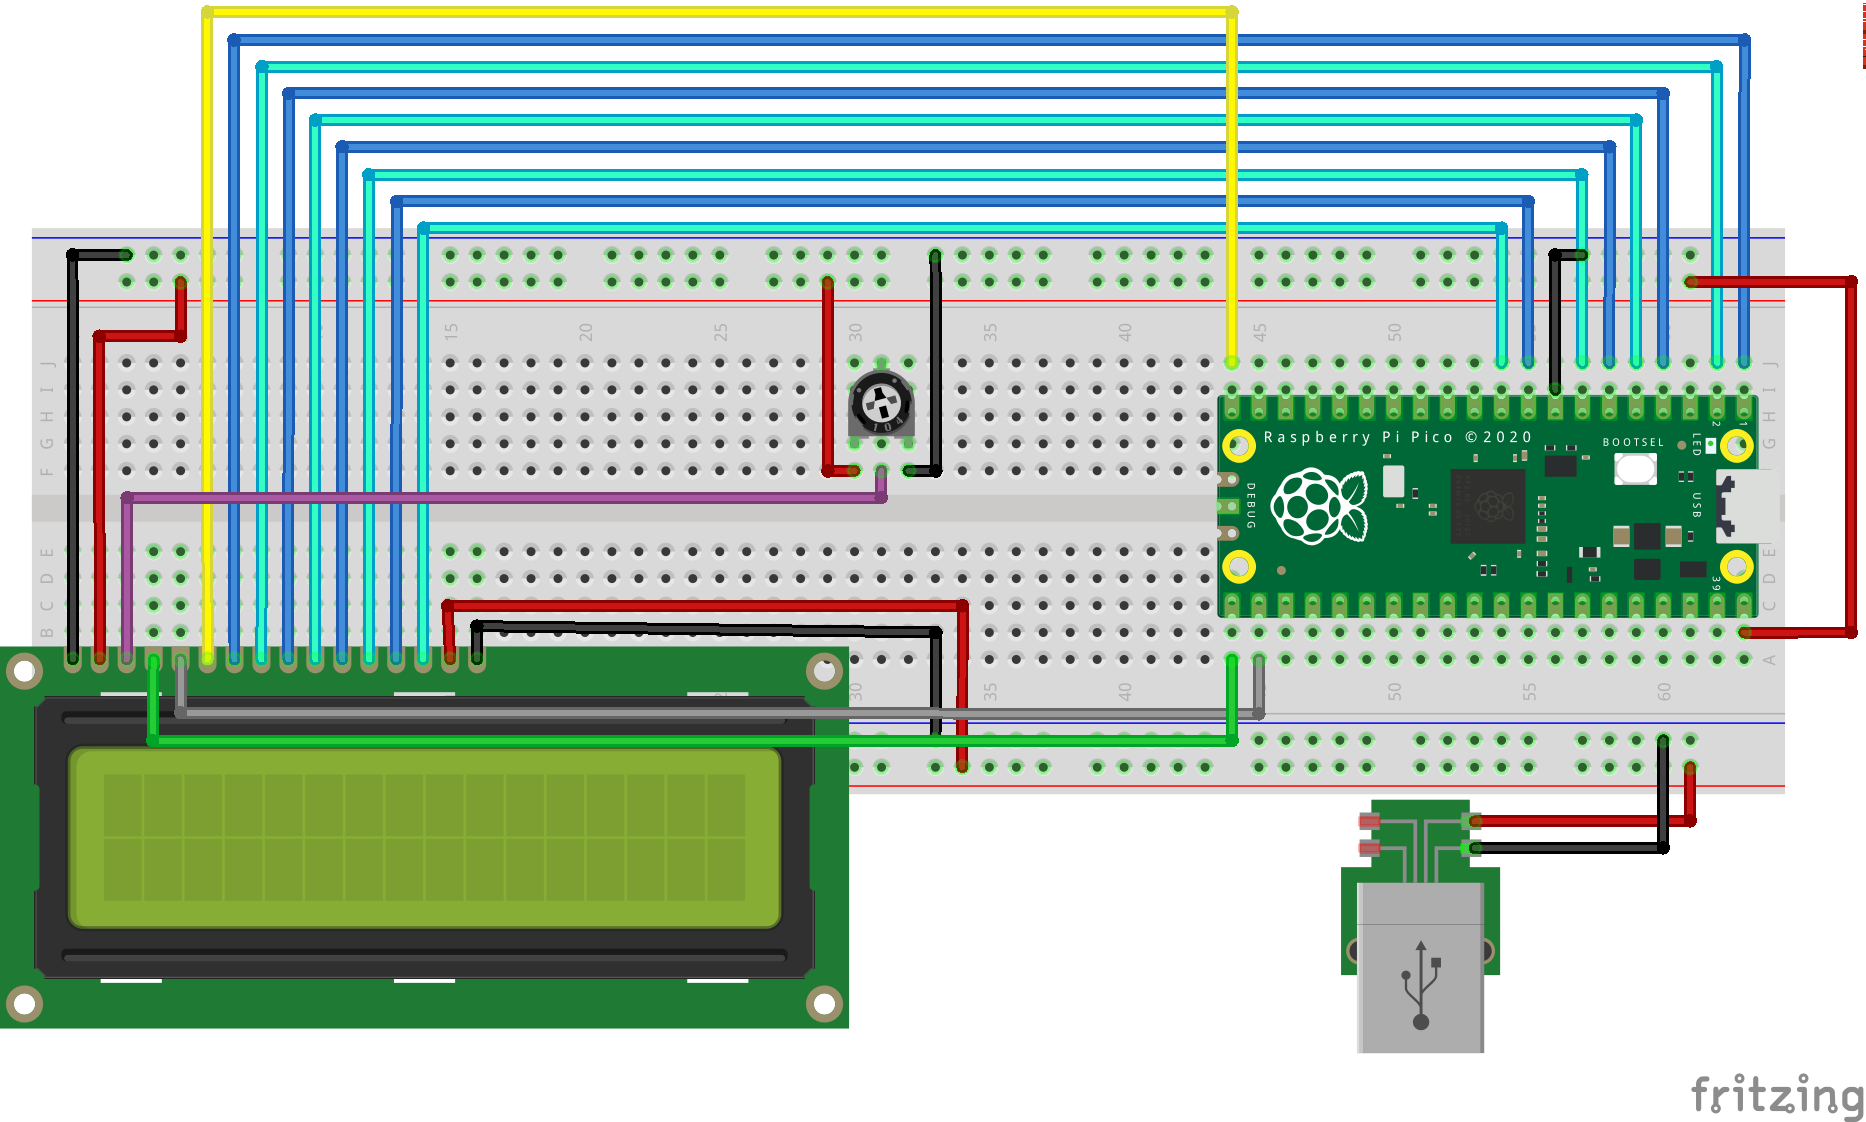
Please note the LCD backlight should be powered by an external 5v power source, as the Pico may not be able to power both the LCD and backlight.
Basic Usage:
Please Note: This describes the minimum steps needed to get an LCD functioning. An example main.c can be found at picoLCD/8-bit/example. Use of the more advanced features are detailed below.
To get started all you need to do is move all .c & .h files (found at either picoLCD/8-bit for 8-bit operation) to your project folder, and do the following:
At the top of your main file add the following #includes:
#include "pico/binary_info.h"
#include "LCDops.h"
#include "generalOps.h"
Additionally, you need to declare which GPIOs the LCD is connected to and the LCD size (Make sure these are not in main()). The example below is for a 16x2 LCD connected as in the above diagram.
{D0,D1,D2,D3,D4,D5,D6,D7, E , RS , RW , LCD Line Length (eg. 16 characters across), Number of Lines on LCD}
int LCDpins[14] = {0,1,2,3,4,5,6,7,15,16,17,16,2};
Finally these pins that we just defined (excluding the LCD line length and line count values) need to be initialized, set as output and pulled low. Here is an example:
for(int gpio = 0; gpioAnd inside your
CMakeLists.txt, addLCDops.candgeneralOps.cto youradd_executable()e.g.add_executable(project main.c LCDops.c generalOps.c )You're now able to use picoLCD's functions as explained in
picoLCD/FUNCTIONS.md!Advanced Features
Included Custom Characters
If you want to use the set of pre-designed custom characters this library provides, detailed in
FUNCTIONS.md, you must also:Move the
.cand.hfiles found atpicoLCD/8-bit/presetChars/to your project folderAdd
#include presetChars.hto your main.c andpresetChars.cto youradd_executable()in CMakeLists.txt.Custom Message Presets
If you want to use the set of pre-designed custom message functions this library provides, detailed in
FUNCTIONS.md, you must also:Move the
.cand.hfiles found atpicoLCD/8-bit/presetMessages/to your project folderAdd
#include presetMessages.hto your main.c andpresetMessages.cto youradd_executable()in CMakeLists.txt.To Do
--> Clean up FUNCTIONS.md
--> Continue adding LCD functions
--> Expand custom characters
--> Secret additions :D
