Oufm UMS Interface Save
config the USB mass storage for android to use the phone as usb disk, provide mount function and simple file explorer.
English Description | 中文描述 | APP Description
English Description
Basic function: Use the usb gadget driver to make the specified image or block device accessible by the PC as a USB Drive; at the same time, mount the image or block device to the Android local.
Scenes to be used:
- Get rid of
MTP, realize file transfer between PC and Android, Mass Storage is more compatible than MTP. - Use a mobile phone to replace a physical USB flash drive.
- Use an existing iso or pe image for PC system maintenance, no need to burn the disk.
The UMSInterface APP is no longer maintained. If you still want to use this APP, please refer to the APP Description.
As an alternative, the following provides an example of a shell script based on the Termux environment to accomplish roughly the same function. This method requires users to have a certain understanding of linux and shell. At the same time, mounting/unmounting partitions, and operations on block devices are High-risk operations, if the user is not familiar with the Linux environment, it may brick the phone.
The alternative method is as follows:
-
This shell script running environment is based on Termux, please install Termux first.
In order to facilitate one-click operation, it is recommended to install Termux:Widget.
In order to display toast messages conveniently, it is recommended to install Termux:API.
-
Copy mass_storage.sh to
/data/data/com.termux/files/home/.shortcuts/.Some of the parameters can be modified according to actual conditions. For example:
-
default_size_mb: The size of the image created by default, unit: MB. -
dst: Mount point path. Leave blank to not mount. -
src: Image or block device path.- You can specify a path that does not exist, and an empty image will be created automatically.
- You can specify a block device path. But be careful to do so, otherwise operating errors may cause the phone to become bricked.
- You can specify an existing image. For example, you can specify an iso image or a pe disk image for PC system maintenance. You can also specify a disk image copied with
ddcommand.
-
-
Add executable permissions to
mass_storage.sh:chmod +x /data/data/com.termux/files/home/.shortcuts/mass_storage.sh -
If
Termux: Widgetis installed, you can add the corresponding widget on the desktop, and clickmass_storage.shon the widget to execute this script.If it is not installed, you can execute this script directly in
Termux.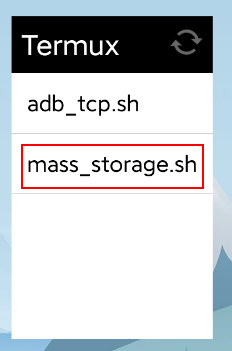
-
If you want to run this script automatically at boot:
-
Install Termux:Boot.
-
Grant
Termux:Bootself-start permission in the application settings. -
Copy
mass_storage.shto/data/data/com.termux/files/home/.termux/boot, and add executable permissions.cp /data/data/com.termux/files/home/.shortcuts/mass_storage.sh /data/data/com.termux/files/home/.termux/boot chmod +x /data/data/com.termux/files/home/.termux/boot/mass_storage.sh
-
Precautions:
- After the PC writes the file to the USB Driver, Android cannot perceive the file system changes. You can refresh by executing
mass_storage.shagain. - After the Android writes a file to the image or block device, the PC cannot perceive the change of the file system. You can refresh it by plugging and unplugging the USB or executing
mass_storage.shagain. - Do not write to the file system at the same time on the PC and Android (such as: file movement, copy, rename, create, delete, write), otherwise the file system will be damaged and the file will be lost.
- Don't store important files in the image or block device specified by the above script without a copy.
中文描述
基本功能: 使用 usb gadget 驱动使指定的镜像或块设备可作为 USB Drive 被PC访问; 同时将此镜像或块设备挂载到Android本地.
使用场景:
- 摆脱
MTP, 实现PC与Android的文件传输, Mass Storage 比 MTP 兼容性更好. - 替代实体U盘, 携带手机后, 无需再带U盘.
- 使用已有的iso或pe镜像, 用于PC系统维护, 无需刻盘, 替代PC启动盘.
UMSInterface APP后面不再维护. 如果仍然想使用此APP, 可参考 APP Description.
作为替代, 下面提供一个基于Termux环境的shell脚本示例, 来完成大致相同的功能. 此方法需要使用者对linux和shell有一定的了解. 同时, 挂载/卸载分区, 以及对块设备的操作本来就是高危操作, 如果使用者对linux环境不熟悉, 可能会使手机变砖.
替代方法如下:
-
此shell脚本运行环境基于
Termux, 请先安装 Termux.同时, 为了方便一键操作, 建议安装 Termux:Widget.
为了方便显示toast消息, 建议安装 Termux:API.
-
将 mass_storage.sh 拷贝至
/data/data/com.termux/files/home/.shortcuts/.其中的部分参数可根据实际情况进行修改. 如:
-
default_size_mb: 默认创建的镜像大小, 单位: MB. -
dst: 挂载点路径. 留空则不挂载. -
src: 镜像文件或块设备路径.- 可以指定一个不存在的路径, 此时会自动创建一个空的镜像.
- 可以指定一个块设备路径. 但要谨慎这么做, 否则操作失误可能会导致手机无法启动.
- 可以指定一个已存在的镜像. 比如可以指定iso镜像 或 pe磁盘镜像用于PC的系统维护. 或者也可以指定一个使用
dd命令拷贝的磁盘镜像.
-
-
为
mass_storage.sh添加可执行权限:chmod +x /data/data/com.termux/files/home/.shortcuts/mass_storage.sh -
如果有安装
Termux:Widget, 则可在桌面添加相应的小部件, 点击小部件上的mass_storage.sh即可执行此脚本.如果没有安装, 可直接在
Termux中执行此脚本. -
如果希望开机时自动运行此脚本:
-
安装 Termux:Boot.
-
应用设置中授予
Termux:Boot自启动权限 -
将
mass_storage.sh拷贝至/data/data/com.termux/files/home/.termux/boot, 并添加可执行权限.cp /data/data/com.termux/files/home/.shortcuts/mass_storage.sh /data/data/com.termux/files/home/.termux/boot chmod +x /data/data/com.termux/files/home/.termux/boot/mass_storage.sh
-
注意事项:
- PC 端向 USB Driver 中写入文件后, Android 无法感知文件系统的变化. 可以通过再次执行
mass_storage.sh来刷新. - 同理, Android 端向镜像或块设备中写入文件后, PC也无法感知文件系统的变化. 可以通过重新插拔USB或再次执行
mass_storage.sh来刷新. - PC 和 Android 端不要同时对文件系统进行写操作(如: 文件的移动, 复制, 重命名, 创建, 删除, 写入), 否则会损坏文件系统, 导致文件丢失.
- 不要在没有副本的情况下, 把重要文件存放到上述脚本指定的镜像或块设备中.
