Open3D Versions Save
Open3D: A Modern Library for 3D Data Processing
v0.18.0
4 months agoHappy new year to all! The Open3D team and many amazing community members bring to you the latest and best Open3D with many new features and bug fixes. Here are the highlights of this release:
- Support for Python 3.11. (Python 3.7 is no longer officially supported.)
- Support for PyTorch 2.0 and TensorFlow 2.14!
:warning: Warning: :warning: Due to incompatibilities in the cxx11_abi on Linux between PyTorch and TensorFlow, official Python wheels on Linux only support PyTorch, not TensorFlow. [See #6288] for details. If you'd like to use Open3D with TensorFlow on Linux, you can build Open3D wheel from source in docker with support for Tensorflow (but not PyTorch) as:
cd docker
# Build open3d and open3d-cpu wheels for Python 3.10 with Tensorflow support
export BUILD_PYTORCH_OPS=OFF BUILD_TENSORFLOW_OPS=ON
./docker_build.sh cuda_wheel_py310
-
New Doppler ICP registration for FMCW Lidars (contributed by @heethesh)
 Comparison of tunnel reconstructions using point-to-plane ICP (left) and Doppler ICP (right) with measurements collected by an FMCW LiDAR (Image from original Doppler-ICP repo)
 -
Adding in memory support for xyz files (#5866) (contributed by @samypr100)
-
Modern and more user friendly
furotheme for Open3D documentation (contributed by @saurabheights) -
The
masterbranch is now renamed tomain
Here is the full set of updates:
Visualization and GUI
- [New] Display RGBD frames as a point cloud video (#6342) (contributed by @ssheorey)
- [New] Allow setting view status from json string (#6241) (contributed by @yxlao)
- [Update] Add env var to disable automatic WebVisualizer use in Jupyter environment (#6541) (contributed by @gutnar)
- [Update] Expose Near Clip and Far Clip parameters to the Python Bindings (#6520) (contributed by @zalo)
- [Update] Update jupyter web_visualizer for ipywidgets 8 (#6239) (contributed by @ssheorey)
- [Fix] Fix the triggering in PickPointsInteractor when there are linesets present (#6499) (contributed by @EwingKang)
- [Fix] fixed ProgressBar scrolling behaviour (#6175) (contributed by @cansik)
- [Fix] removed was-open check for combobox (#6178) (contributed by @cansik)
- [Fix] Fix the pybind reference bug of get_view_control() (#6116) (contributed by @eamonn-zh)
- [Fix] Add new Mitsuba Python example + update CPU rendering docs (#5991) (contributed by @errissa)
- [Fix] Enable picking points from TriangleMeshModels in O3D Visualizer (#5978) (contributed by @errissa)
Geometry
- [New] Add GetSurfaceArea() for t::TriangleMesh (#6248) (contributed by @shanagr)
- [New] Implement open3d::t::geometry::TriangleMesh::SelectByIndex (#6415) (contributed by @nsaiapova)
-
[New] add
add_voxelandremove_voxelin pybind forVoxelGrid::AddVoxel,VoxelGrid::RemoveVoxel(#6023) (contributed by @ohkwon718) - [New] Voxel Downsample for Tensor interface (#6249) (contributed by @theNded)
- [Update] List intersections (#6442) (contributed by @dmitrishastin)
- [Update] Added optional invert parameter in Pointcloud cropping (similar to tensor pointcloud) (#6377) (contributed by @wakkoyankee)
- [Update] :sparkles: Support multi-threading in the RayCastingScene function to commit scene (#6051) (contributed by @sebastienmascha)
- [Update] Save triangle material IDs and uvs during TriangleMesh::SelectByIndex. (#6099) (contributed by @hanseuljun
- [Update] Update nanoflann to version 1.5.0 (#6216) (contributed by @roehling)
- [Fix] Bugfixes and docs improvement of AABB tensor class (#6486) (contributed by @saurabheights)
- [Fix] Fix seg fault in t::geometry::TriangleMesh::SelectByIndex for negative index (#6489) (contributed by @nsaiapova)
- [Fix] Correct bound check for axis aligned bounding box and use same formatting for printing cuda or cpu tensor (#6444) (contributed by @saurabheights)
- [Fix] Fix for Issue #5924: (#5938) (contributed by @dbs4261)
- [Fix] Throw error on non-contiguous Python buffer provided to Image ctor. (#6406) (contributed by @ssheorey)
- [Fix] Normal orientation issues in complex geometries (#6198) (contributed by @eugeniovaretti)
- [Fix] Fix incomplete VoxelGrid creation from triangles intersecting multiple voxels (#6325) (contributed by @sharon-br)
- [Fix] SimplifyQuadricDecimation fixes (#6163) (contributed by @bjudeworley)
- [Fix] fix segment plane non deterministic sampler issue and add unit test (#6308) (contributed by @yuecideng)
- [Fix] Fix and improve ISS keypoint (#6079) (contributed by @DNKpp)
- [Fix] Updated typo in pointcloud.cpp for tensor (#6228) (contributed by @bkhanal-11)
- [Fix] fix oriented boundingbox computation (#6069) (contributed by @ruaqy)
Pipelines
- [New] Add Doppler ICP in tensor registration pipeline (#5237) (contributed by @heethesh)
- [New] Feaure matching API (#5964) (contributed by @theNded)
- [Fix] Fix unused variable error when OpenMP is disabled (#6529) (contributed by @sitic)
- [Fix] Fix IntegrateRGBD example compilation (#6453) (contributed by @sitic)
- [Fix] Fixes #6291 and #6236 (#6305) (contributed by @theNded)
- [Fix] improve 6120 (OpenCV pose estimation bug fix) (#6306) (contributed by @theNded)
- [Fix] Fix tensor reconstruction example (#6207) (contributed by @saurabheights)
- [Fix] Fix typo in reconstruction cpp app (#6214) (contributed by @yuecideng)
Open3D-ML
- [New] Add TUM Facade dataset (isl-org/open3d-ml#613) (contributed by @ThomasFroech)
- [New] Add Pandaset autonomous driving dataset (isl-org/open3d-ml#611) (contributed by @SulekBartek)
- [New] Support Python 3.11 (isl-org/open3d-ml#619) ) (contributed by @ssheorey)
- [Fix] Changed usage of TensorFlow Status API (#6091) (contributed by @NobuoTsukamoto)
- [Fix] Update boundingbox.py - switch np.int_ to np.int32 (isl-org/open3d-ml#624) (contributed by @YishGene)
- [Fix] Replace colon with dash in timestamp variables (https://github.com/isl-org/Open3D-ML/pull/620) (contributed by @Cassius0924)
- [Fix] Corrected pairing in SSD head of pointpillars (https://github.com/isl-org/Open3D-ML/pull/602) (contributed by @zhongyidu)
- [Fix] Avoid renaming unwanted part of the path in dataset loading scripts (isl-org/Open3D-ML#597) (contributed by @mariusud and @ManonCortial)
- [Fix] Fix pytorch 1.13 error due to 2D weights (isl-org/open3d-ml#601) (contributed by @ssheorey)
I/O
- [New] Adding in memory support for xyz files (#5866) (contributed by @samypr100)
- [New] Write directly to GLB from TGeometries (#6404) (contributed by @errissa)
- [Update] Bump certifi lib from 2022.12.7 to 2023.7.22 (#6282) (contributed by dependabot[bot])
- [Update] support msgpack 6.0 (#6269) (contributed by @cielartisan)
- [Fix] Add IO for NPZ files for Tensor-based TriangleMeshes (#6019) (contributed by @errissa)
Core
- [Update] Use standard filesystem instead of experimental for Clang on macOS (#6320) (contributed by @errissa)
- [Update] Output OSError details to make import error more useful (#5997) (contributed by @errissa)
- [Fix] Check for support of CUDA Memory Pools at runtime (#4679) (#6440) (contributed by @ao2)
- [Fix] Fix python UnicodeDecodeError on windows (#6277) (contributed by @MisakaQwQ)
- [Fix] Fix two crash bugs on Apple Silicon (#6008) (contributed by @errissa)
Build System
- [Update] master -> main rename for branches (#6530) (contributed by @ssheorey)
- [Update] Remove extra documentation build for python examples (#6487) (contributed by @saurabheights)
- [Fix] Google Bucket hold and docs building fix (#6460) (contributed by @ssheorey)
- [Update] Add unicode to check style (#6443) (contributed by @dmitrishastin)
- [New] Add support for python3.11 (#6288) (contributed by @OlivierLDff Olivier Le Doeuff and @ssheorey)
- [New] Debian Open3D package in CI (#6044) (contributed by @ssheorey)
- [Fix] Fix path to executable in viewer deb (#5996) (contributed by @simonschmeisser)
- [Fix] Build fixes MSVC and gcc (#6039) (contributed by @ssheorey)
- [Fix] Windows CI out of disk space workaround (#6281) (contributed by @ssheorey)
- [Fix] Increase Ubuntu wheel CI build space. (#6255) (contributed by @ssheorey)
- [Update] relax nbformat (#6135) (contributed by @Borda)
- [Fix] Fix build with gcc-13 (#6215) (contributed by @roehling)
- [Update] Build system improvements backported from Debian (#6180) (contributed by @roehling)
- [Update] Use GLIBCXX_USE_CXX11_ABI by default (#6206) (contributed by @QuentinTorg)
- [Update] Test Ubuntu wheel on 20.04 (#6205) (contributed by @ssheorey)
- [Fix] Enable multi-core link time optimization (#6181) (contributed by @roehling)
Documentation
- [Update] Add missing keyword arg names to visualization bindings (#6407) (contributed by @djkeyes)
- [Fix] Fix regression - Keep output of cell blocks in jupyter in scrollable area. (#6504) (contributed by @saurabheights)
- [Update] Upgrade documentation techstack (#6470) (contributed by @saurabheights)
- [Update] Add Open3D architecture diagram (#6488) (contributed by @ssheorey)
- [Fix] fixed arguments in example notebooks (#6410) (contributed by @tomole444)
- [Update] Update visualization.ipynb (#6263) (contributed by @Sendeky)
- [Fix] Improve Documentation - Fix code links and improve tutorial layout (#6321) (contributed by @saurabheights)
- [Fix] Fix rendering of Python versions table (#6162) (contributed by @johnthagen)
- [Fix] Improve documentation (#6307) (contributed by @saurabheights)
- [Fix] Bring tutorial code snippets in-sync with latest source #6077 (#6128) (contributed by @dancergraham)
Known Issues
- Build errors in 3rd party libraries with gcc-13 on Ubuntu 23.10 (#6544). Please use prebuilt binaries or gcc-12 for building.
Acknowledgment
We would like to thank all of our community contributors for their true labor of love for this release! Also thanks to the many others who helped the Open3D community by reporting as well as resolving issues.
v0.17.0
1 year agoOpen3D 0.17 Release Notes
We are happy to bring you the best Open3D yet! This is a "tick" release focused on resolving existing issues and eliminating bugs. We resolved over 150 issues for Open3D and Open3D-ML since the last release.
Here are the main highlights of this release:
- Open3D now has support for differentiable rendering with Mitsuba.
| Here we use Mitsuba to recover the albedo map from an input image for an object in Open3D. Example. |
- New lighter wheel (~105MB) for x86_64 Linux, which is suitable for systems without CUDA. Try it out with:
pip install open3d-cpu. - The Open3D viewer app is now available for Windows. This version is unsigned, so expect Windows warnings.
- Apple Silicon wheels now come with 3DML support.
- Preview of distributed training with PyTorch for PointPillars on the Waymo dataset.
- PointCloud partitioning with PCA.
Visualization and GUI
[New] Integration with Mitsuba.
- Open3D geometries and materials seamlessly convert to Mitsuba's Principled BSDF:
dataset = o3d.data.MonkeyModel()
mesh = o3d.t.io.read_triangle_mesh(dataset.path)
mesh_center = mesh.get_axis_aligned_bounding_box().get_center()
mesh.material.set_default_properties()
mesh.material.material_name = 'defaultLit'
mesh.material.scalar_properties['metallic'] = 1.0
mesh.material.texture_maps['albedo'] = o3d.t.io.read_image(dataset.path_map['albedo'])
mesh.material.texture_maps['roughness'] = o3d.t.io.read_image(dataset.path_map['roughness'])
mesh.material.texture_maps['metallic'] = o3d.t.io.read_image(dataset.path_map['metallic'])

mi_mesh = mesh.to_mitsuba('monkey')
img = render_mesh(mi_mesh, mesh_center.numpy())
mi.Bitmap(img).write('test.exr')

- Also supports applying other Mitsuba BSDFs to Open3D geometries:
bsdf_rough_plastic = mi.load_dict({
    'type': 'roughplastic',
    'diffuse_reflectance': {
        'type': 'rgb',
        'value': [0.1, 0.1, 0.1]
    },
    'alpha': 0.1,
    'int_ior': 'bk7',
    'ext_ior': 'air',
})
mi_mesh = mesh.to_mitsuba('monkey', bsdf=bsdf_rough_plastic)
img = render_mesh(mi_mesh, mesh_center.numpy())
mi.Bitmap(img).write('test3.exr')
 See
See examples/python/visualization/to_mitsuba.py for more details.
Visualization and GUI (other updates)
- [New] The Open3D viewer app is now available for Windows. This version is unsigned, so expect Windows warnings.

-
[New] Add draw_web CLI for remote visualization. Try it out with
(remotehost) $ open3d draw_web --bind_all /path/to/3D/fileand then open the browser tohttp://remotehost:8888 - [New] Unprojection function in the ViewControl (contributed by @PieroV).
- [New] Added interaction methods for Python ImageWidget (contributed by @MartinEekGerhardsen).
- [Update] Updated customized_visualization tutorial (contributed by @ClarytyLLC).
- [Update] Convert material properties when converting from legacy to tensor TriangleMesh.
- [Fix] O3DVisualizer::RemoveGeometry() function vector subscript out of range (contributed by @UnadXiao).
- [Fix] Fast check for 3D tensorboard data. Open3D does not delay Tensorboard startup for large run folders now.
- [Fix] Fix scrolling direction bug for TextEdit (contributed by @cansik).
- [Fix] VisualizerWithVertexSelection: Call selection_changed callback, when deselecting all points (Ctrl + R) (contributed by @micsc12).
Geometry
- [New] robust plane detection (contributed by @plusk01).
 |
 |
|---|
- [New] Minimal bounding box computation for point clouds (contributed by @ligerlac).
- [New] Added RemoveStatisticalOutliers to tensor PointCloud. (contributed by @yuecideng).
- [New] Added ComputeTriangleNormals ComputeVertexNormals NormalizeNormals to tensor Trianglemesh. (contributed by @yuecideng).
- [New] Added normals oriented functions to tensor PointCloud. (contributed by @yuecideng).
- [New] Added tensor based OrientedboundingBox. (contributed by @yuecideng).
- [New] Added tutorial for tensor based PointCloud.
- [New] Enable python copy & deepcopy for tensor geometry. (contributed by @yuecideng).
- [New] Added partitioning of point clouds and triangle meshes using PCA.
-
[New] Added a function to extract faces in a triangle mesh with a binary mask.

-
[New] UV MAPS Tutorial (contributed by @samliozge).
-
[Update] Added voting and ray jitter to RaycastingScene to improve robustness of signed distance queries.
-
[Update] Improved speed of CreateFromTriangleMeshWithinBounds() by > 100x (contributed by @Hodong-Hwang).
-
[Update] Added parallelization to UV atlas computation by partitioning the mesh.
-
[Update] Function CreateFromVoxelGrid is made static (contributed by @mjaein).
-
[Fix] Fixed wrong voxel center calculation in CreateFromTriangleMeshWithinBounds() (contributed by @plusk01).
-
[Fix] Replace Vectors from internal embree headers with Eigen.
-
[Fix] Use same beta value in SamplePointsPoissonDisk() as in the paper.
-
[Fix] Fix Python Image calculations (pybind Image::To argument order).
-
[Fix] Consistent face orientation for generated alpha shape.
Pipelines
- [New] Tensor reconstruction system upgrade: make fragments (contributed by @theNded).
- [Update] Added additional python bindings for RGBD odometry functionality (contributed by @jdavidberger).
- [Update] release python GIL for generalized icp (contributed by @yuecideng).
- [Fix] fix call to AdvancedMatching in FGR (contributed by @plusk01).
- [Fix] Update ICP fitness and rmse value at the end of the loop (contributed by @bialasjaroslaw).
I/O
- [Update] Add loading colors and uvs in tgeometry TriangleMesh IO.
Core
- [New] Support for arbitrary imports with Open3D submodules in Python. Now you can use any of the following and more:
from open3d.t.geometry import TriangleMesh
from open3d.ml.torch.ops import fixed_radius_search # pybind symbol
from open3d.ml.tf.models import KPFCNN             # Python code
from open3d.visualization import gui  # pybind symbol
from open3d.visualization import draw # Python code
from open3d.visualization.gui import Color
from open3d.visualization.rendering import Camera
No need for awkward shortcuts such as:
import open3d as o3d
Tensor = o3d.core.Tensor
Image = o3d.t.geometry.Image
- [New] unary minus operator (contributed by @yxlao).
- [Update] Replace license text with SPDX identifier.
-
[Fix] Fixed error when use
CUDA_CALLwithout open3d namespace. (contributed by @yuecideng). - [Fix] Fixed multi-device CUDA switching bug. (contributed by @yxlao).
- [Fix] MiniVec's constructor shall not call Device's constructor/destructor (contributed by @yxlao).
- [Fix] Add neighbor search module to the documentation.
Build System
- [New] The Open3D viewer app is now available for Windows.
-
[New] New lighter wheel (~100MB) for x86_64 Linux, which is suitable for systems without CUDA. Try it out with:
pip install open3d-cpu. - [Update] Update imgui to latest version (contributed by @roehling).
- [Update] Support CUDA 12.0 build. (contributed by @NobuoTsukamoto).
- [Update] Add options to use system libraries for new dependencies (contributed by @roehling).
- [Update] Hide un-needed DSO symbols in Linux and macOS.
- [Update] Dependency upgrades for security fixes: civetweb, curl, zlib, libjpeg-turbo, wheel, setuptools, werkzeug, nbformat, ipywidgets, oathlib, certifi .
- [Fix] Build with libomp 11.1 and package in macOS wheel for interoperability with PyTorch.
- [Fix] Fix Mac build issue with ASSIMP.
- [Fix] Wstringop-owerflow compilation error for GCC (contributed by @bialasjaroslaw).
- [Fix] Support msgpack versions without cmake (contributed by @cielavenir).
- [Fix] fix Python 3.8 cuda dll loading on Windows (contributed by @yxlao).
- [Fix] More portable ARM system detection.
- [Fix] Fix build compatibility with fmtlib 8 (contributed by @roehling).
Open3D-ML
- [New] PointPillars Waymo distributed training model weights and docs.
- [New] 3DML support with PyTorch and TensorFlow for Apple Silicon.
- [Update] Update PyTorch to v1.13.1.
- [Update] RandLaNet update_probs label smoothing logic (contributed by @mariusud).
- [Fix] Update broken links (contributed by @Birkenpapier and @friendship1).
Known Issues [WIP]
-
[FIXED in
v0.17.0-1fix6008] The Python wheel may crash when run on Apple Silicon systems, especially on M2. (#5951) - The Windows app is unsigned, so expect warnings from the system.
Acknowledgment
We would like to thank all of our community contributors for their true labor of love for this release!
@bialasjaroslaw @Birkenpapier @cansik @cielavenir @ClarytyLLC @friendship1 @geppi @Hodong-Hwang @jdavidberger @johnthagen @ligerlac @mariusud @MartinEekGerhardsen @micsc12 @mjaein @NobuoTsukamoto @PieroV @plusk01 @roehling @samliozge @theNded @UnadXiao @yuecideng @yxlao
Also thanks to the many others who helped the Open3D community by reporting as well as resolving issues.
v0.16.0
1 year agoOpen3D 0.16 Release Notes
The fall brings a new "tock" release of Open3D, packed with new features and updates! Here are the highlights:
- Open3D visualization now works on Google Colab, and CPU rendering is now easy to use on all Linux machines.
- The visualizer has a new wireframe mode.
- Many new geometry processing algorithms were added, including mesh clipping, hole filling, extrusion and generation of text meshes.
- Added support for texture baking to create great looking 3D models.
- The Open3D standalone viewer is now available for Apple Silicon.
- Dependency version updates: Python 3.10, Tensorflow 2.8, PyTorch 1.12.
Watch the release video here.
Google Summer of Code
Open3D had a successful Google Season of Code 2022 with many new features added, and more in the works for the next release. Here are the features that are part of this release:
Geometry processing algorithms for tensor-based geometry [Contributed by @ZhengyuDiao]
-
[new] Geometry creation functions:
create_arrow(), create_box(), create_cone(), create_coordinate_frame(), create_cylinder(), create_icosahedron(), create_mobius(), create_octahedron(), create_sphere(), create_tetrahedron(), create_torus(). - [update] Improved support for reading / writing text format point cloud files in XYZ, XYZN, XYZI and XYZRGB formats.
-
[fix] Fix the
png/jpgtextures loading inglb(binary glTF) file. -
[update] Tensor point cloud IO now uses
floatinstead ofdoubleby default.
Open3D visualization on Google Colab [Contributed by @FromBei-JingWithLove]
-
[new]
draw_plotlymethod brings interactive 3D visualization for Open3D to Jupyter notebooks and cloud environments (e.g., Colab). -
[new] Tutorial notebook demonstrating the various ways to use
draw_plotly
Build System
- [new] Open3D is now available for Python 3.10. Python 3.6 is no longer supported.
-
[new] C++ users can now link to the Open3D dynamic library through
pkg-configfiles. There are available for Linux and macOS in the Open3D binary packages. - [new] Alpha support for SYCL devices (AlderLake integrated GPUs, Arc GPUs).
- [fix] Windows and Visual Studio build fixes (contributed by @nigels-com, @jmherzog-de, @yuecideng)
- [fix] Fixed build Error on Fedora 36 with GCC 12 (contributed by @NobuoTsukamoto)
- [fix] Fix link error during build due to invalid LIBDIR in newer Debian systems (contributed by @bchretien)
- [update] Improved support for building on Apple Silicon.
-
[update] Separate Python build (
requirements_build.txt) and runtime (requirements.txt) dependencies. (with help from @johnthagen). -
[update] Documentation can be built faster with the
make_docs.py --paralleloption.
Core
- [new] Enable pickling for tensor and tensor based geometry (contributed by @yuecideng).
-
[new] Random seed Open3D globally. Utility random number generation functions to ensure the global Open3D random seed is used.
import open3d as o3d
o3d.utility.random.seed(42)
#include "open3d/utility/Random.h" int main() { using namespace open3d; utility::random::Seed(42); // Globally seed. std::cout << utility::random::RandUint32() << std::endl; // Simply get a random number. return 0; } -
[update] Faster creation of many small Tensors by using statically allocated memory for
SizeVector. -
[new] Add tensor
minimum(), maximum()ops (contributed by @yuecideng). -
[new] Add tensor
Any(), All(), RemoveNonFinite() -
[update] Support for
int64indexdtypeinNearestNeighborSearch(contributed bu @chrockey) - [update] The new datasets API is used throughout Open3D, including pipelines, examples and unit tests. New models with PBR materials (Helmet, Jesse monkey, crate and sword) are available. Add redwood indoor datasets (Augmented ICL-NUIM Dataset).
-
[update] Support
RadiusSearchforEstimateNormals()for Tensor PointCloud (contributed by @yuecideng).
Geometry
- [update] Tensor geometry attributes can now be accessed by the easier dot notation, in addition to the previous dictionary notation. For example:
pcd.point["colors"] is pcd.point.colors
tmesh.triangle["normals"] is tmesh.triangle.normals
Geometry classes of the Tensor API also add new functionality based on VTK:
- Mesh clipping along a plane
- Extraction of slices from triangle meshes as line sets
- Hole filling
- Boolean operations between watertight meshes
- A new algorithm for quadric decimation of triangle meshes
- Linear and rotational extrusion
- Generation of text meshes


Further, we add functionality for parametrising meshes with the UVAtlas library and added functions for baking vertex and triangle attributes to textures.

New operations for Tensor PointCloud:
-
ClusterDBScan, ConvexHull - Radius Outlier Filter,
RemoveDuplicatedPoints, PaintUniformColor -
FarthestPointDownSample, HiddenPointRemoval and SegmentPlane - Uniform and random down sample methods (contributed by @yuecideng).
- FPFH features. (contributed by @yuecideng)
- PointCloud boundary detection (contributed by @yuecideng)
| PointCloud | Boundaries |
|---|---|
 |
 |
-
[new]
RemoveDuplicatedPoints()for PointCloud (Eigen API). (contributed by @scimad) - [new] Farthest point downsampling (Eigen API) (contributed by @yuecideng).
- [update] Plane segmentation in point clouds is now multi-threaded. (Eigen API) (contributed by @yuecideng).
-
[update] Add
SelectByIndexand minor improvement toSelectByMask(contributed by @yuecideng). -
[new] Add Tensor
AxisAlignedBoundingBox(contributed by @yuecideng). - [update] SelectPolygonVolume.CropInPolygon returns point indices.
-
[fix] Blocky / incomplete raycast output for larger voxel sizes fixed with
EstimateRange()update (contributed by @jdavidberger). - [update] Allow setting of number of threads that are used for building a raycasting scene (contributed by @jjabo)
Visualization
-
[new] Wireframe mode added to Open3D visualizer

- [new] Support for Filament's bloom post-processing effects
-
[fix] Make sure
floatanduint16texture formats work correctly -
[fix] Fix bugs with
point_widthandline_widthparameters inMaterialclass
CPU rendering
-
[update] Easy to use out of the box CPU rendering for Linux. Pre-built Mesa CPU rendering library is provided in the Python wheel if the system Mesa library is too old or not in use. You can enable CPU rendering with the environment variable
OPEN3D_CPU_RENDERING=truebefore importing Open3D in Python or running a C++ program. See the tutorial for full details. -
[new] Updated CPU rendering works in Jupyter and Colab environments.

GUI
- [update] Vertical and horizontal radio button groups. (contributed by @forrestjgq)
- [new] Keypress event callback for windows. (contributed by @forrestjgq)
- [fix] Fix mouse event filter issue in popup menu covered area (contributed by @forrestjgq)
-
[new] Added extra
VisualizerWithVertexSelectionpoint picking functions to python API (contributed by @d-walsh and @cansik) - [update] Support double click mouse event in WebRTC. (contributed by @forrestjgq)
- [fix] Fix Point Clouds Getting Culled Prematurely.
- [fix] Set correct default material (lit with flat shading) for triangle mesh with triangle normals.
-
[update] Add interface for get cropped geometry from
VisualizerWithEditingclass (contributed by @yuecideng).
IO
- [new] Open3D now implements a distortion and noise model from the Redwood dataset. This will enable you to simulate the output of realistic depth sensors.
| Original | With noise + distortion | Difference |
|---|---|---|
 |
 |
 |
- [fix] Fix gltf PBR model load regression when loading through ASSIMP.
-
[new] Read
ply, stl, obj, off, gltf, glb, fbxfile formats directly into a TensorTriangleMesh.
Reconstruction
- [update] Update ICP interface to get iteration wise loss information.
- [new] Online SLAM Example with Realsense sensor support, bagfile support, and saved dataset support.
- [new] Legacy offline reconstruction C++ pipeline (contributed by @yuecideng)
-
[update]
InitializePointCloudForColoredICPefficiency improvement. (contributed by @Xiang-Zeng)
Open3D-ML
- [update] Upgrade PyTorch to v1.12 and TensorFlow to v2.8.2. With the new PyTorch version, Open3D PyTorch ops work directly with standard PyTorch wheels and custom wheels are not required any more.
- [fix] Avoid logging.basicConfig in non-scripts (contributed by @ajprax)
- [fix] filter_valid_label: force scores tensor onto the selected device (contributed by @ntw-au)
- [fix] Ensure that a checkpoint is saved on the final training epoch (contributed by @ntw-au)
- [fix] Handle nested dictionaries when merging configs (contributed by @ntw-au)
- [fix] Fix moving zip files (contributed by @tejaswid)
- [fix] Update RandLANet weights link (contributed by @Krupal09)
-
[fix] Getting rid of
torch._six(for future PyTorch versions) (contributed by @krshrimali)
Acknowledgments
We would like to thank all of our community contributors for their true labor of love for this release!
@ntw-au, @jdavidberger, @Xiang-Zeng, @jamesdi1993, @brentyi, @jjabo, @jbotsch-fy, @scimad, @cansik, @NobuoTsukamoto, @theNded, @chunibyo-wly, @jmherzog-de, @luzpaz, @code-review-doctor, @d-walsh, @johnthagen, @pmokeev, @erbensley, @hanzheteng, @chrockey, @agrellRepli, @bchretien, @nigels-com, @forrestjgq, @equant, @naruarjun, @ajprax, @INF800, @ntw-au, @tejaswid, @Krupal09, @krshrimali
Also thanks to the many others who helped the Open3D community by reporting as well as resolving issues.
v0.15.1
2 years agoOpen3D 0.15 Release Notes
We are excited to bring you the best Open3D yet - version 0.15. Watch the release video here.
Starting from this release, we adopt a "tick-tock" model for balancing resolving issues vs. adding new features. In a nutshell, the "tick" releases are focused on resolving existing issues and eliminating bugs, while the "tock" releases mainly focus on developing new features. Open3D 0.15 is a "tick" release. We resolved over 500 issues for Open3D and Open3D-ML, as the infographic below illustrates.

Google Summer of Code 2022
Open3D has applied for the Google Summer of Code 2022 to increase community participation. Check out details and our project ideas here. Please help in making Open3D better for all.
Build System
- [New] We now provide Open3D binary packages for C++ users. No need to “Build from Source” - just download a binary package for your Operating System and use it “out of the box”. See GitHub releases for v0.15 and getting started guides for the latest development package.
- [New] Docker build tools to build ARM64 Linux wheels and multiple Python versions. See ARM64 build guide for more details.
-
[New] Pre-compiled Open3D wheel for ARM64 Linux and macOS. Improved Apple Silicon support. Install Open3D on ARM64 Linux and macOS with
pip install open3d. -
[Update] Open3D now builds with the new CXX11 ABI by default on Linux. Set
-DGLIBCXX_USE_CXX11_ABI=OFFincmakeif you need the old ABI, e.g. to work with PyTorch / TensorFlow libraries. -
[Update] Starting with version 0.15, Open3D Conda packages are no longer supported. Install Open3D with
pip install open3dinside a Conda virtual environment.
Core
Datasets
-
[New] Dataset module for automatically downloading and managing example data. The following example demonstrates how to create a
Datasetobject, extract its path, and display it in the Open3D Visualizer:
import open3d as o3d

if __name__ == "__main__":
    dataset = o3d.data.EaglePointCloud()
    pcd = o3d.io.read_point_cloud(dataset.path)
    o3d.visualization.draw(pcd)
#include <string> #include <memory> #include "open3d/Open3D.h" int main() { using namespace open3d; data::EaglePointCloud dataset; auto pcd = io::CreatePointCloudFromFile(dataset.GetPath()); visualization::Draw({pcd}); return 0; }
Command Line Interface (CLI)
-
[New] Open3D-dedicated Command Line Interface (CLI) for visualization and running Python examples. Below is a code snippet to get started with Open3D and its examples.
# Install Open3D pip package
pip install open3d

# Print help
open3d --help

# List all runnable examples
open3d example --list

# Print source code of an example
open3d example --show [category]/[example_name]

# Run an example
open3d example [category]/[example_name]

# Run Open3D Viewer
open3d draw

# Open a mesh or point cloud file in Open3D Viewer
open3d draw [filename]
-
[Update] Python examples directory has been refactored for better namespace consistency and new examples have been added.
Neighbor search
- [Update] Updated neighbor search module. The neighbor search module is now equipped with highly optimized built-in implementations of all search methods (Knn, Radius, and Hybrid) supporting both CPU and GPU. Faiss build dependency is removed.
Visualization and GUI
-
[New] Introducing raw mode visualization. The raw mode automatically simplifies the lighting environment and object materials to make it easier to inspect the underlying geometry of point clouds and triangle meshes.

-
[New] Open3D new visualizer now features CPU Rendering based on Mesa’s LLVMpipe software OpenGL implementation. Interactive applications, demos, and Python scripts are all supported as well as off-screen rendering. This feature can also be used within Docker.
- Method 1:
LD_PRELOADfrom the command lineLD_PRELOAD=/home/open3d/development/mesa-21.3.4/libGL.so python examples/python/visualization/draw.py - Method 2: Preload library in Python
import ctypes
ctypes.cdll.LoadLibrary('/home/open3d/development/mesa-21.3.4/libGL.so')
import open3d as o3d

mesh = o3d.io.read_triangle_model('/home/open3d/development/FlightHelmet/FlightHelmet.gltf')
o3d.visualization.draw(mesh)

- Method 1:
- [New] WidgetProxy and WidgetStack widgets allow the creation of user interfaces on the fly (contributed by @forrestjgq).
- [New] Background color option for button widgets (contributed by @forrestjgq).
- [New] Set maximum visible items in a list widget to prevent lists from growing too large (contributed by @forrestjgq).
- [New] Function keys are now bindable (contributed by @forrestjgq).
- [New] Support for specifying intrinsic projection matrix in the new visualizer.
- [New] Add support for scaling 3D labels.
- [Fix] Open3D for TensorBoard plugin does not need Open3D-ML now.
- [Fix] Point picking, text input, and UI layout (contributed by @forrestjgq).
Geometry
-
[Fix] Oriented Bounding Box
- Fixed an issue where the orientation of the
OrientedBoundingBoxwas mirrored. - [New] added a new parameter for robust oriented bounding box computation for degenerated point clouds.
- Fixed an issue where the orientation of the
- [Fix] Convex hull meshes created from point clouds now have outward-pointing triangles.
- [Update] Added a new parameter for robust convex hull computation.
-
[Update] TriangleMesh
GetSelfIntersectingTriangles()and related functions likeIsWatertight(),GetVolume(), etc. are now more than 4 times faster. -
[Fix] Corrected an issue with
io::AddTrianglesByEarClipping()where the algorithm could fail for concave polygons. - [New] New Python examples for reconstruction and voxelization.
- [Fix] Improved logger performance.
Open3D-ML
-
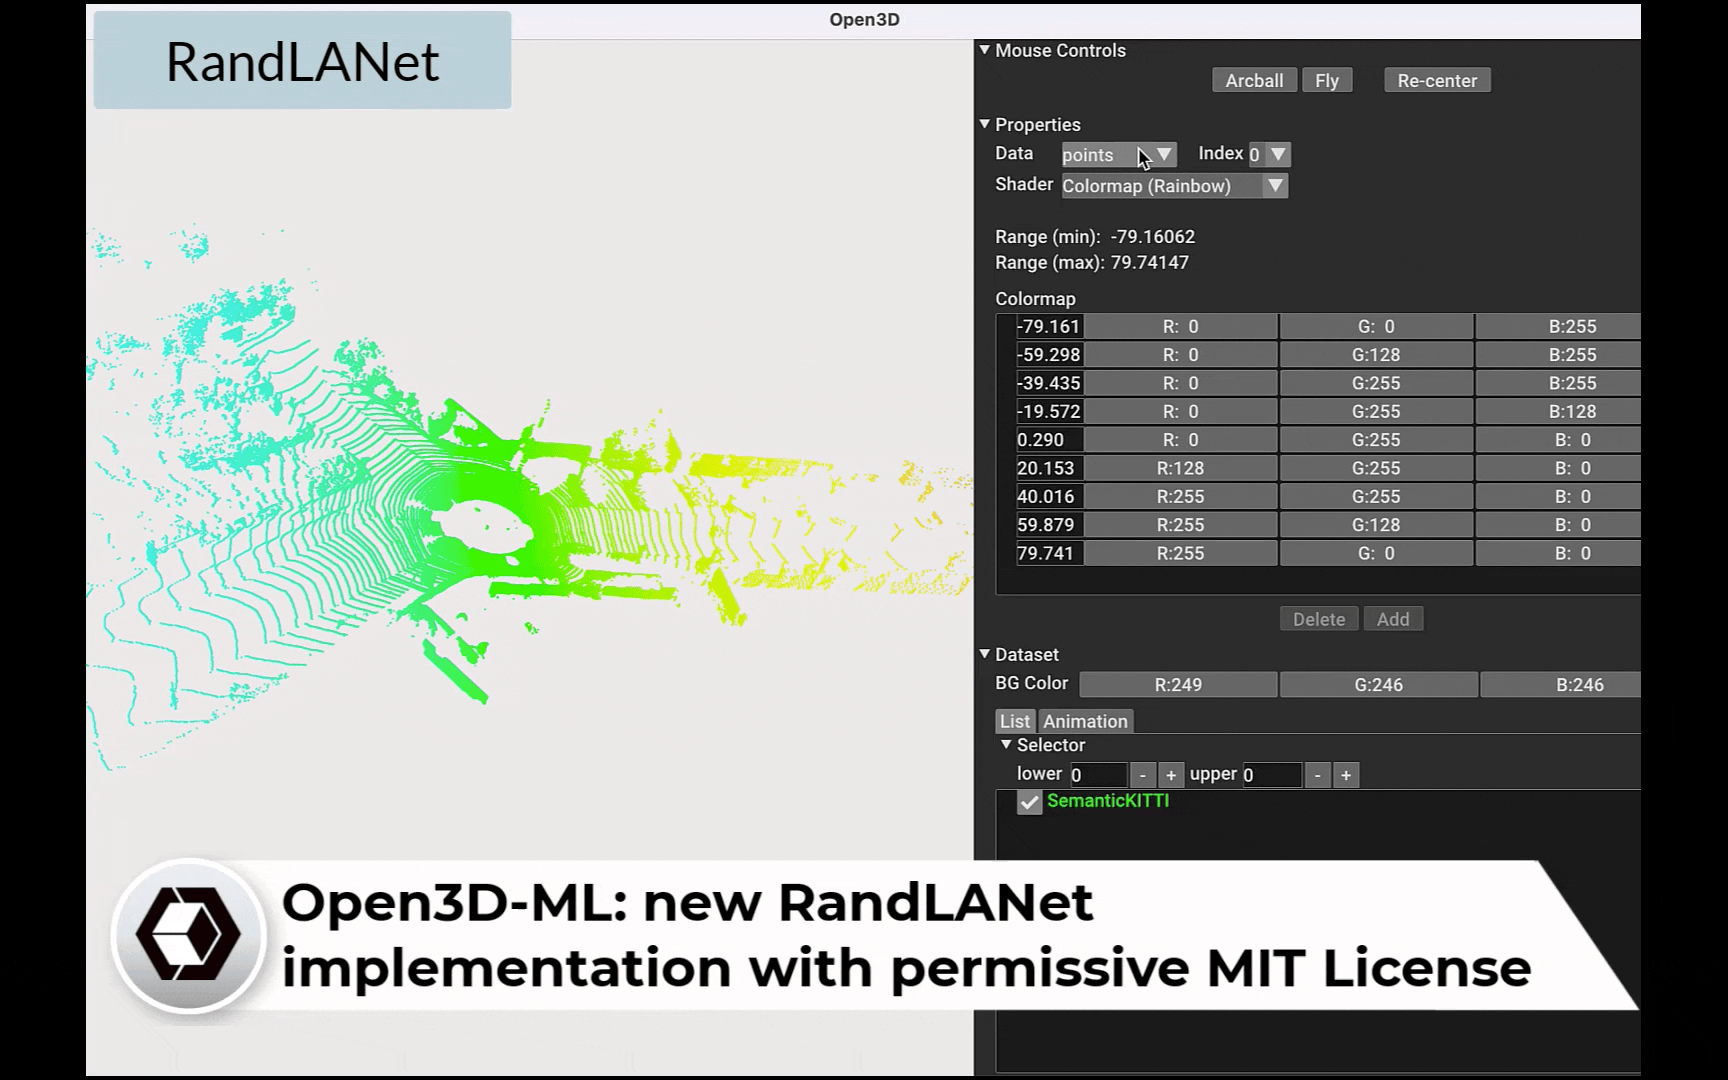
[New] MIT-licensed implementation of RandLANet.
- [New] Intel OpenVINO inference backend (contributed by @dkurt).
- [Fix] Fixed an issue with S3DIS where the loss gets NaN after a few epochs.
- [Fix] Fixed an issue with IoU calculation which fails for large point clouds while running inference in patches.
- [Fix] Fixed an issue where the labels are not correctly ordered in the visualizer.
-
[New] Support for Images in Dataset Visualizer (contributed by @ajinkyakhoche).

Acknowledgment
We would like to thank all of our community contributors for their true labor of love for this release!
@ajinkyakhoche @ceroytres @chunibyo-wly @dkurt @forrestjgq @Fuhrmann-sep @jeertmans @junha-l @mag-sruehl @maxim0815 @Nicholas-Mitchell @nigels-com @NobuoTsukamoto @ntw-au @roehling @theNded
Also thanks to the many others who helped the Open3D community by reporting as well as resolving issues.
v0.14.1
2 years agoOpen3D 0.14 Release Notes
Summary
We are excited to present the new Open3D version 0.14!
In this release, you will find:
- TensorBoard visualization
- Upgraded GUI API
- New
RayCastingSceneclass - Improved Tensor performance
- Improved I/O performance
- New 3D learning models in Open3D-ML: Point Transformer and PVCNN
- Improved interoperability with Numpy
- And more
Changes in Installation and Build system
- Open3D now works with Python 3.9. We release Open3D pre-compiled Python packages in Python 3.6, 3.7 3.8, and 3.9.
- Open3D 0.14 is the last version that supports conda installation. Starting from version 0.15, users will need to install Open3D with
pip install open3d. We recommend installing Open3D withpipinside a conda virtual environment. - Git submodules are no longer required in Open3D. You can now clone Open3D with
git clone https://github.com/isl-org/Open3D.gitwithout the--recursiveflag. Also please note the updated Github URL. - Open3D will now build in
Releasemode by default ifCMAKE_BUILD_TYPEis not specified.Pythonis no longer required for building Open3D for C++ users. - Open3D-ML is now recommended to be used along with PyTorch 1.8.2 and/or Tensorflow 2.5.2. Checkout Open3D-ML for more information.
Tensorboard Integration
Now you can use Open3D within Tensorboard for interactive 3D visualization! At a glance, you can:
- Save and visualize geometry sequences and their properties. This enables interactive visualization and debugging of 3D data and 3DML model training.
- Visualize 3D semantic segmentation and object detection with input data, ground truth, and predictions. In addition, any custom properties for a
PointCloud, from scalar to vector, can be easily visualized. - Synchronize time steps and viewpoints during different runs. This helps debug and monitor the effect of parameter tuning.
Rich PBR materials

Object detection

Semantic segmentation

To get started, write some sample geometry data to a TensorBoard summary with this snippet:
from torch.utils.tensorboard import SummaryWriter  # TensorFlow also works, see docs.
import open3d as o3d
from open3d.visualization.tensorboard_plugin import summary
from open3d.visualization.tensorboard_plugin.util import to_dict_batch
writer = SummaryWriter("demo_logs/")
cube = o3d.geometry.TriangleMesh.create_box(1, 2, 4)
cube.compute_vertex_normals()
colors = [(1.0, 0.0, 0.0), (0.0, 1.0, 0.0), (0.0, 0.0, 1.0)]
for step in range(3):
    cube.paint_uniform_color(colors[step])
    writer.add_3d('cube', to_dict_batch([cube]), step=step)
Now you can visualize this in TensorBoard with tensorboard --logdir demo_logs. For more details on how to use TensorBoard with Open3D, check out this tutorial.
Visualizer
Further enhancements have been added to the GUI viewer. Now you can:
-
Directly visualize tensor-based geometry classes including
PointCloud,TriangleMesh, andLineSet. -
Use physically based rendering (PBR) materials that deliver appealing appearance.
-
New default lighting environment and skybox improves visual appeal
-
Use all the functionality in Tensorboard!

import open3d as o3d
import open3d.visualization as vis
a_sphere = o3d.geometry.TriangleMesh.create_sphere(2.5, create_uv_map=True)
a_sphere.compute_vertex_normals()
a_sphere = o3d.t.geometry.TriangleMesh.from_legacy(a_sphere)
# Compare this...
vis.draw(a_sphere)
a_sphere.material = vis.Material('defaultLit')
a_sphere.material.texture_maps['albedo'] =
    o3d.t.io.read_image('examples/test_data/demo_scene_assets/Tiles074_Color.jpg')
a_sphere.material.texture_maps['roughness'] =
    o3d.t.io.read_image('examples/test_data/demo_scene_assets/Tiles074_Roughness.jpg')
a_sphere.material.texture_maps['normal'] =
    o3d.t.io.read_image('examples/test_data/demo_scene_assets/Tiles074_NormalDX.jpg')
# With this!
vis.draw(a_sphere)
A complete, complex demo scene can be found at examples/python/gui/demo-scene.py
Core
-
The Open3D
Tensorclass received a major performance boost with the help of Intel ISPC compiler and optimization for the contiguous code path.
(See
python/benchmarks/corefor the benchmark scripts. For each operation, the geometric mean of run times with different data types is reported. The time is measured with an Intel i9-10980XE CPU.) -
A major upgrade of Parallel
HashMapis done. Now you can choose from multi-valuedHashMapandHashSetdepending your value types. A comprehensive tutorial is also available. -
Linear Algebra performance have been optimized for small matrices, especially on 4x4 transformations.
-
Semantics for tensor and tensor-based geometry have been improved, especially on device selection.
-
Functions expecting a Tensor now accept Numpy arrays and Python lists. For example:
import open3d as o3d
import numpy as np

mesh = o3d.t.geometry.TriangleMesh()
mesh.vertex['positions'] = np.array([[0, 0, 0], [1, 0, 0], [1, 1, 0]], dtype=np.float32)
mesh.vertex['colors'] = np.array([[1, 0, 0], [0, 1, 0], [0, 0, 1]], dtype=np.float32)
mesh.triangle['indices'] = [[0, 1, 2]]
o3d.visualization.draw(mesh)
I/O
- We now support I/O from/to Numpy compatible
.npz.npyformats for Open3D tensors and tensor maps. It is now easier to convert between Open3D geometry classes and Numpy properties. - We have improved I/O performance for tensor-based point cloud and triangle-mesh file-formats, including
.ply,.pcd,.pts. Geometry loading time is hence improved for the stand-alone visualizer app. - We added support for material data to the MessagePack serialization format of the RPC module.
Geometry
-
We introduce a new class
RaycastingScenewith basic ray intersections functions and distance transform for meshes, utilizing the award-winning Intel Embree library.Example code for rendering a depth map:
import open3d as o3d
import matplotlib.pyplot as plt

# Create scene and add a cube
cube = o3d.t.geometry.TriangleMesh.from_legacy(o3d.geometry.TriangleMesh.create_box())
scene = o3d.t.geometry.RaycastingScene()
scene.add_triangles(cube)

# Use a helper function to create rays for a pinhole camera.
rays = scene.create_rays_pinhole(fov_deg=60, center=[0.5,0.5,0.5], eye=[-1,-1,-1], up=[0,0,1],
                                 width_px=320, height_px=240)

# Compute the ray intersections and visualize the hit distance (depth)
ans = scene.cast_rays(rays)
plt.imshow(ans['t_hit'].numpy())
Distance transform generated with
RaycastingScene:
See the tutorials for more information (Ray casting, Distance queries).
-
Normal estimation for tensor
PointCloudis supported with the tensor-compatible nearest neighbor search modules. -
Customizable tensor-based
TriangleMesh,VoxelBlockGrid, andLineSetare implemented that allow user-defined properties. For example:import open3d as o3d import open3d.core as o3c mesh = o3d.t.geometry.TriangleMesh() mesh.vertex["positions"] = o3c.Tensor([[0.0, 0.0, 1.0], [0.0, 1.0, 0.0], [1.0, 0.0, 0.0], [1.0, 1.0, 1.0]], dtype=o3c.float32) mesh.vertex["my_custom_labels"] = o3c.Tensor([0, 1, 2, 4], dtype=o3c.int32) mesh.triangle["indices"] = o3c.Tensor([[0, 1, 2], [1, 2, 3]], dtype=o3c.int32)
Pipelines
- We have enhanced point cloud registration (ICP) with a tensor interface:
- Float64 (double) precision point cloud is supported for a higher numerical stability
- Robust Kernels, including Huber, Tukey, and GM losses are supported for robust registration.
- Colored-ICP is now supported in the unified tensor-based API.
- See this tutorial for more details.
- We also provide an initial tensor-based reconstruction system in Python, including
- Customizable volumetric RGB-D integration;
- Dense RGB-D SLAM with a GUI;
- See this tutorial for more details.
Open3D-ML
The Open3D-ML library welcomes more state-of-the-art models and operators that are ready to use for advanced 3D perception, especially semantic segmentation, including
- New state-of-the-art Point Transformer for Semantic Segmentation.

- Highly Efficient Point-Voxel Convolution for Semantic Segmentation.

- RaggedTensor integration that enables batch
SparseConvolutionandSparseConvolutionTransposealong with PyTorch. - Batched voxelization for fast point-voxel conversions.
Refer to the tutorial for training and inference on new models. (PyTorch TensorFlow).
Expreimental ARM64 builds
- Experimental Ubuntu ARM64 build
- Python 3.6: open3d-0.14.1-cp36-cp36m-linux_aarch64.whl
- Python 3.7: open3d-0.14.1-cp37-cp37m-linux_aarch64.whl
- Python 3.8: open3d-0.14.1-cp38-cp38-linux_aarch64.whl
- Python 3.9: open3d-0.14.1-cp39-cp39-linux_aarch64.whl
- Visualizer does not work on Raspberry Pi due to the lack of full OpenGL
- Tested on Nvidia Jetson boards with Ubuntu 18.04
- You may use pyenv to setup your virtualenvs
- Experimental Apple Silicon M1 ARM64 build:
- Python 3.8: open3d-0.14.1-cp38-cp38-macosx_11_0_arm64.whl
- Python 3.9: open3d-0.14.1-cp39-cp39-macosx_11_0_arm64.whl
- Tested on M1 macOS Monterey
- You may use miniconda to setup your virtualenvs
- Test your installation
pip install open3d-xxx.whl
# Test the new vidualizer
python -c "import open3d as o3d; c = o3d.geometry.TriangleMesh.create_box(); o3d.visualization.draw([c])"
# Test the traditional visualizer
python -c "import open3d as o3d; c = o3d.geometry.TriangleMesh.create_box(); o3d.visualization.draw_geometries([c])"
Acknowledgment
We thank all the community contributors for this release! (alphabetical order) @cclauss @chrockey @chunibyo-wly @cosama @forrestjgq @gsakkis @junha-l @ktsujister @leomariga @li6in9muyou @marcov868 @michaelbeale-IL @muskie82 @nachovizzo @NobuoTsukamoto @plusk01 @ShreyanshDarshan @ShubhamAgarwal12 @SoftwareApe @stanleyshly @stotko @theNded @zhengminxu
v0.13.0
2 years agoOpen3D 0.13.0 Release Notes
We welcome you to the 0.13.0 release of Open3D. This release is full of exciting new features with a strong emphasis in real-time pipelines, but also full of bug fixes and usability improvements. The big highlights of this release are as follows:

Click in the image above to watch the presentation video, or visit:
https://www.youtube.com/watch?v=pLCVCH7ypI4
- New real-time 3D reconstruction pipeline, featuring GPU and CPU support based on VoxelHashing.
- New real-time point cloud registration algorithm, featuring a high-performance version of Iterative Closest Point (ICP).
- New Neighbor Search module, introducing your favorite search algorithms such as KNN and RadiusSearch, with support for GPU and CPU devices through a common interface.
- New web visualizer, which enables users to access the advanced rendering and visualization features of Open3D in your favourite web environments (remote and locally!), including Jupyter notebooks, Jupyter lab, and standalone web applications.
- New 3D machine learning models and datasets, featuring PointRCNN for 3D object detection, SparseConvNets for point cloud semantic segmentation, and support for ScanNet and SunRGBD.
- Upgraded GUI module, providing improved and more versatile versions of existing widgets, and new ones: ImageWidget and ToggleSwitch.
- Upgraded build system, adding support for CUDA 11.
Real-time 3D reconstruction
We introduce a new CUDA accelerated pipeline including RGBD odometry, frame-to-model tracking, and volumetric integration.
 Figure 1. Example of 3D reconstruction from an RGB-D sensor.
Odometry
We introduce the tensor based real-time RGBD Odometry pipeline. In addition to the legacy Hybrid and Intensity based methods, we support the popular point-to-plane method.
TSDFVoxelGrid
We further accelerate volumetric integration and introduce fast ray casting for rendering.
VoxelHashing
Based on the accelerated RGBD odometry and raycasting, we present the fully functional VoxelHashing system. It performs dense volumetric reconstruction with fast frame-to-model tracking. We present an easy-to-use GUI that also shows real-time interactable surface reconstruction.
SLAC
We have further enhanced our legacy offline reconstruction system by introducing the Simultaneous Localization and Calibration (SLAC) algorithm. This algorithm applies advanced dense multi-way registration along with non-rigid deformation to create highly-accurate reconstructions.
Real-time point cloud registration
We present a high-performance implementation of ICP using Open3D’ Tensor library. This module is one of the first on leveraging the new Neighbor search module and the newly crafted parallel kernels. This implementation brings support for multi-scale ICP, which allows us to do iterations on different resolutions in order to accelerate convergence while keeping computation low.
 Figure 2. ICP registration of multiple point clouds from a driving dataset.
New Neighbor Search module
Neighbor search is at the core of many 3D algorithms. Therefore, it is critical to have access to a fast implementation able to execute a large number of queries in a fraction of a second. After months of development, the Open3D team is proud to present the new Neighbor Search module!
This module brings support for core search algorithms, such as KNN, Radius search, and Hybrid search. All these algorithms are provided with support for both CPU and GPU, through a common and easy-to-use interface. Write your code once and support multiple devices! Moreover, we have not sacrificed a single flop of computation, making this module one of the fastest neighbor search libraries ever created.
Web visualizer
The need for visualizing complex 3D data in web environments has surged considerably in the past few years, in part thanks to the proliferation of sensors like LIDAR and RGBD cameras. New use cases, such as online dataset inspection and remote visualization are now an integral part of many tasks, requiring the crafting of ad-hoc tools, which often are cumbersome to use.
 Figure 3. Standalone visualization of a semantic segmentation model in a browser.
In order to improve this situation, we introduce our new web-based visualization module, which enables 3D visualization from any browsers and any location. This module lets users run advanced rendering and visualization pipelines, both remote and locally through your web browser. All the power of Open3D’ rendering engine --including support for PBR materials, multiple lighting systems, 3D ML visualization, and many other features--, are now supported in your browser. This module also includes a Jupyter extension for interactive web-based visualization! This new feature allows you to run compute-intensive 3D processing in a dedicated server while visualizing the results remotely on any device through your browser.
 Figure 4. Visualization of a 3D model on a Jupyter notebook.
3D Machine Learning
Architectures
In this release, we introduce a new point cloud semantic segmentation architecture based on a Sparse Convolution-based UNet model. This architecture leverages the new sparse convolution operators provided by Open3D, and achieves state of art performance for Semantic Segmentation on the ScanNet dataset. We have also added support for PointRCNN for the task of 3D object detection. To enable PointRCNN we have added new operators like furthest_point_sampling, three_interpolate, ball_query, which are available through Open3D for TensorFlow and Pytorch.
 Figure 5. Example of 3D semantic segmentation using a SparseConvUNet model on ScanNet.
 Figure 6. Example of 3D object detection using a PointRCNN on KITTI.
All these models are provided with their respective training and inference pipelines with support for TensorFlow and Pytorch. Pre-trained models are also provided (check out the following link).
Datasets
This release brings the following datasets: Scannet and SunRGBD.
Frameworks
We now support all models on newer versions of TensorFlow (2.4.1) and PyTorch (1.7.1), on CUDA 11.0.
GUI and rendering modules
Open3D 0.13.0 brings a cascade of improvements and fixes to the renderer and GUI modules.
- The camera can now be controlled with respect to a target object, and the pan-in/pan-out actions are smoother.
- The render supports render targets.
- The black screen issue in MacOS systems is now solved.
- Support for a video widget
- The background of the 3D scene widget can be updated with an image.
- Camera objects can be visualized in the 3D scene.
- Camera objects support intrinsic and extrinsic parameters.
- Support for multiple fonts.
- Support for a new ToggleSwitch widget.
- New GUI/rendering examples for common tasks, such as data acquisition from RGBD sensors, 3D reconstruction, and registration, among others.
Build System
Our pip packages now include support for CUDA 11.0, PyTorch 1.7.1, and TensorFlow 2.4.1 to enable RTX 3000 series devices. Please, notice that we provide custom PyTorch wheels for Linux to work around an incompatibility between CUDA 11, PyTorch, and extension modules such as Open3D-ML.
This release also brings new improved support for CUDA on Windows. Users can now build CUDA accelerated Python wheels for Windows. Open3D is now built with security options enabled by default.
We hope you find Open3D 0.13.0 exciting and useful. Happy coding!
Remember that you can reach out with questions, requests, or feedback through the following channels:
Find the full change log here.
The Open3D team
v0.12.0
3 years agoOpen3D 0.12.0 Release Notes
Open3D 0.12.0 is out, and it comes with new 3D object detection pipelines and datasets, the newest versions of some of your preferred classic tools, and many bug fixes. Check out our 0.12.0 release video:

Extensions to the Open3D-ML module
The previous release of Open3D introduced an exciting new module dedicated to 3D Machine Learning Open3D-ML, featuring support for 3D semantic segmentation workflows. In this release, we have extended Open3D-ML with the task of 3D object detection. This extension introduces support for new datasets, such as the Waymo Open dataset, Lyft level 5 open data, Argoverse, nuScenes, and KITTI. As always, all these datasets can be visualized out-of-the-box using our visualization tool, from Python or C++. The visualization tool is now equipped with the capability to render 3D bounding boxes along with all the previously existing modalities, e.g. semantic labels, XYZRGB, depth, normals, etc.
Open3D-ML features
PointPillars, the first of the many object detection models to come in the near future. To enable the implementation of PointPillars, we have added a set of new ML operators in Open3D, such as: grid_sampling, NMS, and IOU. These operators are available to the community and can be used to build new models, using our Python and C++ APIs.
import os
import open3d.ml as _ml3d
import open3d.ml.torch as ml3d

cfg_file = "ml3d/configs/pointpillars_kitti.yml"
cfg = _ml3d.utils.Config.load_from_file(cfg_file)

model = ml3d.models.PointPillars(**cfg.model)
cfg.dataset['dataset_path'] = "/path/to/your/dataset"
dataset = ml3d.datasets.KITTI(cfg.dataset.pop('dataset_path', None), **cfg.dataset)
pipeline = ml3d.pipelines.ObjectDetection(model, dataset=dataset, device="gpu", **cfg.pipeline)

...
# run inference on a single example.
result = pipeline.run_inference(data)
We have also updated our model zoo, providing new pretrained models on KITTI for the task of 3D object detection, and new semantic segmentation models on Paris-Lille3D and Semantic3D.
Remember that all the tools provided in Open3D-ML are compatible with PyTorch and TensorFlow!
Support for RealSense SDK v2
RealSense sensors’ support has been upgraded to leverage the RealSense SDK v2. Users can now capture crisp 3D data from L515 devices. As part of this upgrade, we include support for Bag files format (RSBagReader), and direct streaming from sensors. These operations can now be done through a new sensor class: RealSenseSensor, offering a simple and intuitive way to control your sensors.
import open3d as o3d
bag_reader = o3d.t.io.RSBagReader()
bag_reader.open(bag_filename)
while not bag_reader.is_eof():
    im_rgbd = bag_reader.next_frame()
    # process im_rgbd.depth and im_rgbd.color

bag_reader.close()
import json
import open3d as o3d
with open(config_filename) as cf:
    rs_cfg = o3d.t.io.RealSenseSensorConfig(json.load(cf))

rs = o3d.t.io.RealSenseSensor()
rs.init_sensor(rs_cfg, 0, bag_filename)
rs.start_capture(True)  # true: start recording with capture
for fid in range(150):
    im_rgbd = rs.capture_frame(True, True)  # wait for frames and align them
    # process im_rgbd.depth and im_rgbd.color

rs.stop_capture()

For further information, check this tutorial.
CORE and 3D reconstruction
Open3D 0.12 brings exciting CORE upgrades, including a new Neighbor Search module. This module supports typical neighbor search methods, such as KNN, radius search, and hybrid search, on both CPUs and GPUs, under a common interface!
Furthermore, we have created a new version of the TSDF integration algorithm accelerated on GPU. This version is able to achieve outstanding computational performance, requiring between 2 and 4 ms to integrate a pair of frames.
New rendering functionalities
We have done an important effort over the last months to put out a modern, real-time, rendering API. This effort is still ongoing, and we are committed to bringing top-tier rendering capabilities with a strong emphasis in performance, versatility, ease of use, and beauty. As part of our commitment, in this release we have added relevant extensions to this API:
- Support for Screen-space reflections

- Full programmatic support for headless rendering in Filament (for real)
box = o3d.geometry.TriangleMesh.create_box(2, 2, 1)
render = rendering.OffscreenRenderer(640, 480)
render.scene.add_geometry("box", box, grey)
render.scene.camera.look_at([0, 0, 0], [0, 10, 0], [0, 0, 1])
img = render.render_to_image()
- Support for arbitrary camera intrinsic matrices: A small step for the Camera class; a very anticipated step by the Open3D community
Camera::SetProjection(const Eigen::Matrix3d& intrinsics,
                               double near,
                               double far,
                               double width,
                               double height)
- Support for text rendering: Render text in 3D
Label3D::Label3D(const Eigen::Vector3f& pos, const char* text)
- Full control over the color grading pipeline
class ColorGradingParams {
public:
    ColorGradingParams(Quality q, ToneMapping algorithm);

    void SetTemperature(float temperature);
    void SetTint(float tint);
    void SetContrast(float contrast);
    void SetVibrance(float vibrance);
    void SetSaturation(float saturation);
    void SetChannelMixer(const Eigen::Vector3f& red,
                         const Eigen::Vector3f& green,
                         const Eigen::Vector3f& blue);
    void SetShadowMidtoneHighlights(const Eigen::Vector4f& shadows,
                                    const Eigen::Vector4f& midtones,
                                    const Eigen::Vector4f& highlights,
                                    const Eigen::Vector4f& ranges);
    void SetSlopeOffsetPower(const Eigen::Vector3f& slope,
                             const Eigen::Vector3f& offset,
                             const Eigen::Vector3f& power);

    void SetCurves(const Eigen::Vector3f& shadow_gamma,
                   const Eigen::Vector3f& midpoint,
                   const Eigen::Vector3f& highlight_scale);
}
Control shadow behaviors and post-processing effects:
class View
{
    void SetPostProcessing(bool enabled);
    void SetAmbientOcclusion(bool enabled, bool ssct_enabled);
    void SetAntiAliasing(bool enabled, bool temporal);
    void SetShadowing(bool enabled, ShadowType type);
}
Visualization and GUI: O3DViewer (beta)
The visualization module has been extended, using the new rendering capabilities and the GUI API, to create a unified visualizer displaying all the features contained in previous Open3D visualizers, e.g., camera animation, data selection, support for callbacks, and multiple shading modes.

This new visualizer, codename O3DViewer, will be the official visualization tool in Open3D starting in Open3D 0.14. At that time, previous visualizers will be deprecated.

We hope you find Open3D 0.12.0 exciting and useful. Happy coding!
Remember that you can reach out with questions, requests, or feedback through the following channels:
Find the full changelog here.
The Open3D team
v0.11.2
3 years agov0.11.1
3 years agov0.11.0
3 years agoWe are excited to present Open3D 0.11.0!
Open3D 0.11.0 introduces a brand new 3D Machine Learning module, nicknamed Open3D-ML. Open3D-ML is an extension of your favorite library to bring support for 3D domain-specific operators, models, algorithms, and datasets. In a nutshell, users can now create new applications combining the power of 3D data and state-of-the-art neural networks! Open3D-ML is included in all the binary releases of Open3D 0.11.0.
Open3D-ML comes with support for Pytorch +1.4 and TensorFlow +2.2, the two most popular machine learning frameworks. The first iteration of this module features a 3D semantic segmentation toolset, including training and inference capabilities for RandlaNet and KPConv. The toolset supports popular datasets such as SemanticKITTI, Semantic3D, 3D Semantic Parsing of Large-Scale Indoor Spaces S3DIS, Toronto3D, and Paris-Lille-3D. Open3D-ML also provides a new model zoo compatible with Pytorch and TensorFlow, so that users can enjoy state-of-the-art semantic segmentation models without hassles.
We have endowed the new Open3D-ML module with a new data viewer tool. Users can now inspect their datasets and model’s predictions in an intuitive and simple way. This visualization tool includes support for Pytorch and TensorFlow frameworks and is fully customizable due to its Pythonic nature.
This viewer has been built upon the new visualization API, integrating the new Rendering and GUI modules. Thanks to the new visualization API, users can perform advanced rendering, fully programmatically from Python and C++. Users can also create slick GUIs with a few lines of Python code. Check out how to do this here.
The Open3D app has also been extended to include the following features:
- Support for FBX and glTF2 assets
- Full support for PBR models.
Open3D 0.11 includes for the first time support for Linux ARM (64-bit) platforms. This has been a long-time requested feature that finally made it into the release. You can now enjoy all Open3D features, including our new rendering and visualization pipelines in OpenGL-enabled ARM platform.
[Breaking] Please, notice that the API and the structure of Open3D have changed considerably after an intense refactoring process. You will need to update your code to use the new namespaces. Please, check the full changelog and the documentation for further information.
We hope you find Open3D 0.11.0 exciting and useful. Happy coding!
Remember that you can reach out with questions, requests, or feedback through the following channels:
Find the full changelog here.
The Open3D team