Nordprojects Lantern Save
Transform any surface into mixed-reality using Raspberry Pi, a laser projector, and Android Things.
Android Things Lantern

Lantern combines an Ikea lamp, laser projector and Android Things to create a connected projector that explores the relationships between surfaces and content.
Note - as of January 2022 Android Things has been discontinued. We are leaving this project up as the hardware steps will still work to create a connected projector, powered by a Raspberry Pi. To display content on the projector you would now need to install Linux on the Pi and create your own content to display. For example launching a full screen web browser and projecting web apps.
This repo contains all the Android Things app code that used to power Lantern.
The project is split into three modules:
-
/things- the Android Things app -
/mobile- the companion mobile app -
/shared- code used by both apps
For instructions on how to build the hardware, see our project page on Hackster.io.
How it works

Lantern imagines a future where projections are used to present ambient information and relevant UI around everyday objects. Point it at a clock to see your appointments, or point to speaker to display the currently playing song. As opposed to a screen, when it’s no longer needed, the projections simply fade away.

Lantern is set-up and controlled using the companion app for Android. They communicate using Nearby Connections, a protocol developed by Google to facilitate local peer-to-peer communication with nearby devices.
Lantern is built around the concept of ‘channels’ – app fragments that can be configured through the companion app, and display projected UI. Each surface has a different channel, so Lantern will display something different on the table, the wall and the ceiling.
By building on Android Things, we benefit from a modern, familiar technology stack, which makes connectivity and graphics really simple to implement and iterate. Both the Android Things code and the companion app are written in Kotlin, which has been a joy to work with.
Technical overview

There are two main components to the Lantern software - the ‘Things’ app (/things), which runs on Android Things on a Raspberry Pi, and the Companion app (/mobile) which runs on an Android phone.
The hardware is built as an ‘Ikea hack’, with a 3D-printed enclosure, a Raspberry Pi, a laser projector (HDMI), an accelerometer (I2C) and a few off-the-shelf wires and connectors.
How to make your own Lantern

Note: this guide focuses on the software side of Lantern. For more in-depth instructions, see the guide on Hackster.io.
Step 1: Assemble the hardware


To build the hardware, you’ll hack the Ikea Tertial lamp, 3d-print the enclosure, and assemble it with the Raspberry Pi, projector and the other components.
For more information, read the assembly instructions.
Step 2: Install Android Things

Android Things for Raspberry Pi comes as an image that can the flashed to an SD card. Our favourite way to do this is to use the android-things-setup-utility, which can be downloaded from the Android Things Console.
Download it, and run as superuser e.g.
sudo ~/Downloads/android-things-setup-utility/android-things-setup-utility-macos
or
sudo ~/Downloads/android-things-setup-utility/android-things-setup-utility-linux
On Windows, right-click the executable file and choose ‘Run as administrator’
When prompted, choose ‘Install Android Things’, ‘Raspberry Pi’ and then ‘Development image’.
Insert your SD card; Android Things will then be written to it.
Step 3: Boot Android Things and connect

Insert the SD card into the Raspberry Pi and connect the power. Once Android Things starts, we'll setup the WiFi connection.
Connect an ethernet cable from the Pi to your computer (or to something on your network like a router).
Run android-things-setup-utility again, this time choosing to configure WiFi. Follow the on-screen prompts to complete the setup.
Once connected, open a terminal and use adb to connect to the device.
adb connect android.local
Step 4: Build and install the code

Open this repo in Android Studio and wait for Gradle to sync. Once finished, you should have a things Run Configuration in the menu in the toolbar. Choose things and hit Run.
Turn on the projector. Once the code is built, Lantern will start 🎉 !
Step 5: Assemble the lamp
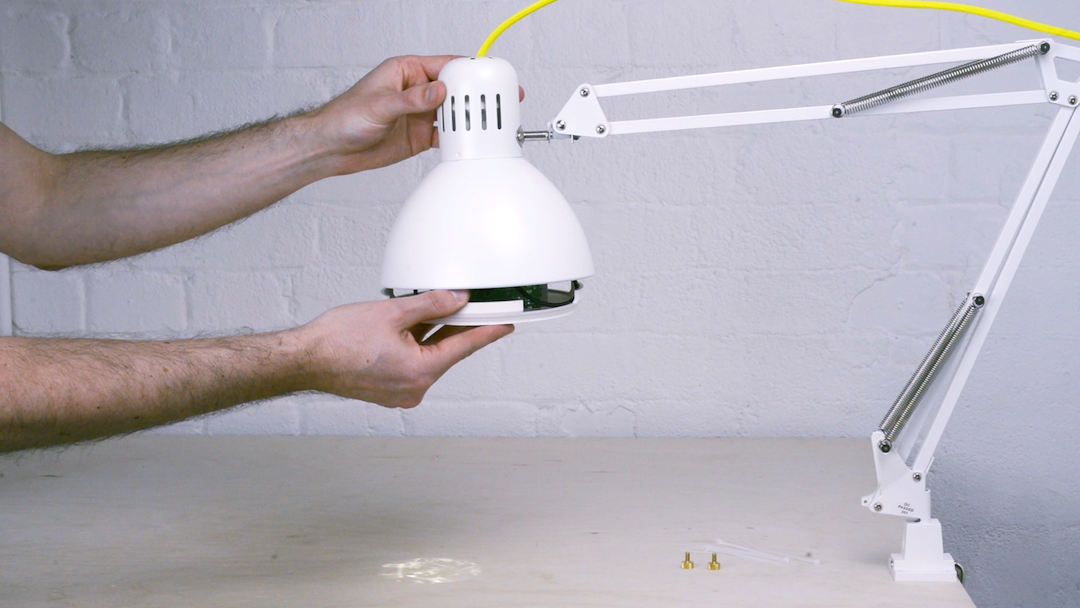
Insert the hardware into the lamp and attach it with the thumbscrews.
Step 6: Install the companion app and configure your Lantern
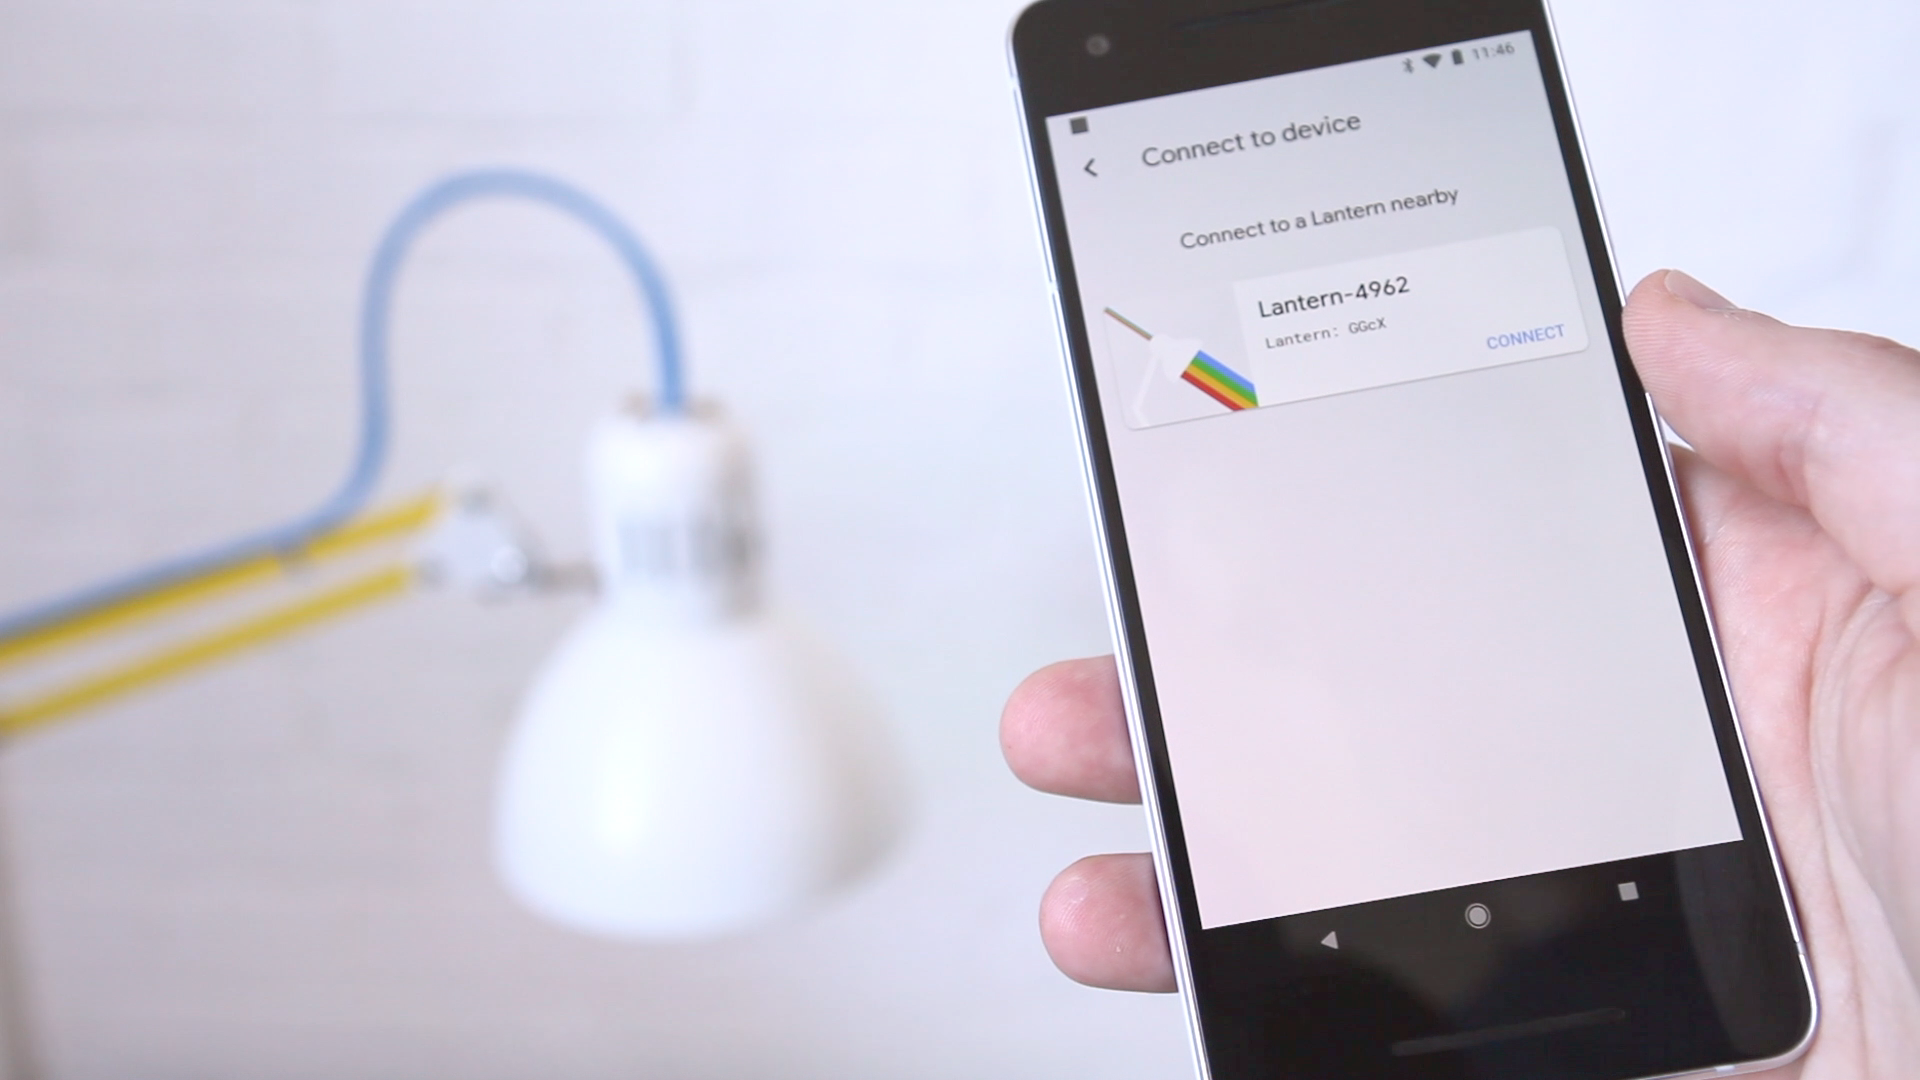
Connect your Android phone (with dev mode enabled). In Android Studio, choose the mobile Run Configuration and hit Run.
Using the companion app, connect the Lantern and play with the channels we’ve created!
Making your own channels
To create your own channel, create a Kotlin file at
things/src/main/java/com/example/androidthings/lantern/channels/MyChannel.kt. Then paste
the following code to begin:
package com.example.androidthings.lantern.channels

import android.os.Bundle
import android.view.Gravity
import android.view.LayoutInflater
import android.view.View
import android.view.ViewGroup
import android.widget.TextView
import com.example.androidthings.lantern.Channel

class MyChannel : Channel() {
    override fun onCreateView(inflater: LayoutInflater, container: ViewGroup?,
                              savedInstanceState: Bundle?): View? {
        val view = TextView(context)
        view.text = "Hello world from my new Lantern channel!"
        view.textSize = 30f
        view.gravity = Gravity.CENTER
        return view

        // alternatively, you can load from a layout file!
        // return inflater.inflate(R.layout.my_channel, viewGroup, false)
    }
}
Finally, you need to register the channel so it can be found from the app. Open the file
things/src/main/java/com/example/androidthings/lantern/ChannelsRegistry.kt and add your new
channel to the channelsWithInfo list. e.g.
    Pair(::MyChannel, ChannelInfo(
            "my-channel",
            "My brand-new Lantern channel",
            "It may not look like much, but this channel is going places!"
    )),
That's it! Now build the project and run on your Raspberry Pi. Now select the channel with the mobile app to see it run. (You don't need to update the mobile app, because the things app sends a list of available channels when it connects.)
Configuration Screen on mobile
If you create a channel that needs configuration (e.g. a URL to display), you can create a configuration Activity in the companion mobile app.
To add a channel configuration screen, first create an activity and then add it to the list of available activities using the following steps:
-
Subclass
ChannelConfigActivity -
Add your new subclass to the AndroidManifest.xml file, making sure to set it's parent activity to
".channels.ChannelsListActivity"<activity android:name=".channels.config.WebConfigActivity" android:configChanges="orientation" android:label="Customize" android:parentActivityName=".channels.ChannelsListActivity" android:screenOrientation="portrait" /> -
Add a toolbar to the activity layout file...
    <android.support.v7.widget.Toolbar
        style="@style/ToolBarStyle"
        android:id="@+id/toolbar"
        android:layout_width="match_parent"
        android:layout_height="wrap_content"
        android:background="?attr/colorPrimary"
        android:minHeight="?attr/actionBarSize"
        android:theme="?attr/actionBarTheme" />
...and set it as the action bar in
onCreatesetSupportActionBar(toolbar) supportActionBar?.setDisplayHomeAsUpEnabled(true) toolbar.setNavigationIcon(R.drawable.back_chevron) -
Add an entry to
ChannelConfigOptionslinking it to the channel ID."webview" to WebConfigActivity::class.java -
Add the
customizable = trueflag to the ChannelInfo instance inChannelsRegistryin the things app -
To update the config from within your activity, add values to
config.settingsorconfig.secretsand callfinishWithConfigUpdate()
Development
While developing on Lantern, you might want to skip the StartupActivity. To do this, add
--ez quickStart true to the Launch Flags of your Run Configuration.
Configure the weather channel
To get local weather data for the ambient weather caustics you need to create a secrets.xml.
Create a file at things/src/main/res/values/secrets.xml, with the following contents:
<?xml version="1.0" encoding="utf-8"?>
<resources>
    <string name="openweathermap_api_key">YOUR_KEY_HERE</string>
</resources>
This file is ignored by Git, to prevent accidental key-sharing.
The weather channel uses OpenWeatherMap APIs to work. To compile your
own, signup for an account and generate an API key, and add it to the secrets.xml
openweathermap_api_key entry.
Changelog
11th July 2018
- Added 'camera' example channel (thanks @TobiasSchaffner! #7)
7th May 2018
- First public release!
