Modelchimp Save
Experiment tracking for machine and deep learning projects
ModelChimp

![]()
What is ModelChimp?
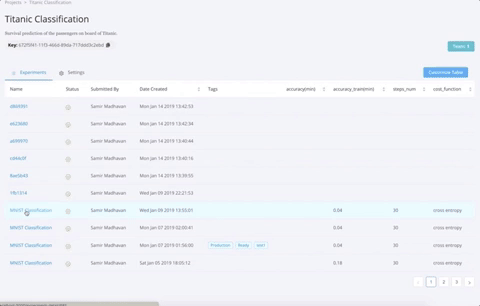
ModelChimp is an experiment tracker for Deep Learning and Machine Learning experiments.
ModelChimp provides the following features:
- Real-time tracking of parameters and metrics
- Realtime charts for experiment metrics at epoch level
- Code used for the experiment
- Experiment comparison
- Collaborate and share experiments with team members
- Python objects storage such as data objects and model objects which can be used pulled for other experiments
- Storage of test and validation images for computer vision use cases. Useful for post experiment forensics of deep learning models
- Server based solution with user registration and authentication
Why ModelChimp?
The idea for ModelChimp came up when I was building a recommendation algorithm for a large retail company based in India. Along with my 6 member team, we would store the meta information related to each experiment in an excel sheet. Two of the biggest problems we encountered while using this approach were:
- Sometimes, we would miss out on logging the details while fine-tuning and analysing the model
- Sharing these excel sheets over email amongst the team members and the client was a cumbersome process
ModelChimp is a solution to this problem faced by data scientists and machine learning engineers/enthusiasts. They can spend more time on experiments and not on managing the data related to the experiments.
Installation
Choose either Docker based installation or the manual approach.
- Docker
- Production Deployment
Docker
- Docker is a prerequisite. You can download it from here - https://docs.docker.com/install/
$ git clone https://github.com/ModelChimp/modelchimp
$ cd modelchimp
$ bash docker.sh
-
After starting ModelChimp server, you can access it at http://localhost:8000
-
Use the following credentials to log in
username: [email protected]
password: modelchimp123
- (Optional) If you are using modelchimp on a remote server then add the hostname or ip address in the .env file for the following variables
DOMAIN=<hostname/ip>
ALLOWED_HOSTS=.localhost,127.0.0.1,<hostname/ip>
- (Optional) For inviting team members, email credentials have to be added for the following variables in .env file
EMAIL_HOST=
EMAIL_HOST_USER=
EMAIL_HOST_PASSWORD=
EMAIL_PORT=587
DEFAULT_FROM_EMAIL="[email protected]"
Production Deployment
- Modelchimp can be deployed referring the docker-compose.local.yml with the container orchestration of your choice. If you are not using any container orchestration and want to start it manually then you can use the following command
docker-compose -f docker-compose.local.yml up --build -d
This will start the containers in daemon mode on the machine where Modelchimp resides. Modelchimp can be accessed from port 8000
- (Optional) To store the data in an external postgres database. Add the following credentials to the .env file
DB_HOST=<DB_HOST>
DB_NAME=<DB_NAME>
DB_USER=<DB_USER>
DB_PASSWORD=<DB_PASSWORD>
DBPORT=
- (Optional) To store the file assets in an s3 bucket. Add the following credentials to the .env file
AWS_STORAGE_FLAG=True
AWS_ACCESS_KEY_ID=<ID>
AWS_SECRET_ACCESS_KEY=<KEY>
AWS_STORAGE_BUCKET_NAME=<bucket_name>
- (Optional) To invite team members to a project. Add the following email credentials to the .env file
EMAIL_HOST=
EMAIL_HOST_USER=
EMAIL_HOST_PASSWORD=
EMAIL_PORT=587
DEFAULT_FROM_EMAIL="[email protected]"
Documentation
- Getting Started - https://docs.modelchimp.com/#installation
- Sample Projects
- Scikit: https://docs.modelchimp.com/scikit/
- Tensorflow: https://docs.modelchimp.com/tensorflow/
- Pytorch: https://docs.modelchimp.com/pytorch/
- Keras: https://docs.modelchimp.com/keras/
- PySpark: https://docs.modelchimp.com/pyspark/
