LoraGW Setup Save
SX1301 Lora Concentrator Raspberry PI based gateway setup
Lora Gateway base setup for SX1301 based concentrators
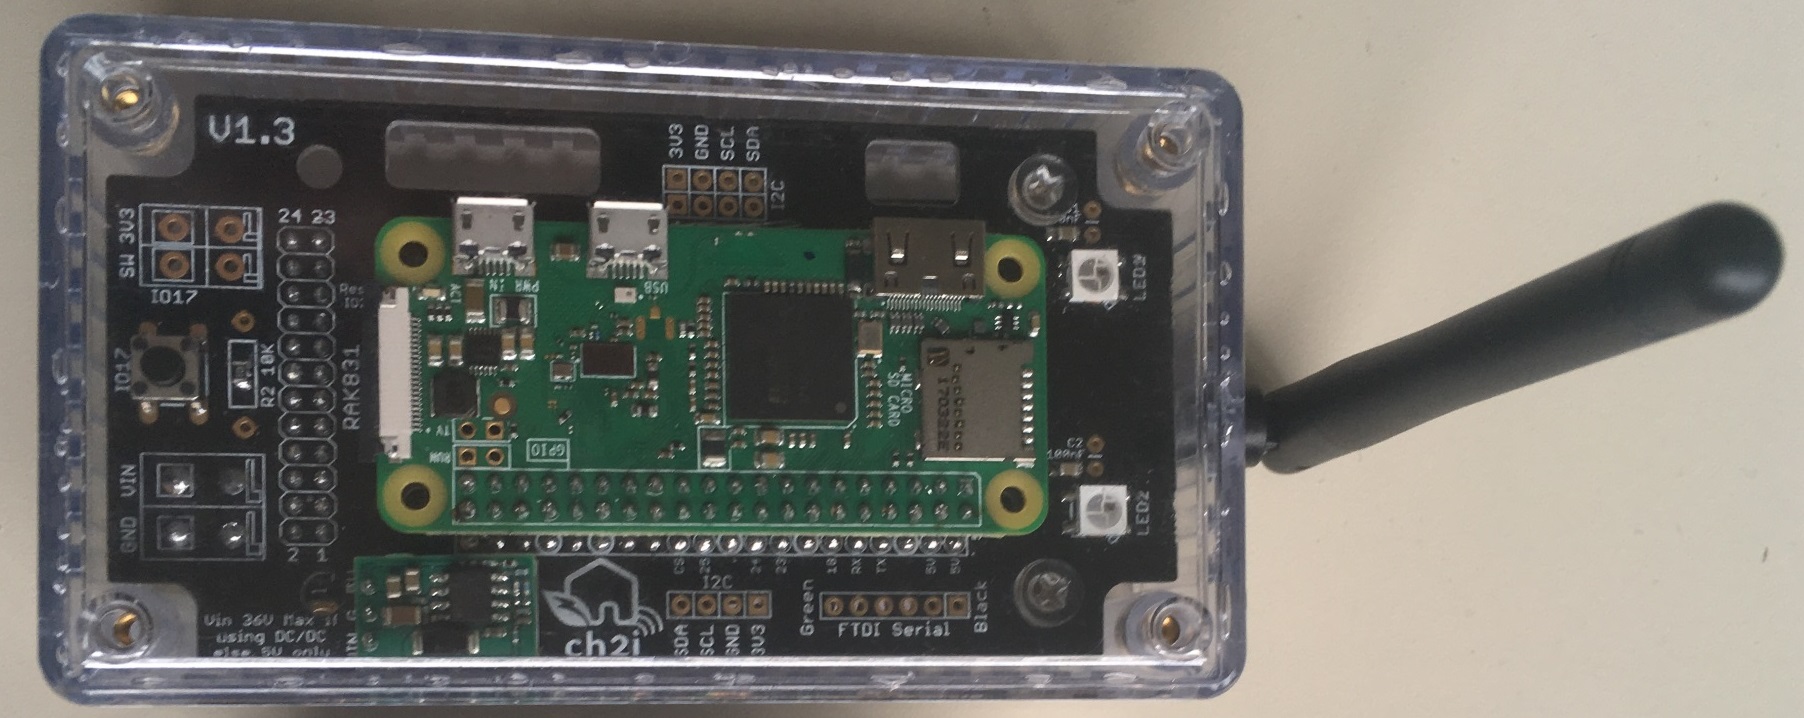
This setup is used for some LoraWAN concentrators based on small computers such as Raspberry PI or others. For example it works fine with the RAK831 PI Zero shield
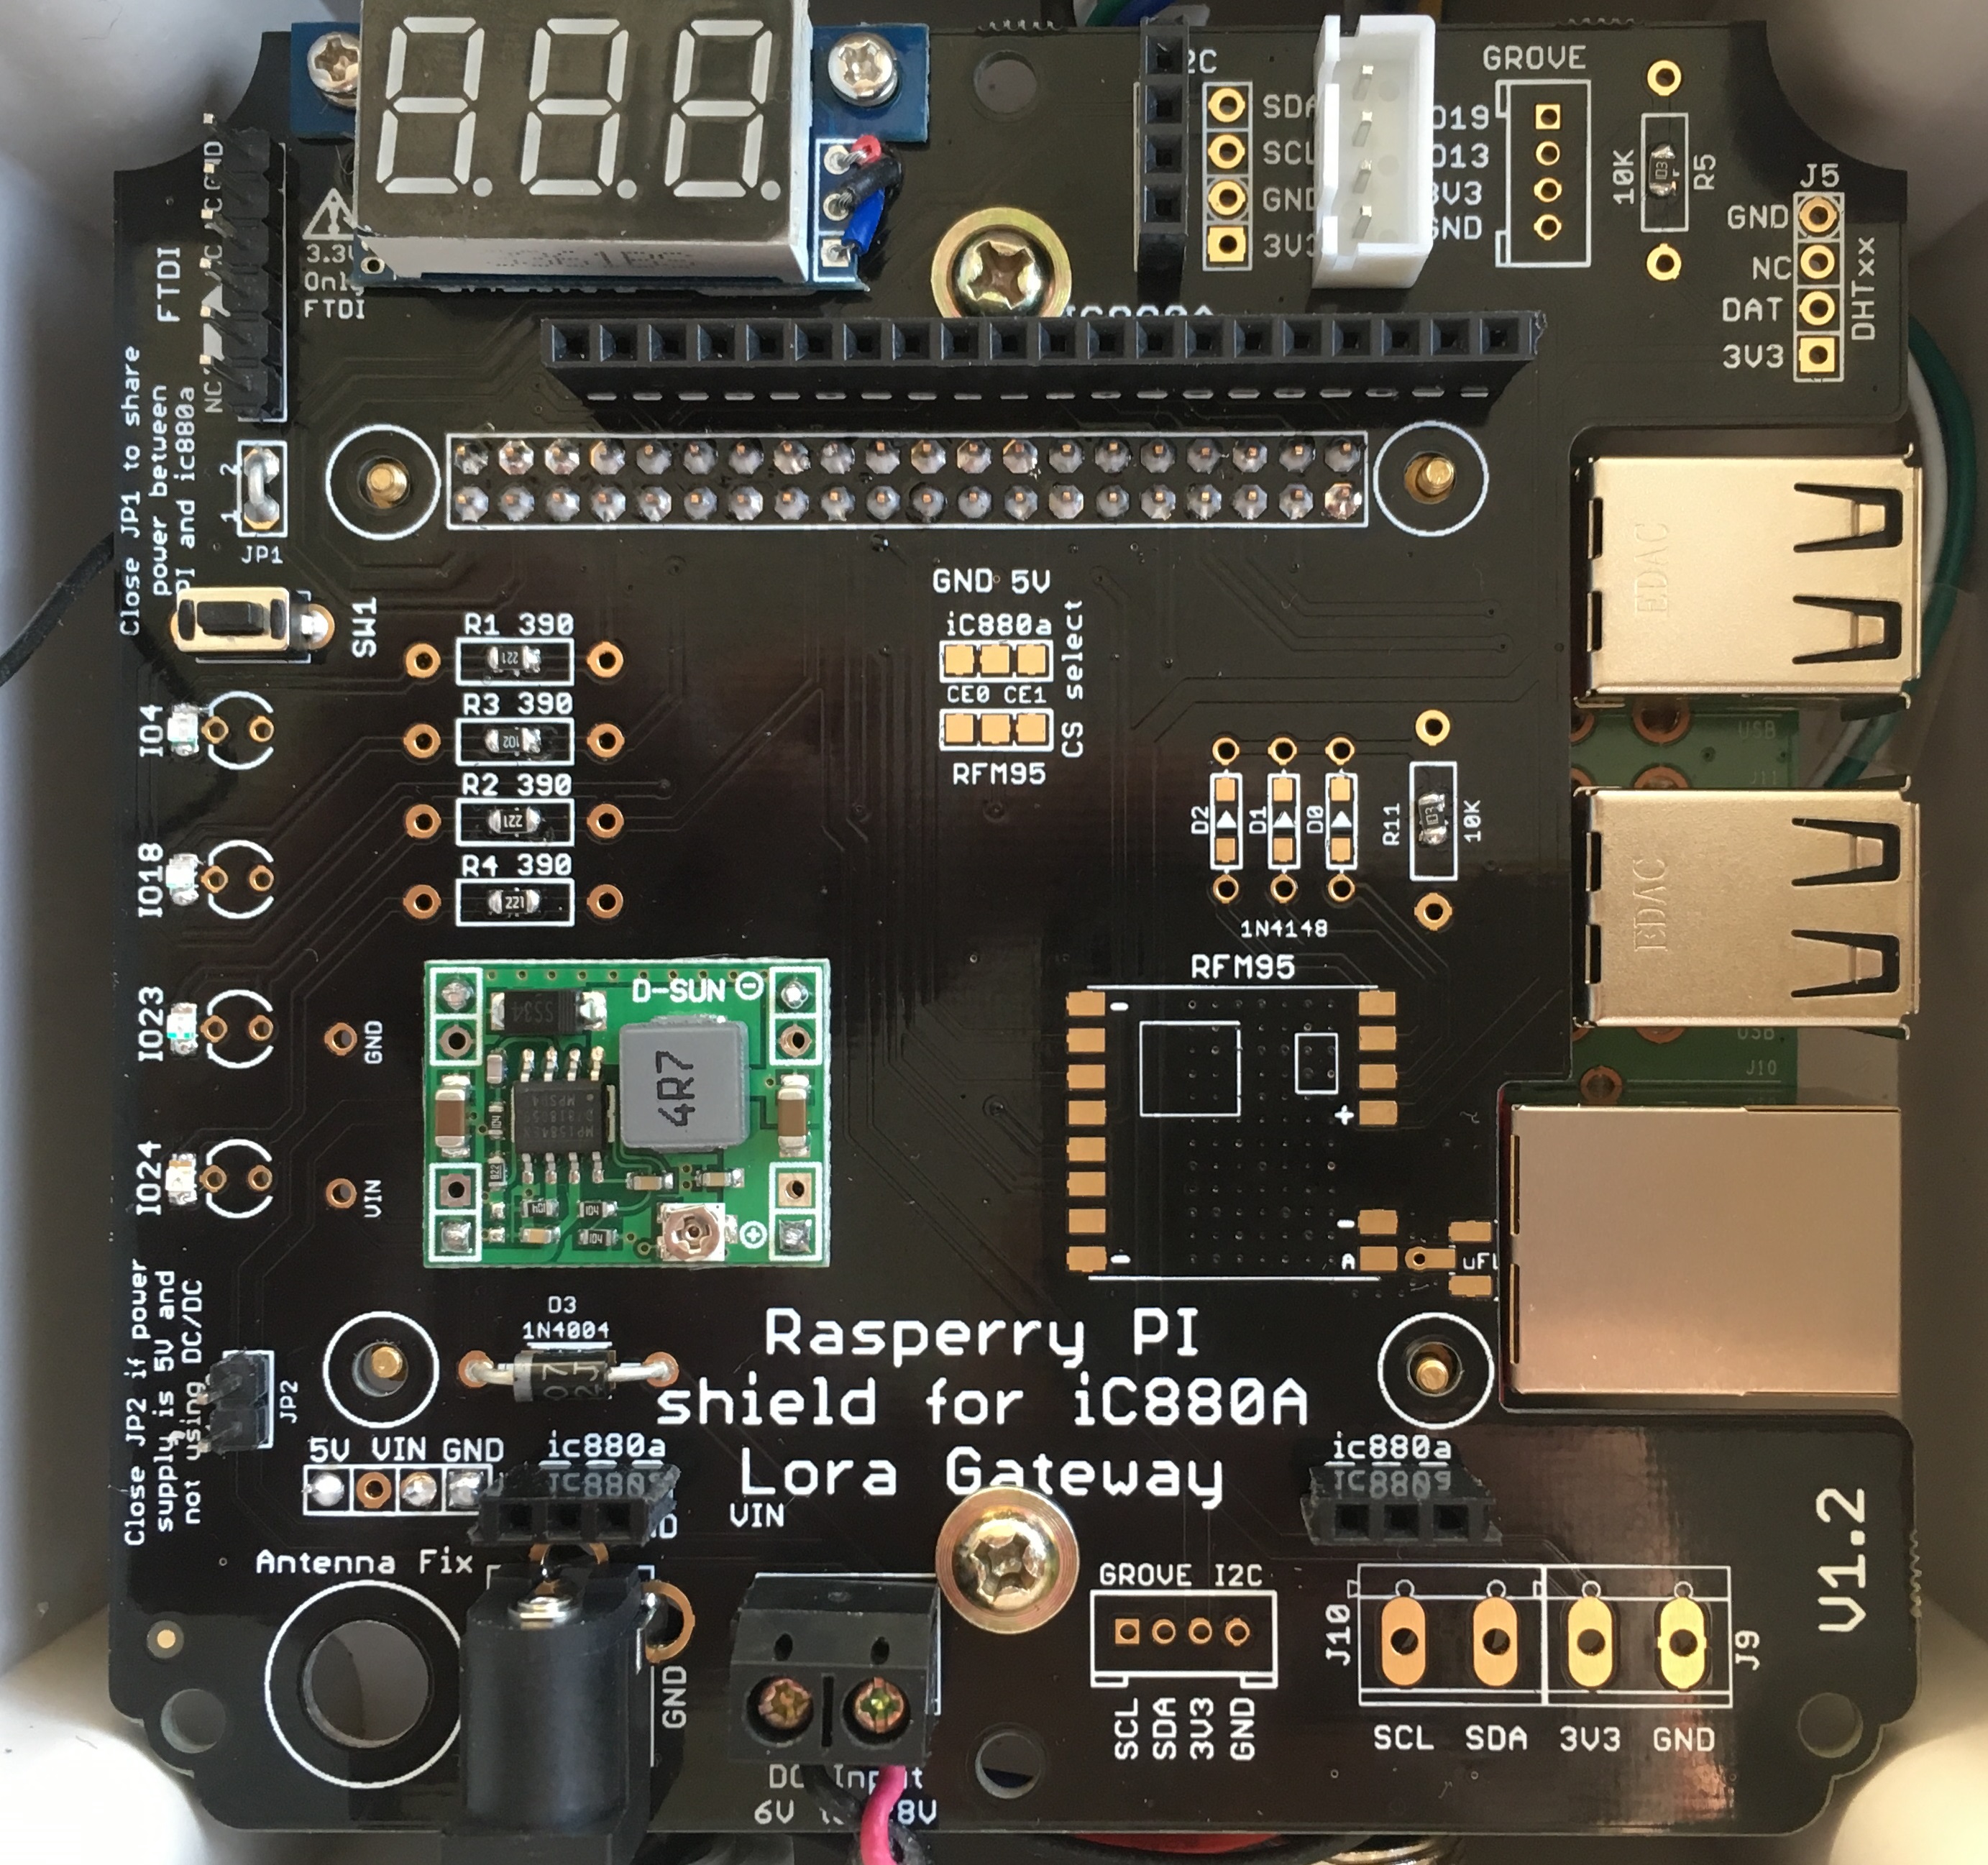
And for the iC880a sield for Raspberry PI V2 or V3.
Installation
Download Raspbian lite image and flash it to your SD card using etcher.
Prepare SD to your environement
Once flashed, you need to do some changes on boot partition (windows users, remove and then replug SD card)
Enable SSH
Create a dummy ssh file on this partition. By default SSH is now disabled so this is required to enable it. Windows users, make sure your file doesn't have an extension like .txt etc.
Enable USB OTG (Pi Zero Only)
If you need to be able to use OTG (Console access for any computer by conecting the PI to computer USB port)
Open up the file cmdline.txt. Be careful with this file, it is very picky with its formatting! Each parameter is seperated by a single space (it does not use newlines). Insert modules-load=dwc2,g_ether after rootwait quiet.
The new file cmdline.txt should looks like this
dwc_otg.lpm_enable=0 console=serial0,115200 console=tty1 root=PARTUUID=37665771-02 rootfstype=ext4 elevator=deadline fsck.repair=yes rootwait quiet modules-load=dwc2,g_ether init=/usr/lib/raspi-config/init_resize.sh
For OTG, add also the bottom of the config.txt file, on a new line
dtoverlay=dwc2
Optionnal, disable Auto Resize of SD Card
And since I don't like the Auto Resize SD function (I prefer do do it manually from raspi-config), remove also from the file cmdline.txt auto resize by deleting the following
init=/usr/lib/raspi-config/init_resize.sh
The new file cmdline.txt should looks like this
dwc_otg.lpm_enable=0 console=serial0,115200 console=tty1 root=PARTUUID=37665771-02 rootfstype=ext4 elevator=deadline fsck.repair=yes rootwait quiet modules-load=dwc2,g_ether
Pre Connect to your WiFi AP
Finally, on same partition (boot), to allow your PI to connect to your WiFi after first boot, create a file named wpa_supplicant.conf to allow the PI to be connected on your WiFi network.
country=FR
ctrl_interface=DIR=/var/run/wpa_supplicant GROUP=netdev
update_config=1
network={
  ssid="YOUR-WIFI-SSID"
  psk="YOUR-WIFI-PASSWORD"
}
Of course change country, ssid and psk with your own WiFi settings.
That's it, eject the SD card from your computer, put it in your Raspberry Pi Zero . It will take up to 90s to boot up (shorter on subsequent boots). You then can SSH into it using raspberrypi.local as the address.
If WiFi does not work, connect it via USB to your computer It should then appear as a USB Ethernet device.
ssh [email protected]
Now connect to raspberry PI with ssh or via USB otg
Remember default login/paswword (ssh or serial console) is pi/raspberry.
So please for security reasons, you should change this default password
passwd
Launch PI configuration script
This 1_Pi_Config.sh script will prepare your Pi environnment, create and configure a loragw user, add access to SPI, I2C, Uart. It will reduce video memory to 16MB to allow max memory for the stuff need to be done. It also enable excellent log2ram SD card preservation.
wget https://raw.githubusercontent.com/ch2i/LoraGW-Setup/master/1_Pi_Config.sh
chmod ug+x 1_Pi_Config.sh
sudo ./1_Pi_Config.sh
Reconnect after reboot
Log back with loragw user and if you changed hostname to loragw-xxyy, use this command
ssh [email protected]
Get CH2i Gateway Install repository
git clone https://github.com/ch2i/LoraGW-Setup
cd LoraGW-Setup
Configure Gateway on TTN console
Now you need to register your new GW on TTN before next step, see gateway registration, the GW_ID and GW_KEY will be asked by the script
Then launch script to install all stuff
sudo ./2_Setup.sh
That's it, If you are using PI Zero shield, the 2 LED should be blinking green and you should be able to see your brand new gateway on TTN
Usefull information
Startup
Check all is fine also at startup, reboot your gateway.
sudo reboot
LED Blinking colors (RAK831 Shied with 2 WS2812B Leds)
WS2812B driver use DMA channel, and with new Raspbian version, using DMA 5 will corrupt your SD card. see this issue. It's now solved but if you have old GW with old scripts, be sure to update the line of script /opt/loragw/monitor_ws2812.py from
strip = Adafruit_NeoPixel(2, gpio_led, 800000, 5, False, 64, 0, ws.WS2811_STRIP_GRB)
to (using DMA channel 10 instead of 5)
strip = Adafruit_NeoPixel(2, gpio_led, 800000, 10, False, 64, 0, ws.WS2811_STRIP_GRB)
LED 1
- green => connected to Internet
- blue => No Internet connexion but gateway WiFi AP is up
- red => No Internet, no WiFi Access Point
LED 2
- green => packet forwarder is started and running
- blue => no packed forwarder but local LoRaWAN server is started
- red => No packet forwarder nor LoRaWAN server
LED Blinking colors (iC880a with 4 GPIO Leds)
- GPIO 4  (Blue) Blink => Internet access OK
- GPIO 18 (Yellow) Blink => local web server up & running
- GPIO 24 (Green)
	- Blink => packet forwarder is running
	- Fixed => Shutdown OK, can remove power
- GPIO 23 (Red)
	- Blink every second, one of the previous service down (local web, internet, )
  - Middle bink on every bad LoRaWAN packet received
  - Lot of short blink => Activity on SD Card (seen a boot for example)
Change behaviour
You can change LED code behaviour at the end of script /opt/loragw/monitor.py
Shutdown
You can press (and let it pressed) the switch push button, leds well become RED and after 2s start blinking in blue. If you release button when they blink blue, the Pi will initiate a shutdown. So let it 30s before removing power.
Shutdown LED display (for RPI 3 and iC880a only)
If you have a raspberry PI 3 with this iC880A shield, then the /boot/config.txt file has been enhanced with the following lines:
# When system if Halted/OFF Light Green LED
dtoverlay=gpio-poweroff,gpiopin=24
The Green LED (gpio24) will stay on when you can remove the power of the gateway. It's really a great indicator.
You can also select which GPIO LED is used to replace activity LED if you need it.
# Activity LED
dtoverlay=pi3-act-led,gpio=23
The Red LED (gpio23) will blink on activity.
Shutdown or Activity LED (for RPI Zero Shield V1.5+)
If you have a raspberry PI Zero with this RAK831, then you can change the /boot/config.txt file to choose one of the two following features:
# When system is Halted/OFF Light Green LED
dtoverlay=gpio-poweroff,gpiopin=26
The Green LED (gpio26) will stay on when you can remove the power of the gateway. It's really a great indicator.
You can also choose select this LED to replace activity LED if you need it.
# Activity LED
dtparam=act_led_gpio=26
The Greend LED (gpio26) will blink on activity.
You can select only one of the 2 options, not both at the same time.
Detailled information
The installed sofware is located on /opt/loragw, I changed this name (original was ttn-gateway) just because not all my gateways are connected to TTN so I wanted to have a more generic setup.
ls -al /opt/loragw/
total 344
drwxr-xr-x 3 root root   4096 Jan 21 03:15 .
drwxr-xr-x 5 root root   4096 Jan 21 01:01 ..
drwxr-xr-x 9 root root   4096 Jan 21 01:03 dev
-rw-r--r-- 1 root root   6568 Jan 21 01:15 global_conf.json
-rwxr-xr-- 1 root root   3974 Jan 21 01:15 monitor-gpio.py
-rwxr-xr-- 1 root root   3508 Jan 21 03:15 monitor.py
-rwxr-xr-- 1 root root   4327 Jan 21 01:15 monitor-ws2812.py
-rwxr-xr-x 1 root root 307680 Jan 21 01:14 mp_pkt_fwd
-rwxr-xr-- 1 root root    642 Jan 21 01:36 start.sh
LED blinking and push button functions are done with the monitor.py service (launched by systemd at startup). There are 2 versions of this service (with symlink), one with WS2812B led and another for classic GPIO LED such as the one on this IC880A shield. So if you want to change you can do it like that
stop the service
sudo systemctl stop monitor
If you have ic880a shield, change monitor service
In this case you do not have WS2812B RGB LED on the shield, but GPIO classic one. The push button GPIO to power off the PI is also not on the same GPIO, so you need to setup the correct monitor service.
sudo rm /opt/loragw/monitor.py
sudo ln -s /opt/loragw/monitor-gpio.py /opt/loragw/monitor.py
start the service
sudo systemctl start monitor
Check packed forwarder log
sudo journalctl -f -u loragw
-- Logs begin at Sun 2018-01-21 14:57:08 CET. --
Jan 22 01:00:41 loragw loragw[240]: ### GPS IS DISABLED!
Jan 22 01:00:41 loragw loragw[240]: ### [PERFORMANCE] ###
Jan 22 01:00:41 loragw loragw[240]: # Upstream radio packet quality: 100.00%.
Jan 22 01:00:41 loragw loragw[240]: # Semtech status report send.
Jan 22 01:00:41 loragw loragw[240]: ##### END #####
Jan 22 01:00:41 loragw loragw[240]: 01:00:41  INFO: [TTN] bridge.eu.thethings.network RTT 52
Jan 22 01:00:41 loragw loragw[240]: 01:00:41  INFO: [TTN] send status success for bridge.eu.thethings.network
Jan 22 01:00:53 loragw loragw[240]: 01:00:53  INFO: Disabling GPS mode for concentrator's counter...
Jan 22 01:00:53 loragw loragw[240]: 01:00:53  INFO: host/sx1301 time offset=(1516578208s:159048µs) - drift=-55µs
Jan 22 01:00:53 loragw loragw[240]: 01:00:53  INFO: Enabling GPS mode for concentrator's counter.
Jan 22 01:01:11 loragw loragw[240]: ##### 2018-01-22 00:01:11 GMT #####
Jan 22 01:01:11 loragw loragw[240]: ### [UPSTREAM] ###
Jan 22 01:01:11 loragw loragw[240]: # RF packets received by concentrator: 0
Jan 22 01:01:11 loragw loragw[240]: # CRC_OK: 0.00%, CRC_FAIL: 0.00%, NO_CRC: 0.00%
Jan 22 01:01:11 loragw loragw[240]: # RF packets forwarded: 0 (0 bytes)
Jan 22 01:01:11 loragw loragw[240]: # PUSH_DATA datagrams sent: 0 (0 bytes)
Jan 22 01:01:11 loragw loragw[240]: # PUSH_DATA acknowledged: 0.00%
Jan 22 01:01:11 loragw loragw[240]: ### [DOWNSTREAM] ###
Jan 22 01:01:11 loragw loragw[240]: # PULL_DATA sent: 0 (0.00% acknowledged)
Jan 22 01:01:11 loragw loragw[240]: # PULL_RESP(onse) datagrams received: 0 (0 bytes)
Jan 22 01:01:11 loragw loragw[240]: # RF packets sent to concentrator: 0 (0 bytes)
Jan 22 01:01:11 loragw loragw[240]: # TX errors: 0
Jan 22 01:01:11 loragw loragw[240]: ### BEACON IS DISABLED!
Jan 22 01:01:11 loragw loragw[240]: ### [JIT] ###
Jan 22 01:01:11 loragw loragw[240]: # INFO: JIT queue contains 0 packets.
Jan 22 01:01:11 loragw loragw[240]: # INFO: JIT queue contains 0 beacons.
Jan 22 01:01:11 loragw loragw[240]: ### GPS IS DISABLED!
Jan 22 01:01:11 loragw loragw[240]: ### [PERFORMANCE] ###
Jan 22 01:01:11 loragw loragw[240]: # Upstream radio packet quality: 0.00%.
Jan 22 01:01:11 loragw loragw[240]: # Semtech status report send.
Jan 22 01:01:11 loragw loragw[240]: ##### END #####
Jan 22 01:01:11 loragw loragw[240]: 01:01:11  INFO: [TTN] bridge.eu.thethings.network RTT 53
Jan 22 01:01:11 loragw loragw[240]: 01:01:11  INFO: [TTN] send status success for bridge.eu.thethings.network
Use legacy Packet Forwarder (not needed)
First build it
./build_legacy.sh
If you want to use the legacy packet forwarder, you'll need to change file /opt/loragw/start.sh to replace the last line
./mp_pkt_fwd.sh
by
./poly_pkt_fwd.sh
sudo systemctl stop loragw
sudo systemctl start loragw
Adjust log2ram
if you chose log2ram to reduce SD card write, you need to change some log file rotation to avoid RAM Disk to be full.
For this you need to edit each file in /etc/logrotate.d/, and on each file:
- remove line(s) containing
delaycompress(this avoid uncompressed old log) - change line(s) containing
rotate nby rotate 12 (this this the max log file history) - change line(s) containing
dailybyhourly(rotate log each hour) - change line(s) containing
monthlybydaily(rotate log each day)
In this case we got last 12H with 1 file per hour. Of course, you can adjust these paramaters to feet you need, it's just an example,
file /etc/logrotate.d/rsyslog
/var/log/syslog
{
        rotate 12
        hourly
        missingok
        notifempty
        compress
        postrotate
        invoke-rc.d rsyslog rotate > /dev/null
        endscript
}

/var/log/mail.info
/var/log/mail.warn
/var/log/mail.err
/var/log/mail.log
/var/log/daemon.log
/var/log/kern.log
/var/log/auth.log
/var/log/user.log
/var/log/lpr.log
/var/log/cron.log
/var/log/debug
/var/log/messages
{
        rotate 12
        hourly
        missingok
        notifempty
        compress
        sharedscripts
        postrotate
        invoke-rc.d rsyslog rotate > /dev/null
        endscript
}
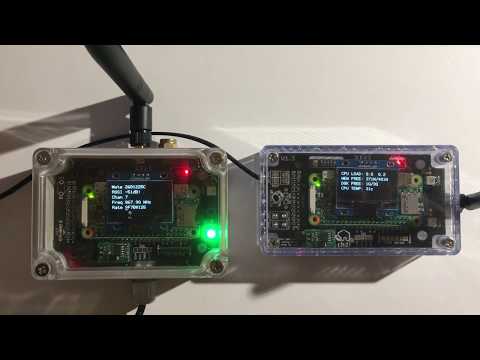
And here is the final result
Click on image to see the video
Add some other features
Here are other feature I use sometime on my gateways:
- Put the whole filesystem in ReadOnly
- Setup PI as a WiFi access point
- Install a nice local LoraWAN Server
- Use a OLED display
