GuiTestSharp Save
An extensible multiplatform framework to test GUIs in WinForms, WPF, GtkSharp and Xamarin.Mac.
dotnet GUI test automation platform
A very simple platform to implement GUI tests on WinForms, WPF, GTK# and Xamarin.Mac applications.
Click on the following images to watch the videos of this system working!
Motivation
This is the automated GUI testing system we use internally to develop Plastic SCM, and we thought it would be a good idea to share it for anyone to benefit from it.
It heavily depends on our own PNUnit, a modification to NUnit to run distributed tests we contributed more than a decade ago.
We develop GUIs for Windows, GNU/Linux, and macOS, and while we used a well-known commercial tool on Windows for GUI automated testing, we didn't have a solution for Linux and macOS. The existing solutions were not cross-platform.
So, we decided to go ahead and implement our own GUI testing system.
The beautiful parts are:
- You can write tests in C#, using the same editors and debuggers you use to write your application. After years of scripting languages without proper debuggers and editors, this was a blessing for us.
- The same test code can actually test applications written for different operating systems and even having different aesthetics and layouts.
- Most solutions based on UI Automation on Windows end up in trouble sooner or later. If you heavily tested GUIs on Windows, you probably faced that at some point the "object inspectors" can't find any object. It might happen only once in a while, or repeatedly. Tests end up being fragile. We removed this with our implementation.
The less beautiful parts are:
- Purists will say you can easily trick these tests to make them something different to actual GUI tests. For example, when a test clicks a button with a
ClickOkButton()call, it all depends on how this method is implemented. If it invokes some GUIbutton.Click()code, then it will be almost as good as actually sending the event to the app. If the implementer wants to fool you, it could be invoking the underlying logic, and then the test would be pointless. More on this in the how does it work section.
How does it work
The PNUnit framework, apart from the pnunit.framework.dll library itself, consists on two applications: agent.exe and launcher.exe. The launcher is responsible of telling the agent which tests should run, and of gathering and reporting the results. The agent is in charge of launching the application being tested, and terminating it if it doesn't exit on its own.
Because the tests need access to the actual application (the entire GUI, and not only the classes that make up your bussiness logic, the tests must run inside the application's context, and not inside the typical NUnit test runner. So, the agent is not only in charge of launching the target application, but of serializing the test data and using the right arguments to pass it to the application.
This way, the application is not entirely test agnostic, as it ends up depending on the testing framework, but this is a small price to pay compared to the benefits.
While your application runs on the GUI's thread (and on any additional thread it might create, for example for I/O bound work), the test runs on another thread, and it manipulates UI elements through Invoke on WinForms, and the like on other platforms. It is the developer's duty to write the code that manipulates the UI as faithful as possible to what the GUI framework would do / behave as with a real user.
How test code looks
The test code is written in C#, taking advantage of the NUnit platform, along with the custom WaitingAssert class.
A typical section of a text looks at follows:
Assert.AreEqual(
    "Goodbye", window.GetItemInListAt(0),
    "The item 0 in the list does not match the expected one.");

Assert.AreEqual(
    "Hello", window.GetItemInListAt(1),
    "The item 1 in the list does not match the expected one.");

window.ChangeText("Hello");

window.ClickRemoveButton();

WaitingAssert.AreEqual(
    "Removing element Hello...",
    window.GetProgressMessage,
    "The progress message does not match the expected one while" +
        "removing 'Hello'.");

WaitingAssert.IsTrue(
    window.AreButtonsEnabled,
    "The window buttons were not re-enabled in a reasonable " +
        "time after removing 'Hello'.");
As you can see, there are very specific interfaces like ChangeText and ClickRemoveButton. This framework is not a general purpose test framework, but something very simple to develop and maintain.
Sample application
We built a sample GUI application to explain how testing works. In fact, we built 3 different ones: WinForms on Windows, GTKSharp on GNU/Linux, and Xamarin.Mac for macOS, but it is extensible to any GUI framework, as long as there are bindings to work with it from C#. You'd only need to adapt the UI specific code of the testing stack.

The sample application is really simple. It consist on a single window that has:
- A text entry.
- Two buttons (
AddandRemove). - A list.
- A progress text at the bottom.
- When the user types text and clicks the
Addbutton, the application launches a background operation. While the operation runs, the application displays a progress text at the bottom describing what is happening under the hood (it is really just aSleepsimulating some CPU bound or I/O). When the operation ends, the text introduced by the user is added to the list in alphabetical order. Then the text input is cleared. - If the user clicks the
Removebutton the text is removed from the list. - If the text entry is empty when the user clicks a button, the progress text at the bottom displays an error message.
- If the new text to add already exists in the list, or if the text to remove can't be found, the application shows an error message on a dialog once the background operation ends.
In short, we simply simulate what a regular GUI application does. You can see the multplatform application under testing bellow:
Windows Forms under Windows 10

Xamarin.Mac under macOS Mojave

GTK# 2 under Ubuntu 18.10

Repository structure
-
/src: the main code of the example.-
/application: the source code of the application.-
/lib: the multiplatform bussiness logic. This library does not have code that depends on any UI framework or that is OS-specific.-
/gui: the GUI code.-
/windows: the Windows GUI application, based on WinForms. -
/linux: the Linux GUI application, based on GTKSharp (GTK+). -
/macos: the macOS GUI application, based on Xamarin.Mac.
-
-
-
/testing: the testing related source code. On this repository there is only GUI testing code, but unit tests would be here too.-
/guitest: the library that contains the tests. -
/guitestinterfaces: the interfaces (and some utility classes) that all of the applications (Windows, macOS & GNU/Linux) need to implement so the tests can interact with them.
-
-
-
-
/lib: the third party libraries (source code or library assemblies).-
/log4net: the logging library used by thepnunitframework. -
/mono: the library that the testing framework needs to identify the specific OS version and hardware platform when running under the Mono Runtime. -
/nunit: the well known NUnit testing framework, in its last 2.x release. -
/pnunit: Códice's contribution to the NUnit framework, stands for Parallel NUnit. It allows you to run tests in parallel both between them and to the application that is being tested. This version is a little bit different to the one you can find in the NUnit 2.6 release, with changes to make GUI testing work. Maybe in the future we'll release it as a standalone library, but for now you can use this version.
-
How to build
You can build the solutions in this repository with Visual Studio, MonoDevelop, MSBuild, or XBuild.
Windows
The Windows application is based on WinForms, so with a standard Visual Studio install you should already have everything you need.
With Visual Studio
- Open
/src/lib/pnunit/pnunit.slnand build it (Ctrl + Shift + Bby default).- This will build the PNUnit framework to
/bin/pnunit, including theagentand thelauncher.
- This will build the PNUnit framework to
- Open
/src/application/gui/windows/windows.slnand build it.- This will build the application and its dependencies to
/bin/application. - It will also build the testing library because it is in the same Visual Studio solution, but it will output to
/bin/pnunit.
- This will build the application and its dependencies to
- Go to
/bin/pnunitin two different terminals and launch the following:-
> agent.exe agent.conf- This launches the PNUnit agent, which will stay idle until the
launcherissues a command.
- This launches the PNUnit agent, which will stay idle until the
-
> launcher.exe wintest.conf- This will launch all of the tests defined in the wintest.conf suite, one after the other. Once all the test are executed, it will print the output and generate a report file in the same directory.
-
With MSBuild
- Make sure
MSBuild.exeis in your%PATH%. It normally isn't. - Execute the following from the root directory of the repository:
-
MSBuild.exe lib/pnunit/pnunit.sln -
MSBuild.exe src/application/gui/windows/windows.sln
-
- Go to
/bin/pnunitin two different terminals and launch the following:-
> agent.exe agent.conf- This launches the PNUnit agent, which will stay idle until the
launcherissues a command.
- This launches the PNUnit agent, which will stay idle until the
-
> launcher.exe wintest.conf- This will launch all of the tests defined in the wintest.conf suite, one after the other. Once all the tests finish, it will print the output and generate a report file in the same directory.
-
Linux
You need to do the following before starting:
- Add the Mono repository for your GNU/Linux distro following the instructions detailed here. We do not recommend relying on the Mono packages on your distro's repositories, as they tend to be old versions.
- Install the following packages.
-
mono-complete -
monodevelop -
gtk-sharp2
-
These instructions work both on a complete GNU/Linux OS environment and on the WSL (Windows Subsystem for Linux). For the later, you will need:
- A X Window Server running on your Windows machine.
- Exporting environment variable
DISPLAY=:0for your session.
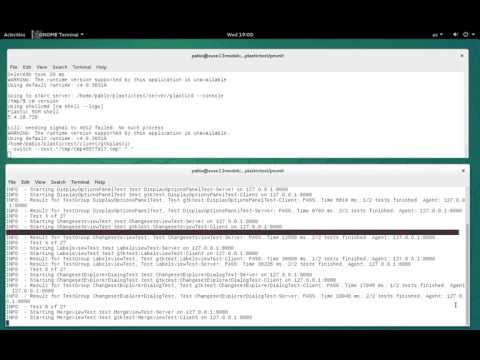
Running Linux's GUI tests on Windows shows how flexible and rock-solid this system is!
With MonoDevelop
- Open
/src/lib/pnunit/pnunit.slnand build it (Ctrl + Shift + Bby default).- This will build the PNUnit framework to
/bin/pnunit, including theagentand thelauncher.
- This will build the PNUnit framework to
- Open
/src/application/gui/windows/windows.slnand build it.- This will build the application and its dependencies to
/bin/application. - It will also build the testing library because it is in the same Visual Studio solution, but it will output to
/bin/pnunit.
- This will build the application and its dependencies to
- Go to
/bin/pnunitin two different terminals and launch the following:-
> agent agent.conf- This launches the PNUnit agent, which will stay idle until the
launcherissues a command.
- This launches the PNUnit agent, which will stay idle until the
-
> launcher wintest.conf- This will launch all of the tests defined in the wintest.conf suite, one after the other. Once all the test are executed, it will print the output and generate a report file in the same directory.
-
You might need to give execution permissions to both the agent and the launcher scripts. To do so:
chmod u+x agent
chmod u+x launcher
With msbuild
- Make sure
msbuild.exeis in your$PATH. It should be after installingmono-completeormonodevelop. It is now the preferred tool for compiling C# code, replacingxbuild. - Execute the following from the root directory of the repository:
-
msbuild lib/pnunit/pnunit.sln -
msbuild src/application/gui/windows/windows.sln
-
- Go to
/bin/pnunitin two different terminals and launch the following:-
> agent agent.conf- This launches the PNUnit agent, which will stay idle until the
launcherissues a command.
- This launches the PNUnit agent, which will stay idle until the
-
> launcher wintest.conf- This will launch all of the tests defined in the wintest.conf suite, one after the other. Once all the tests finish, it will print the output and generate a report file in the same directory.
-
You might need to give execution permissions to both the agent and the launcher scripts. To do so:
chmod u+x agent
chmod u+x launcher
Note: if you are using Windows Subsystem for Linux to test the GNU/Linux example using Windows (obscure scenario, but you might want to give it a try!), make sure you don't have the Windows' MSBuild executable in your Windows' PATH. Because you can execute Windows binaries from the WSL, if the Windows variant of MSBuild is in your PATH, when you try to compile the application using Mono's MSBuild, it will use some of the Windows' executables. The compile process will succeed, but the application won't launch.
macOS
You need to do the following before starting, if you don't have already done it in the past:
- Download Visual Studio installer (Community is OK) from it's official site.
- Run the installer. Install XCode from the App Store when asked to.
- If opened, close Visual Studio. Then open XCode, so it can install missing components required by Xamarin.Mac.
- Re-launch Visual Studio.
With Visual Studio for macOS
- Open
/src/lib/pnunit/pnunit.slnand build it (cmd + Shift + Bby default).- This will build the PNUnit framework to
/bin/pnunit, including theagentand thelauncher.
- This will build the PNUnit framework to
- Open
/src/application/gui/macos/macos.slnand build it.- This will build the application (
macos.app) and its dependencies to/bin/application. - It will also build the testing library because it is in the same Visual Studio solution, but it will output to
/bin/pnunit.
- This will build the application (
- Go to
/bin/pnunitin two different terminals and launch the following:-
> mono agent.exe agent.conf- This launches the PNUnit agent, which will stay idle until the
launcherissues a command.
- This launches the PNUnit agent, which will stay idle until the
-
> mono launcher.exe mactest.conf- This will launch all of the tests defined in the wintest.conf suite, one after the other. Once all the test are executed, it will print the output and generate a report file in the same directory.
-
