Golty Save
A selfhostable service for automatically downloading YouTube channels, playlists and videos. It's like Sonarr, but for YouTube.
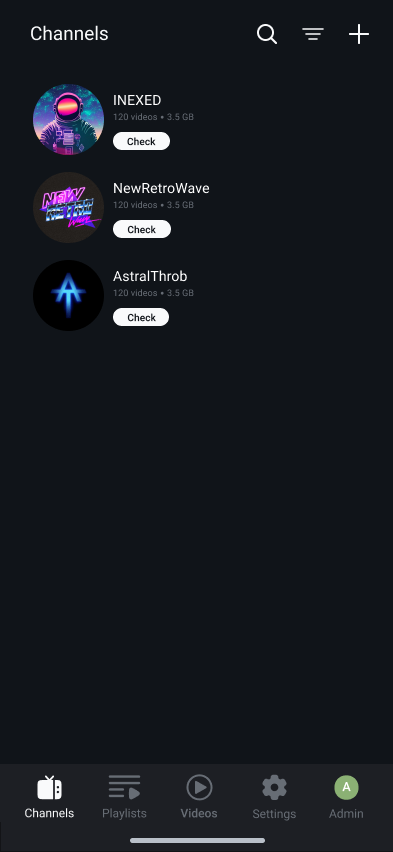
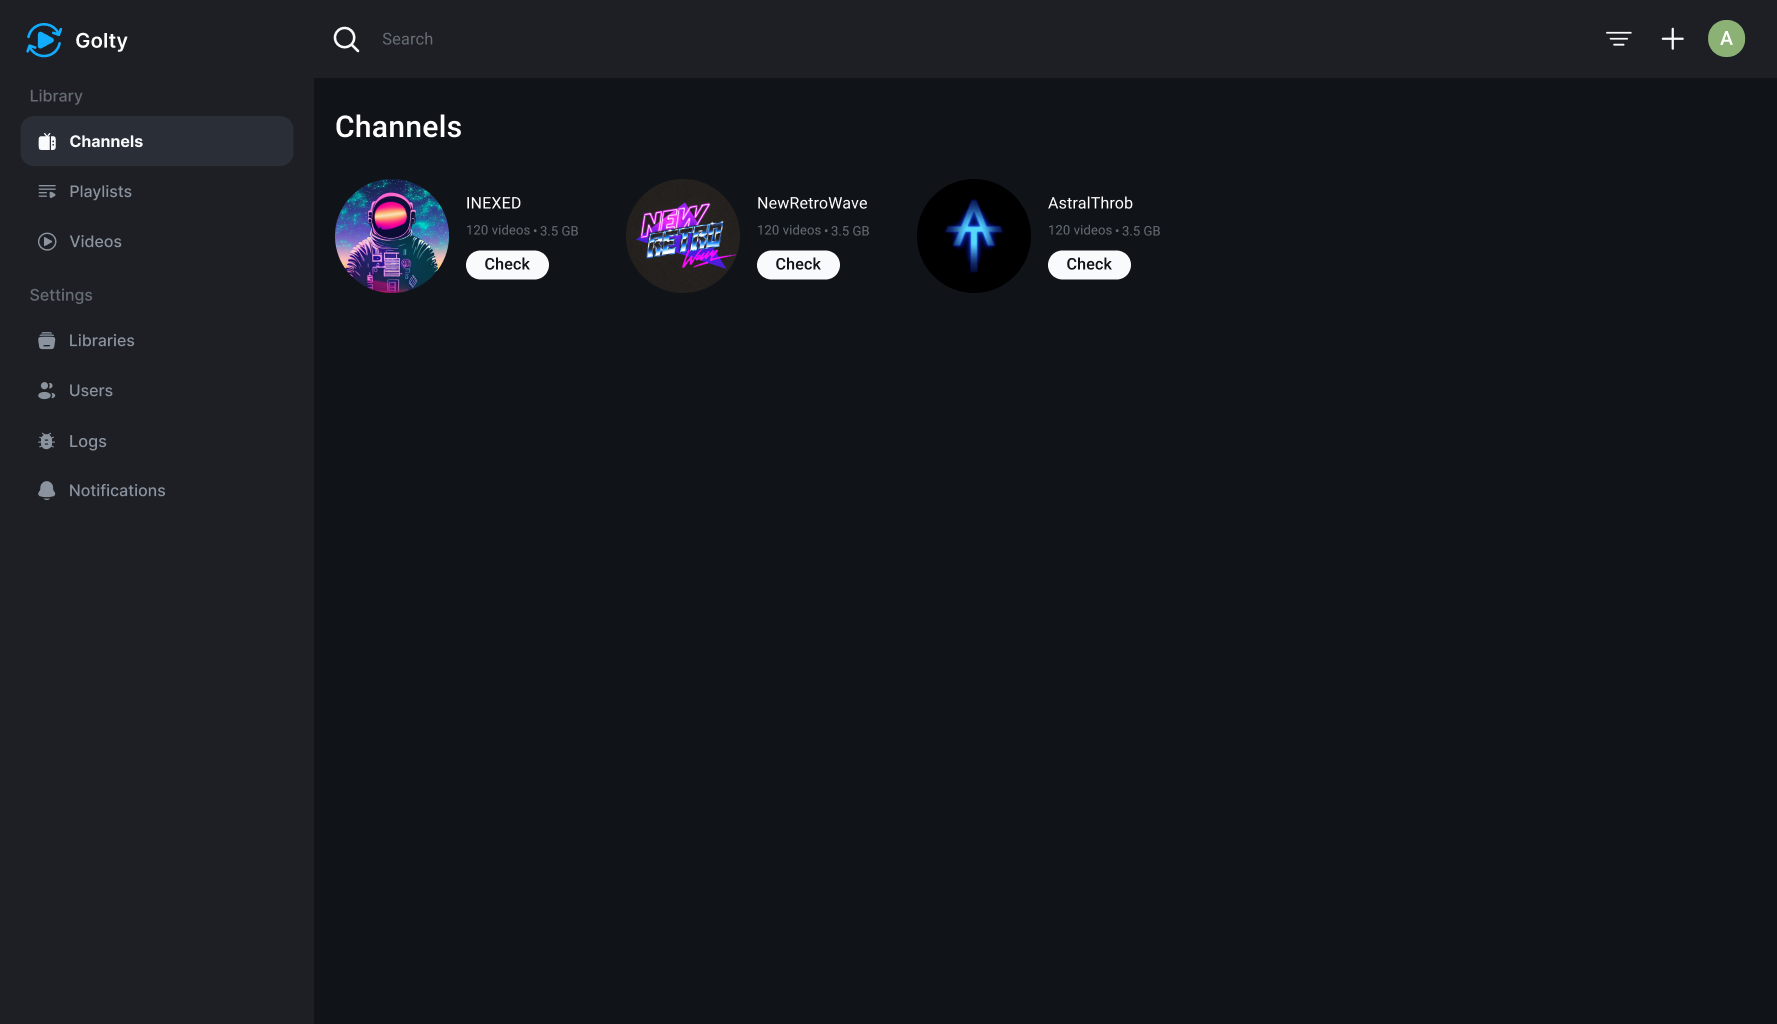
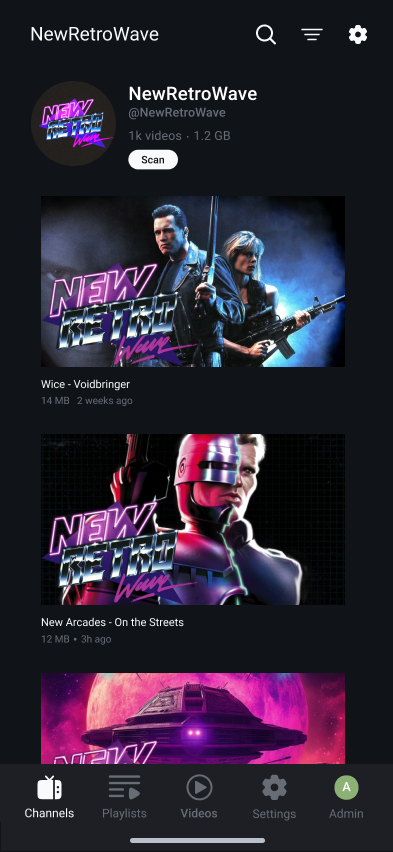
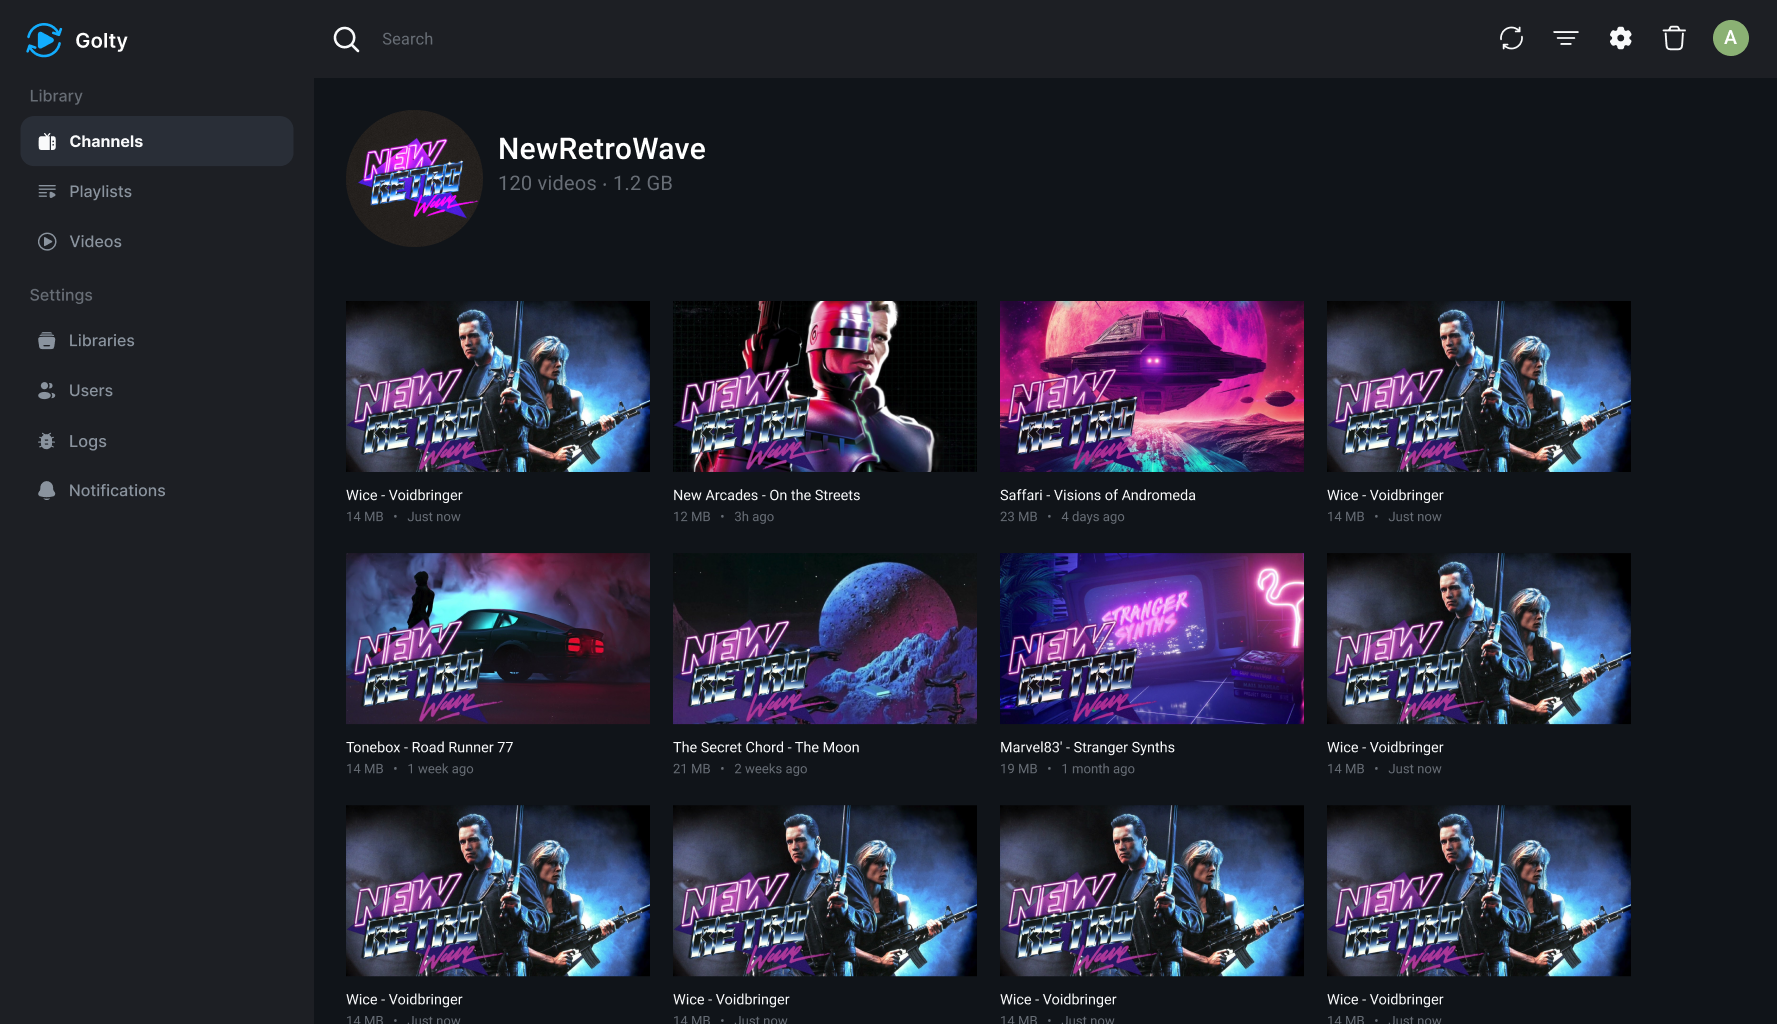
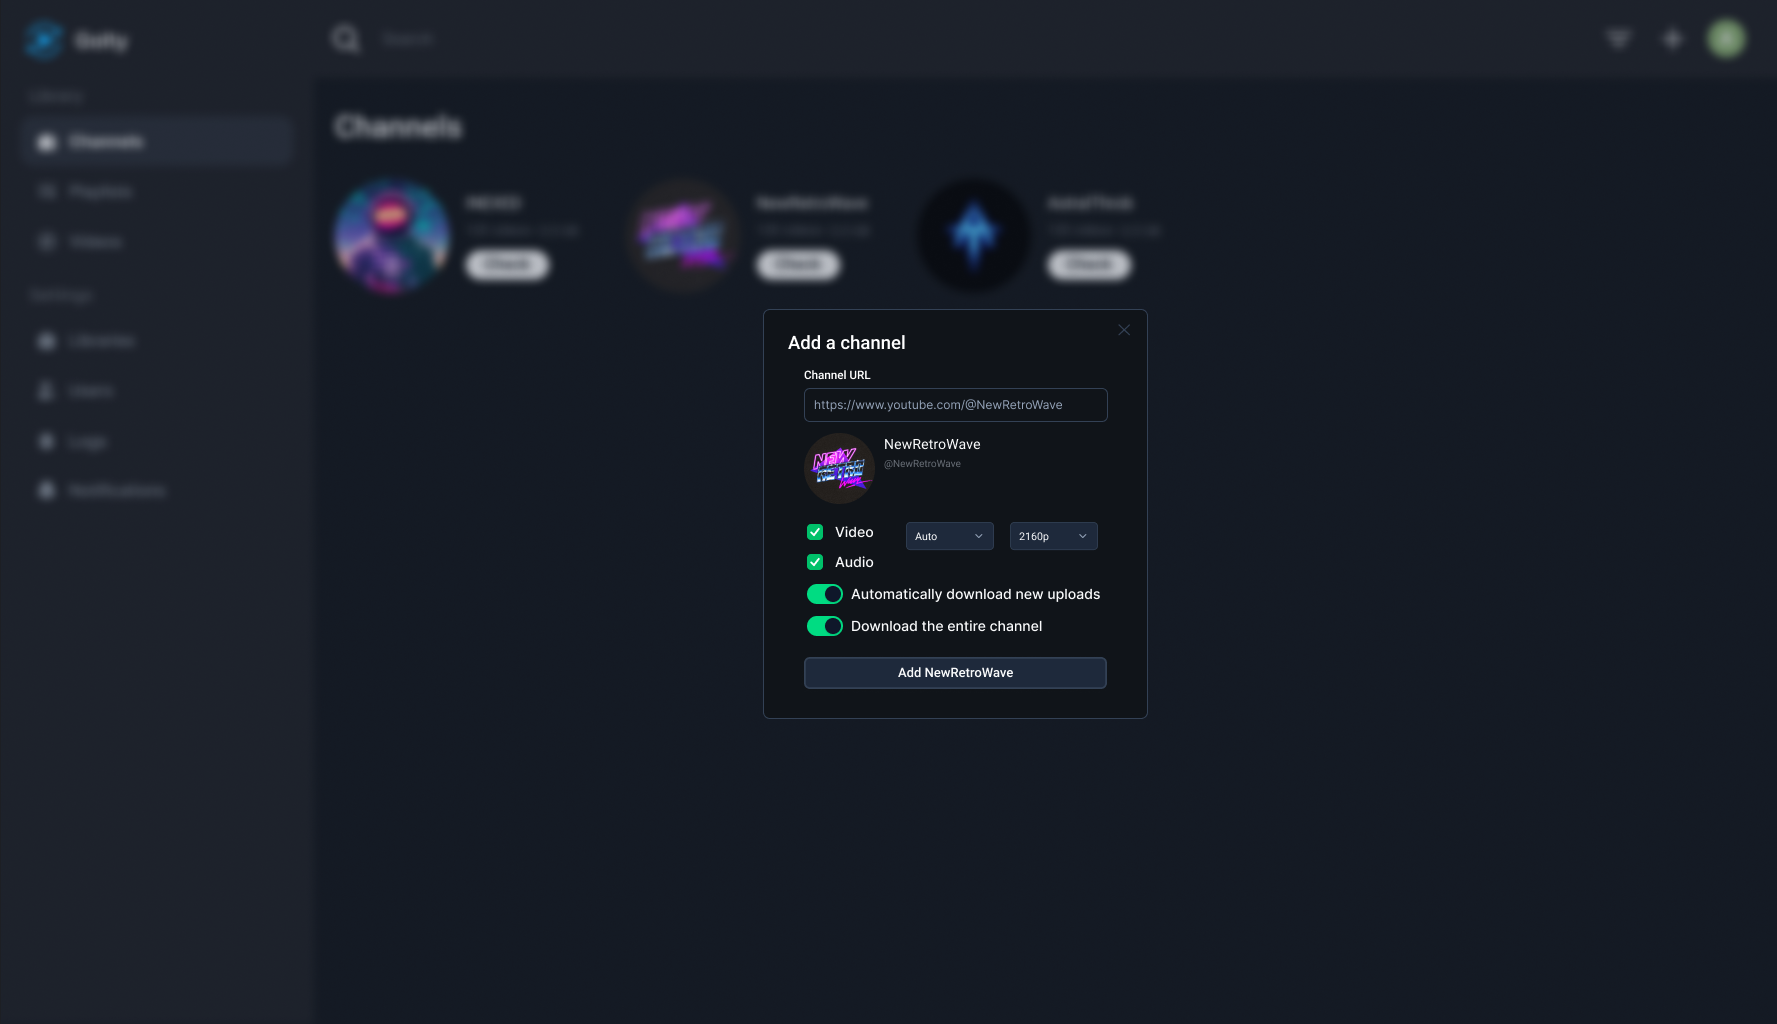
Golty V2 Sneak Peek
Development of Golty v2 has officially started (took me long enough), here are a couple of previews of the new design:
Channels Tab
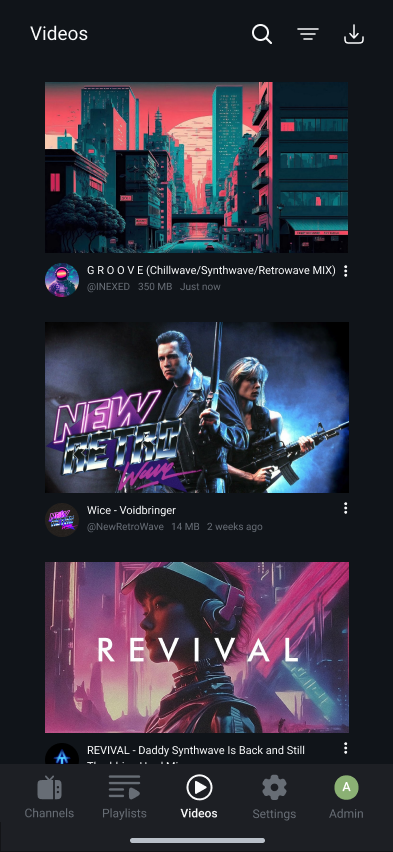
Channel Videos Tab
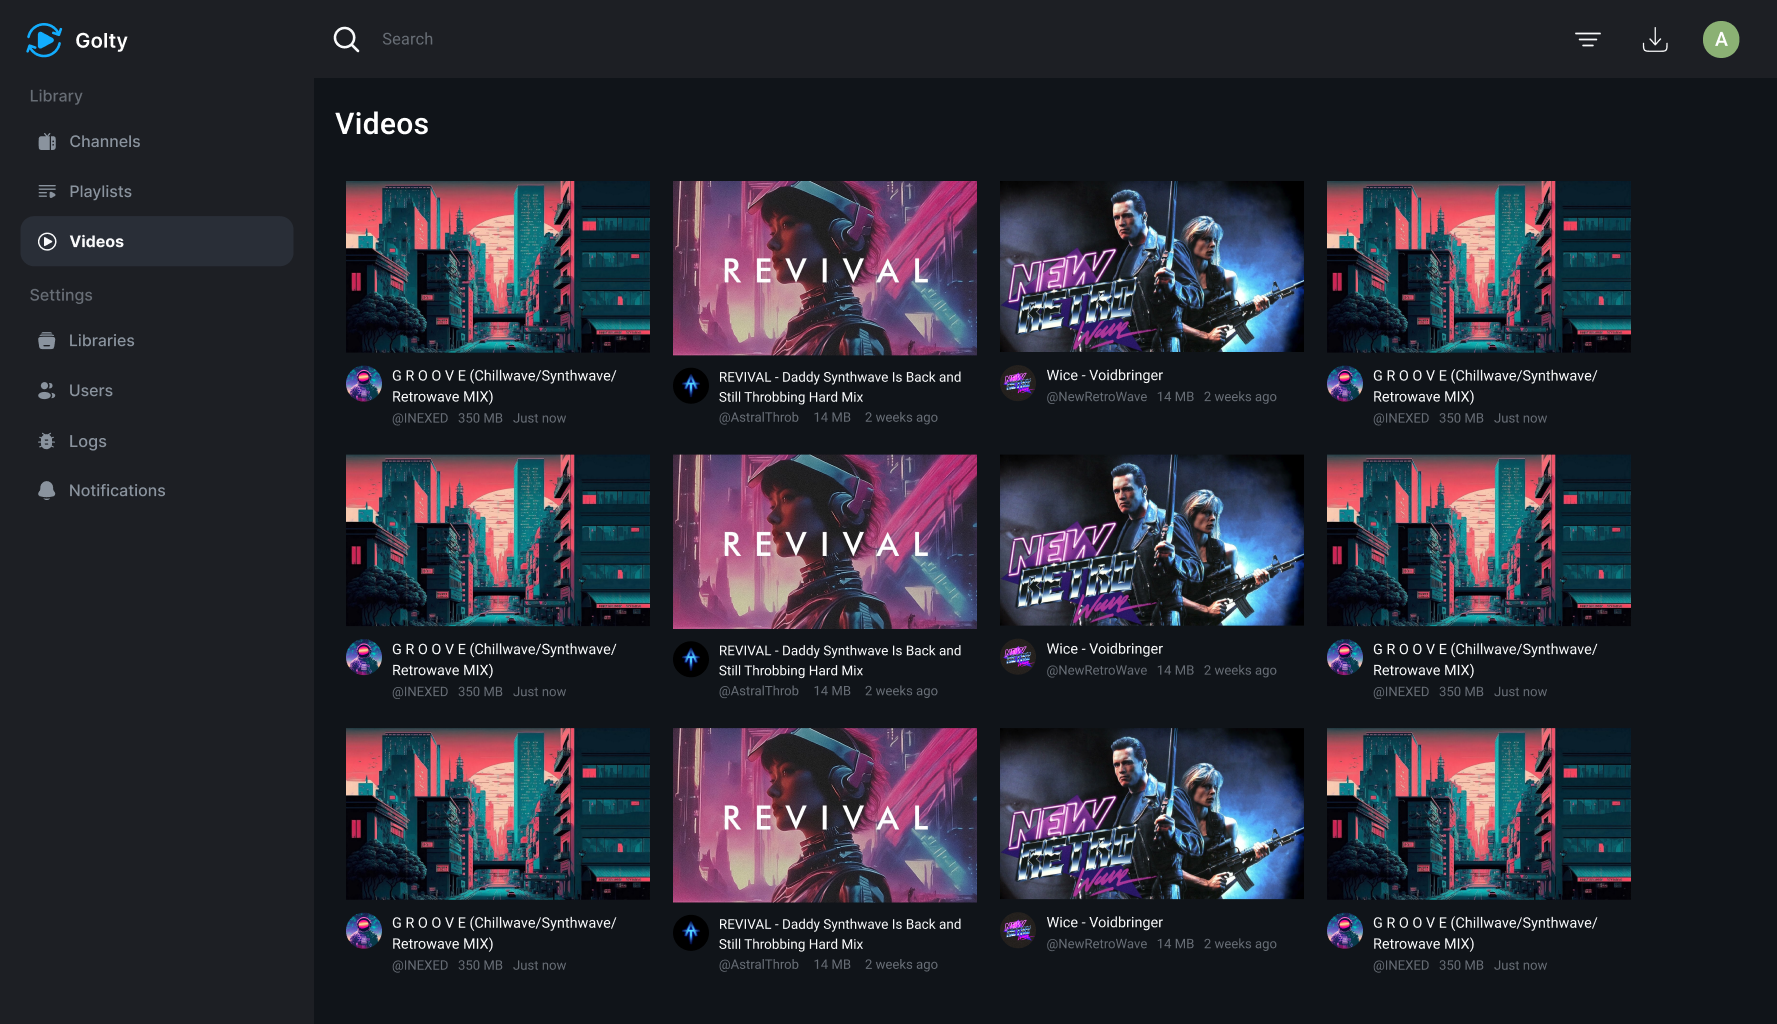
Videos Tab
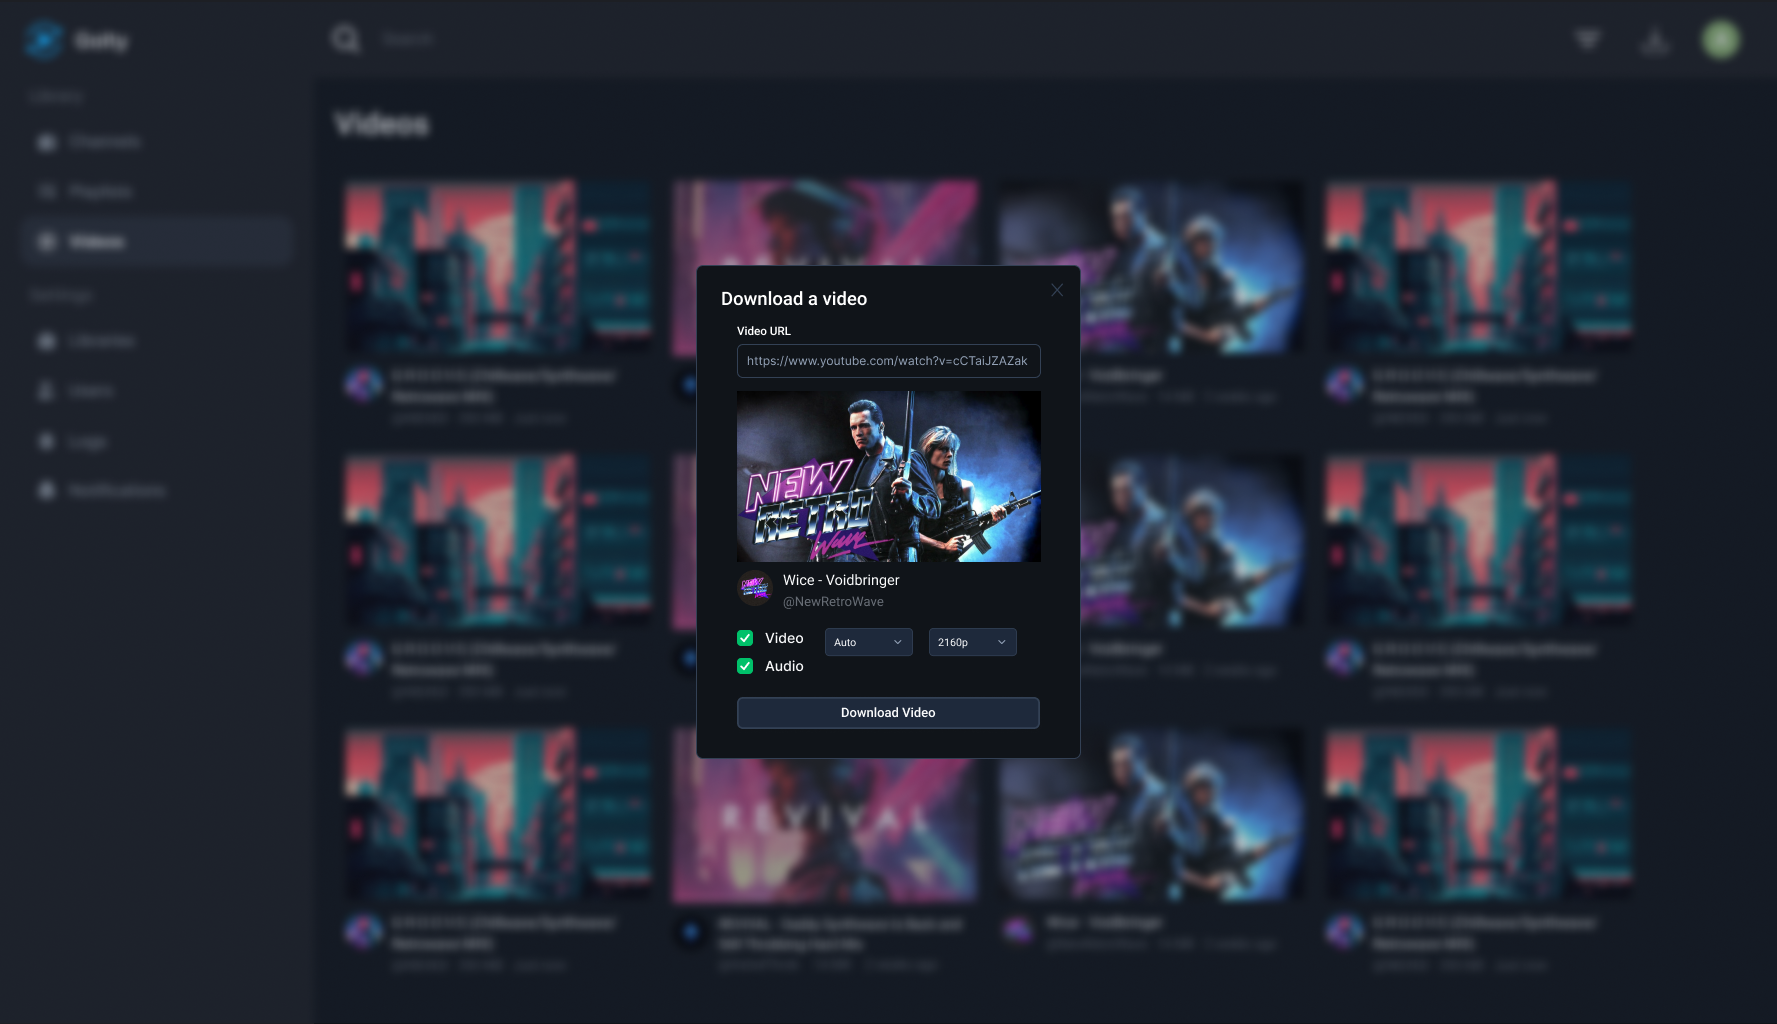
Download Video Form

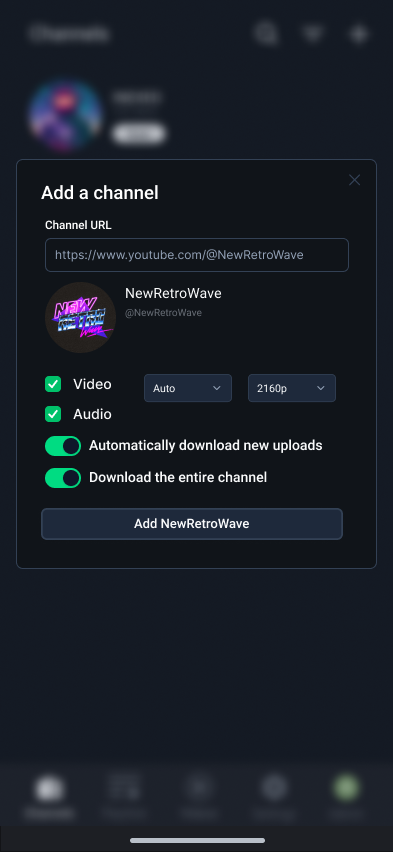
Add Channel Form
⚠️ Warning
The documentation you see below is now completely outdated and cannot be used. The documentation will be updated slowly as I'm working on Golty v2.
Golty
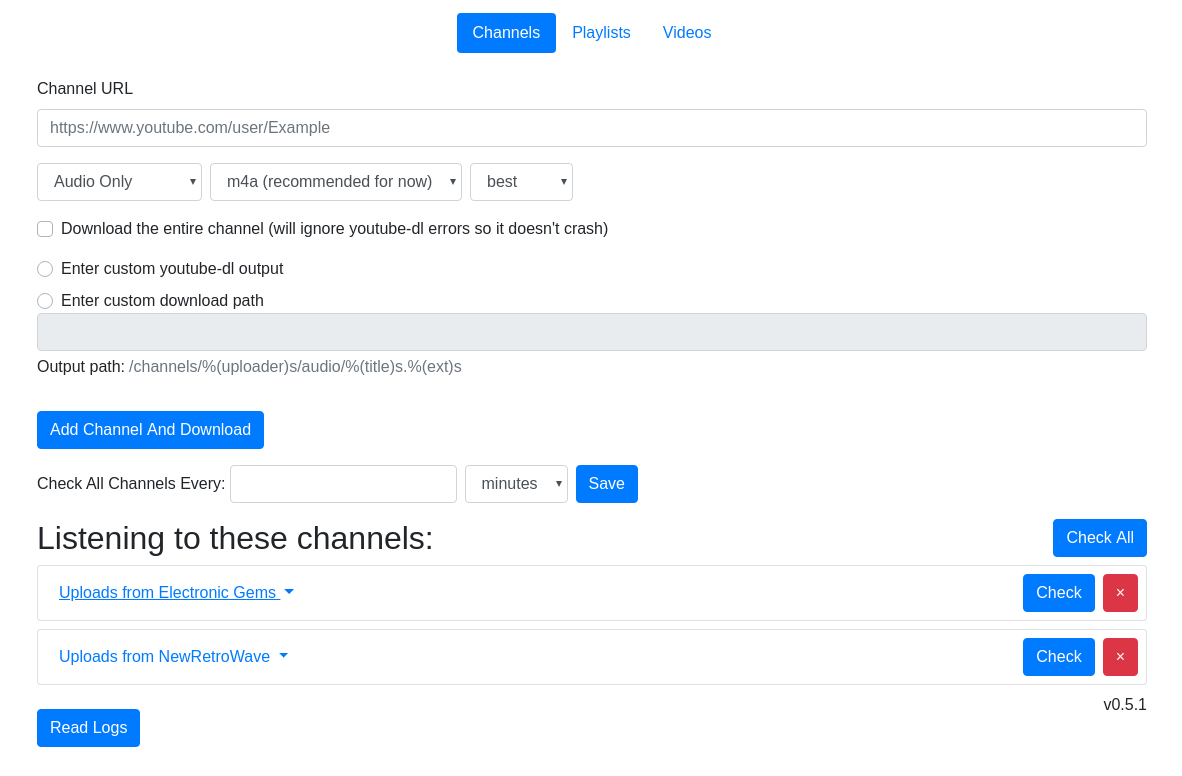
Golty makes it easy for you to automatically download videos from as many YouTube channels as you'd like.
Features
-
Clean, very simple design - The dashboard only contains an input form where you can add a channel and configure checking intervals and what to download, and a little list of all your channels where you can delete them or tell the server to check for new uploads immediately.
-
Everything is on a single page - You can view and control everything from just one page.
-
Makes downloading videos/audio automatically very easy - Just paste a link of a channel you want to download, set a checking interval and that's it, the server will keep checking for new uploads and download if necessary.
Getting Started (without Docker)
Prerequisites
- Windows, Mac or Linux - Only tested on Linux, but should work on Mac and Windows
- Go, version 1.13.4 or newer
- youtube-dl
Setting Up (Tested on Linux, but should work on Mac. Windows - not sure)
git clone https://github.com/XiovV/go-auto-yt.git
cd go-auto-yt
go build
./go-auto-yt
You can now go to http://localhost:8080 and start using Golty.
Getting Started (with Docker)
Prerequisites
- Docker - Built on 19.03.3
- Docker Compose - Build on 1.24.0
Configuring The Container
The docker-compose.yml file in the repository can be used as a guide for setting up your own containers. The only thing that needs to be checked is the volumes section. If you keep the default, you need to ensure that there are downloads and config folders in the same directory as the docker-compose.yml file. Otherwise, feel free to modify those mapping to your own local directories. Docker Bind Mount Docs
volumes:
    # Choose ONE of these
      - ./downloads:/app/downloads # local folder mapping
    #  - downloads:/app/downloads # docker volume mapping
    # And ONE of these
      - ./config:/app/config # local folder mapping
    #  - config:/app/config # docker volume mapping
If you wish to use Docker volume mappings, comment out the local folder lines and uncomment the docker volume lines. You must also uncomment the root volumes section at the bottom of the sample YAML file. This will instruct docker to create the volumes.
volumes:
  downloads:
  config:
You can view these volumes with the docker volumes command and view further information with docker volume inspect VOLUME_NAME. Further reading: Docker Volume Docs
The port can also be changed by modifying the ports: item. By default, this is set to 8080 but if you wanted to change it to port 9000, for example, modify the docker-compose.yml to reflect the below. This follows the standard docker container networking model of host:container.
ports:
  - 9000:8080
The container runs with PID/GID of 1000 and UMASK of 022 by default. This can be changed by passing environment variables to the container like so:
environment:
  - PUID=1001
  - PGID=1001
  - UMASK_SET=0044
Running The Container
Once the configuration is complete, docker-compose up -d will pull and run the container for you in the background. The container will now be accessible from http://localhost:8080 (or whichever port you've modified it to) on that machine. Using docker logs will show the container logs for troubleshooting.
Reverse Proxies
If you'd like to have multiple services run over a single port, Reverse Proxies can be used with the docker container. Popular options are Traefik, Caddy and NGINX.
Traefik
Traefik is a popular option as a reverse proxy because it has official docker support and a high level of configurability. A docker-compose example for a Traefik v2 container itself is below:
services:
  traefik:
    container_name: traefik
    image: traefik:latest
    command:
      # Entrypoints
      - --entrypoints.http.address=:80
      - --entrypoints.https.address=:443
      # Provider Info
      - --providers.docker
      # Certificate Resolver Info (If you need SSL Certs)
      - [email protected]
      - --certificatesresolvers.le.acme.storage=/letsencrypt/acme.json
      - --certificatesresolvers.le.acme.tlschallenge=true
    labels:
      # The labels in this section are for redirecting port 80 to port 443
      # If you're using this internally or otherwise don't need HTTPS, remove these
      # Middleware Redirect
      - "traefik.http.middlewares.https-redirect.redirectscheme.scheme=https"
      # Global HTTP -> HTTPS Redirect
      - "traefik.http.routers.redirs.rule=hostregexp(`{host:.+}`)"
      - "traefik.http.routers.redirs.entrypoints=http"
      - "traefik.http.routers.redirs.middlewares=https-redirect"
    ports:
      - "80:80"
      - "443:443"
    volumes:
        - "/var/run/docker.sock:/var/run/docker.sock"
        - "certs:/letsencrypt"
    restart: unless-stopped
    network_mode: "bridge"
volumes:
  certs:
Using the above config, make below additions to the go-auto-yt docker-compose.yml:
labels:
      - "traefik.enable=true"
      # Using HTTPS here as best practise, replace with http if necessary
      - "traefik.http.routers.go-auto-yt.entrypoints=https"
      - "traefik.http.routers.go-auto-yt.rule=Host(`your.domain.here`)"
      # If you want auto SSL certificate generation
      - "traefik.http.routers.go-auto-yt.tls.certresolver=le"
More advanced configuration options can be found in the docs.
Caddy
Caddy is still at v1 (v2 is currently in beta, use at your own risk) and at this time doesn't have an official docker image. Community offerings exist so if you're set on using Caddy then take a look at some of those. There's an example of one in use below. You can also set a custom Caddyfile if you do some reading on the topic.
services:
  caddy:
    container_name: caddy
    image: lucaslorentz/caddy-docker-proxy
    restart: unless-stopped
    ports:
      - "80:80"
      - "443:443"
    command: -email [email protected] -agree=true
    volumes:
      - /var/run/docker.sock:/var/run/docker.sock
      - caddy:/root/.caddy
    network_mode: "bridge"

volumes:
  caddy:
Add the following labels to your go-auto-yt docker-compose.yml to get the Caddy container to pick them up and proxy requests. If you need advanced features (custom headers, etc), check the README of whichever solution you're using. The one above can be found here.
labels:
      - caddy.address=your.domain.here
      - caddy.targetport=8080
      # If you require transparent proxying
      - caddy.proxy.transparent=
NGINX
Using NGINX as a reverse proxy has a number of different implementations. Official documentation lives here. Jwilder's docker container is a popular choice for a containerised version. NGINX doesn't automatically fetch SSL certificates for you like the other solutions so if you need that, consider an additional service such as this one. An example of using the two together can be found here.
services:
  proxy:
    container_name: proxy
    image: jwilder/nginx-proxy
    restart: unless-stopped
    ports:
      - 80:80
      - 443:443
    environment:
      - DEFAULT_HOST=proxy.local
    volumes:
      - conf:/etc/nginx/conf.d
      - vhost:/etc/nginx/vhost.d
      - html:/usr/share/nginx/html
      - dhparam:/etc/nginx/dhparam
      - /var/run/docker.sock:/tmp/docker.sock:ro
    network_mode: "bridge"

volumes:
  certs:
  conf:
  vhost:
  html:
  dhparam:
Add the below environemnt variables to your go-auto-yt docker-compose.yml file to have them proxied by the container with the above config:
environment:
  - VIRTUAL_HOST=your.domain.here
  - VURTUAL_PORT=8080
  # If you need SSL and have used JrCs's solution linked above, add the below
  - LETSENCRYPT_HOST=your.domain.here
  - [email protected]
Roadmap
- Login screen
- Ability to change channel/playlist preferences
- Custom video resolution selection
- Notifications when a new upload is detected
- Specify after what amount of time to automatically delete videos
- Support more file extensions
