GCC CL Save
GCC dataset Collector and Labeler (GCC CL) [CVPR2019]
GCC-CL
GCC-CL(GCC dataset Collector and Labeler) is a tool for generating synethic crowd image datasets. It consists of two parts, collector and labeler. The former is used to generate crowd image information; the latter produce input and output file through those information for crowd count models.
Demonstration
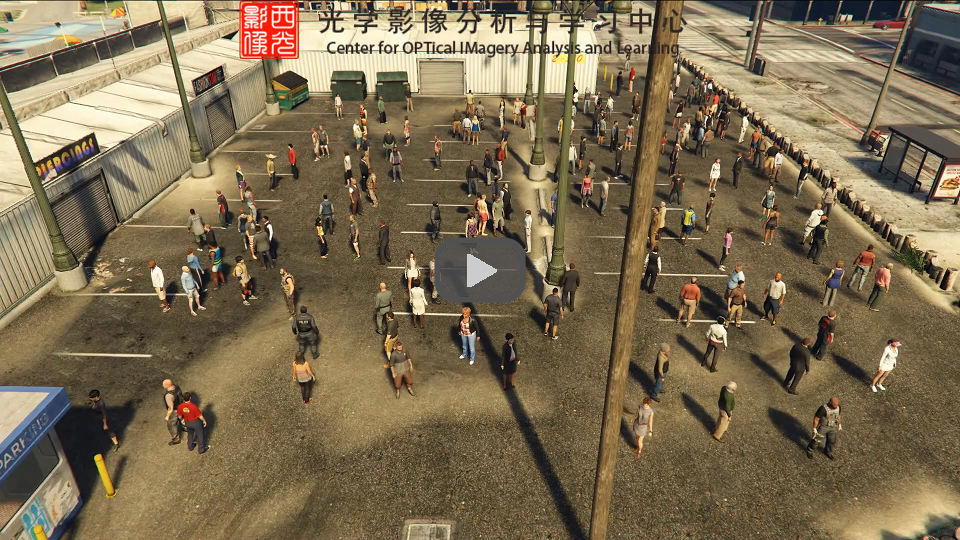
GCC-Collector
GCC-Collector is a tool to generate crowd image and head points in GTA V. It is a custom plugin running along with GTAV, written in C++.
Attention!!! All mods must be used in the offline version of GTA V.
Request
Compilation
- Navigate to GCC-Collector directory, use Visual Studio to open the project
GCC-Collector.sln. - Open the project (GCC-Collector) property pages,
General/Windos SDK Version, select the latest win10 SDK existed in your computer. - Install
minhookandeigenusing NuGet. - Make sure Configution is release, Platform is x64, and then use hot key
ctrl + shift + Bto compile the project. As a result, asi fileGCC-Collector.asiwill be generated in /GCC-CL/GCC-Collector/x64/Release
Installation
- Following Script Hook V installation steps, copy
ScriptHookV.dll,dinput8.dlland compiledGCC-Collector.asito the game's root folder (where GTA5.exe is located); - Use this mod(No Chromatic aberration & Lens distortion) to avoid chromatic aberration and lens distortion;
- Compile or directly use the compiled plugin-in
unlimitedLife.asi,noVehicle.asi. Just copy these two asi to the games's root folder.
unlimitedLife.asimakes sure the player undead.noVehicle.asiis optional. When you are creating some crowd images in the street, this plugin-in helps you avoid accidents caused by vehicles entering the scene. And it also set the number of pedestrians created by game scenario close to zero.
How to work
To create a series of crowd images in one scene, You should follow the steps below:
- download GCC-COllector-Tool and put
SceneDirectorAnim.txtin the game's root folder. - Create a directory named
datain the game's root folder. - Open GTA V in the offline version.
- Control your role in GTAV go to the scene where you want use it as the background of the crowd images which would be generated.
- Press
F9to start a scene script; - Press
F10to adjust the camera. useW, A, S, Dto move the camera forward, left, backward and right, mouse button(left or right button both works) to move up or down,shift/ctrlto speed up or slow down, and+/-to adjust the field of view. When the camera has the desired angle, pressF10again to stop adjust camera and record camera location information automatically. - Press
F11to start drawing the crowd generation area. Use the method of connecting multiple points to form a polygon by moving your game character in the scene. PressIto set a polygon vertex at current position. PressF11again to end the drawing. The program automatically connects the points in a sequence set by the user. In the process of setting the vertices, you can pressTabto move the focus to a specific vertex, and then you can reset that point. During setting the vertices, you can pressF10to enter the camera view to observe the vertices or modify the camera settings. PressF10again to return to set vertices. (Note that it will be better to set a convex polygon area, do not let the sides of the polygon cross.) Following the guide to readjust the camera, and other three cameras (from four different angle). - At last, you should confirm how many pedestrians you want to generate in the scene. Press
F12and follow the guide in the game, you will know how to do it. - Now one scene has been created and saved, press
F5to go back to original state, and do above steps(except step 1) again to recorded another scene.
After a series of scene have been created. restart the game, after the opening animation
- colse the minimap if it is shown in the lower left corner of screen, or generating segement maps do not work well, as issue#7 demonstrated;
- press
Lto launch the GCC-Collector to generate crowd with recorded.information - press 'F5' if you want to leave the process and go back to normal. The process would end after one-round of collecting.(Not immediately)
GCC-Labeler
GCC-Labeler is written in Python3. It needs the following Python libraries:
- scipy
- numpy
- matplotlib
- PIL
You can install these libraries using pip.
main.py is the entrance of the project. Line 22 and 23 define the source path and the target path.
source_dir = 'source'
target_dir = 'target'
Source path is the path where the file you generated using GCC-Collector is located. The target path is used to specify where to store the final produced image files and the annotation files. Change two paths according to your actual situation. Just run python main.py, the final crowd count images and labels will be generated in target_dir.
For example, the source directory(the data folder we created in GCC-Collector) like this:
source/
`-- part_11_2
    |-- 1534540881
    |   |-- part_0.raw
    |   |-- part_0_0.bmp
    |   |-- part_0_1.bmp
    |   |-- part_180.raw
    |   |-- part_180_0.bmp
    |   |-- part_180_1.bmp
    |   |-- part_360.raw
    |   |-- part_360_0.bmp
    |   |-- part_360_1.bmp
    |   `-- pedInfo.xml
    |-- 1534575913
    |   |-- part_0.raw
    |   |-- part_0_0.bmp
    |   |-- part_0_1.bmp
    |   |-- part_180.raw
    |   |-- part_180_0.bmp
    |   |-- part_180_1.bmp
    |   |-- part_360.raw
    |   |-- part_360_0.bmp
    |   |-- part_360_1.bmp
    |   `-- pedInfo.xml
    |-- Zheight.log
    |-- areaInfo.log
    |-- eyeInfo.log
    `-- levelInfo.log

3 directories, 24 files
After we run the main.py, we can get the target directory like this:
target/
`-- scene_11_2
    |-- jpgs
    |   |-- 1534540881.jpg
    |   `-- 1534575913.jpg
    |-- jsons
    |   |-- 1534540881.json
    |   `-- 1534575913.json
    |-- mats
    |   |-- 1534540881.mat
    |   `-- 1534575913.mat
    |-- pngs
    |   |-- 1534540881.png
    |   `-- 1534575913.png
    |-- segs
    |   |-- 1534540881.raw
    |   `-- 1534575913.raw
    `-- vis
        |-- 1534540881.jpg
        `-- 1534575913.jpg

7 directories, 12 files
Acknowledgments
Some code borrows from gtav-mod-scene-director and GTAVisionExport. The former gave us so many examples for how to use these functions in Script Hook V. The latter inspired us to extract crowd mask.
Citation
If you find this project useful for your research, please cite:
@inproceedings{wang2019learning,
  title={Learning from Synthetic Data for Crowd Counting in the Wild},
  author={Wang, Qi and Gao, Junyu and Lin, Wei and Yuan, Yuan},
  booktitle={Proceedings of IEEE Conference on Computer Vision and Pattern Recognition (CVPR)},
  pages={8198--8207},
  year={2019}
}
