ESP8266 Power Monitor Save
An Arduino sketch to connect an INA-219 module to an ESP dev board and measure Voltage, Current, Power, Energy Consumption and Costs via the Blynk mobile app.
ESP8266-Power-Monitor
An Arduino sketch to connect an INA219 module to an ESP Dev Board and measure Voltage, Current, Power, Energy Consumption and Costs via the Blynk mobile app.
Official Blynk Community forum thread: http://community.blynk.cc/t/power-monitor-ina219-blynk/10297
Installation
Wifi Credentials
Create a new folder in your library dir (arduino\libraries\wifi_credentials) called 'wifi_credentials' and create a new file called 'wifi_credentials.h' and copy the example below:
/*
   Wifi Credentials
*/
#ifndef WIFI_CREDS_H
#define WIFI_CREDS_H
#define WIFI_SSID               "xxxxxxxxxxxxxxxxxxxxxxxxxxxxxxxx"
#define WIFI_PASS               "xxxxxxxxxxxxxxxxxxxxxxxxxxxxxxxx"
#endif
Replace "xxxxxxx" with your own Wifi network credentials.
Hardware
- INA219
- ESP8266 (WeMos/NodeMCU Dev Board)
Diagrams to come...
Software
- Download and install the Blynk Mobile App for iOS or Android.
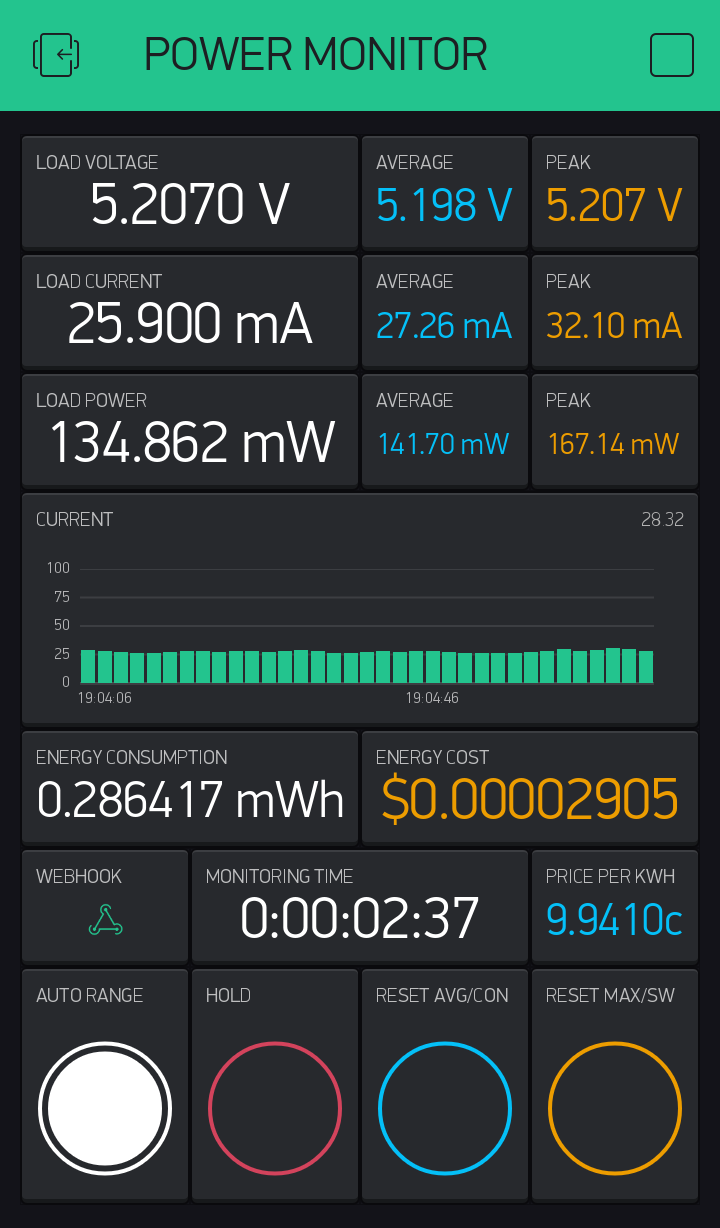
- Scan the QR code at the bottom of this page to clone the screenshot below, or create a new project yourself and manually arrange and setup the widgets.
- Email yourself the Auth code.
- Download this repo and copy the files in to your sketches directory. Open the sketch in Arduino IDE.
- Go to the settings.h tab. This is where all the customisable settings are. You should be able to change almost everything from there before compiling.
Settings.h
- Replace AUTH with your own Auth code.
#define AUTH "xxxxxxxxxxxxxxxxxxxxxxxxxxxx"
- If you are using Over the Air updates (Optional) then just make sure the following line is active as well as setting a Hostname.
#define OTA_UPDATES
#define OTA_HOSTNAME    "POWER-MONITOR"
- If you are using the Blynk Cloud server then comment out the line below:
//#define USE_LOCAL_SERVER
- Otherwise enter your local server IP address below:
#define SERVER IPAddress(192, 168, 1, 2)
- Enter your fixed energy price per kWh in cents or enter the address of the API where you can get the latest price. Comment out or delete which ever you don't use.
#define FIXED_ENERGY_PRICE     9.934
//#define ENERGY_API           "http://192.168.1.2:3000/"
- You can define the average sample depth (in seconds) for each type of measurment.
- Lower = Fast but less accurate.
- Higher = Slow but accurate.
- 5-10 is a good range.
#define AVG_DEPTH_VOLTAGE           5
#define AVG_DEPTH_CURRENT           5
#define AVG_DEPTH_POWER             5
Upload
- Compile and upload to your sktech to your WeMos or NodeMcu style ESP8266 as you would on any other sketch via USB.
- If you are using Over The Air Updates, then after your first upload, you must disconnect power (USB in this example), then connect it again! Once it boots up again you will then see it in your IDE > Ports menu. If you do not power cycle the ESP, you will face issues uploading your first sketch.
- Run Blynk Mobile App and open your project. Press the Play icon in the top corner to start the project.
- If all has been done correctly, you should at least see the stopwatch counting. If it isn't then you need to troubleshoot.
Troubleshooting
If you have any technical questions, reply to one of my posts in the support forums with your question. I will usually reply within a day.
http://community.blynk.cc/t/power-monitor-ina219-blynk/10297
Gallery
- QR Code to Clone Project

