Dream Textures Versions Save
Stable Diffusion built-in to Blender
0.3.1
6 months agoThis release fixes bugs found in the initial release of v0.3.0.
For a full list of new features in this major version, see the release notes for v0.3.0.
Choose Your Installation
Several versions are available. Find the one that will work for you.
Windows
NVIDIA GPU
-
Dream Textures for Windows (CUDA) - Local generation with NVIDIA CUDA
- Due to file size limits on GitHub, the add-on ZIP file is contained in a 7-Zip archive.
- Install 7-Zip, right click on the downloaded
dream_textures-windows-cuda.7zarchive, select "7-Zip" > "Extract Here" to get thedream_textures-windows-cuda.zipfile. - In Blender preferences open "Add-ons" > "Install...", then choose the
dream_textures-windows-cuda.zipfile.
Note If you get the error
ModuleNotFoundError: No module named '...', you will need to copy the files into Blender manually:
- Delete the dream textures folder here:
C:\Users\YOUR_USER\AppData\Roaming\Blender Foundation\Blender\3.6\scripts\addons\dream_textures- Manually unzip the add-on folder to that same path. After doing that there should be a file
__init__.pyinC:\Users\YOUR_USER\AppData\Roaming\Blender Foundation\Blender\3.6\scripts\addons\dream_textures\__init__.py- Restart Blender
AMD GPU
- Dream Textures for Windows (DirectML) - Local generation with DirectX 12
macOS
Apple Silicon (M1/M2)
- Dream Textures for Apple Silicon - Local generation for Apple Silicon Macs
Intel
Dream Textures is not currently available for Intel Macs.
Linux
Installation must be completed manually. Follow the instructions to install manually for more details.
Blender Market
You can optionally purchase it for a small fee on Blender Market.
The version on Blender Market is identical to the free download available here. It is simply a way to support my work on this tool.
Setup
After installing the appropriate add-on ZIP file, enable the add-on and expand its preferences. There you will find further instructions for setup.
See the setup guide for more detailed instructions.
What's Changed
- Support seamless for latest diffusers by @carson-katri in https://github.com/carson-katri/dream-textures/pull/725
- Fix Generating from Opened Blend File by @NullSenseStudio in https://github.com/carson-katri/dream-textures/pull/730
- Locate Principled BSDF by type not name by @carson-katri in https://github.com/carson-katri/dream-textures/pull/731
- Bump versions linux-rocm.txt by @cornpo in https://github.com/carson-katri/dream-textures/pull/718
Full Changelog: https://github.com/carson-katri/dream-textures/compare/0.3.0...0.3.1
0.3.0
6 months agoWarning A newer version is available. Download the latest release to get new features and bug fixes.
This update adds support for SDXL, safetensors and ckpt files, a new API for extending Dream Textures with new backends, and more.
Choose Your Installation
Several versions are available. Find the one that will work for you.
Windows
NVIDIA GPU
-
Dream Textures for Windows (CUDA) - Local generation with NVIDIA CUDA
- Due to file size limits on GitHub, the add-on ZIP file is contained in a 7-Zip archive.
- Install 7-Zip, right click on the downloaded
dream_textures-windows-cuda.7zarchive, select "7-Zip" > "Extract Here" to get thedream_textures-windows-cuda.zipfile. - In Blender preferences open "Add-ons" > "Install...", then choose the
dream_textures-windows-cuda.zipfile.
Note If you get the error
ModuleNotFoundError: No module named '...', you will need to copy the files into Blender manually:
- Delete the dream textures folder here:
C:\Users\YOUR_USER\AppData\Roaming\Blender Foundation\Blender\3.6\scripts\addons\dream_textures- Manually unzip the add-on folder to that same path. After doing that there should be a file
__init__.pyinC:\Users\YOUR_USER\AppData\Roaming\Blender Foundation\Blender\3.6\scripts\addons\dream_textures\__init__.py- Restart Blender
AMD GPU
- Dream Textures for Windows (DirectML) - Local generation with DirectX 12
macOS
Apple Silicon (M1/M2)
- Dream Textures for Apple Silicon - Local generation for Apple Silicon Macs
Intel
Dream Textures is not currently available for Intel Macs.
Linux
Installation must be completed manually. Follow the instructions to install manually for more details.
Blender Market
You can optionally purchase it for a small fee on Blender Market.
The version on Blender Market is identical to the free download available here. It is simply a way to support my work on this tool.
Setup
After installing the appropriate add-on ZIP file, enable the add-on and expand its preferences. There you will find further instructions for setup.
See the setup guide for more detailed instructions.
What's New
Stable Diffusion XL
Use the model stabilityai/stable-diffusion-xl-base-1.0 for higher resolution 1024x1024 images. Include the refiner model stabilityai/stable-diffusion-xl-refiner-1.0 to improve the results even further.
| HD Texture Generation | SDXL ControlNet Support |
|---|---|
|
|
|
.safetensors and .ckpt file support
Link individual files or entire folders of models. You can configure linked models from Dream Textures' preferences.
Public Backend API
A new API is available for extending Dream Textures. This can be used to add custom generation backends. For example, a backend that connects to ComfyUI could be created as a standalone addon.
Dream Textures has built-in support for a HuggingFace Diffusers backend. If you are interested in contributing a new backend, this backend can be used as a reference.
Dream Textures backend addons are kept in the community_backends folder. If you make a useful backend, feel free to open a PR adding it to this folder.
Full Changelog
- Add more nodes by @carson-katri in https://github.com/carson-katri/dream-textures/pull/626
- Various UI Tweaks by @NullSenseStudio in https://github.com/carson-katri/dream-textures/pull/659
- Update DirectML by @NullSenseStudio in https://github.com/carson-katri/dream-textures/pull/667
- Public Backend API by @carson-katri in https://github.com/carson-katri/dream-textures/pull/654
- DirectML Out of Memory Retry by @NullSenseStudio in https://github.com/carson-katri/dream-textures/pull/707
- Check for refiner before unpacking tuple from
load_modelby @carson-katri in https://github.com/carson-katri/dream-textures/pull/716 - Fix depth projection with ControlNet by @carson-katri in https://github.com/carson-katri/dream-textures/pull/717
- ControlNet
AutoPipeline.from_pipelookup workaround by @carson-katri in https://github.com/carson-katri/dream-textures/pull/720 - Upgrade diffusers and remove ControlNet workaround by @carson-katri in https://github.com/carson-katri/dream-textures/pull/721
Full Changelog: https://github.com/carson-katri/dream-textures/compare/0.2.0...0.3.0
0.2.0
1 year agoThis update brings ControlNet, optimization, and nodes!
Check out the new render engine to get started with the node system.
Join the Dream Textures Discord server to discuss the add-on, share your art, and get help from other users.
Choose Your Installation
Several versions are available. Find the one that will work for you.
Windows
NVIDIA GPU
-
Dream Textures for Windows (CUDA) - Local and cloud rendering with NVIDIA CUDA
- Due to file size limits on GitHub, the add-on ZIP file is contained in a 7-Zip archive.
- Install 7-Zip, right click on the downloaded
dream_textures-windows-cuda.7zarchive, select "7-Zip" > "Extract Here" to get thedream_textures-windows-cuda.zipfile. - In Blender preferences open "Add-ons" > "Install...", then choose the
dream_textures-windows-cuda.zipfile.
AMD GPU
- Dream Textures for Windows (DirectML) - Local and cloud rendering with DirectML
macOS
Apple Silicon (M1/M2)
- Dream Textures for Apple Silicon - Local and cloud rendering for Apple Silicon Macs
Intel
Dream Textures is not currently available for Intel Macs.
Linux
Installation must be completed manually. Follow the instructions to install manually for more details.
Blender Market
You can optionally purchase it for a small fee on Blender Market.
The version on Blender Market is identical to the free download available here. It is simply a way to support my work on this tool.
Note DreamStudio builds will no longer be released. Please see the official Stability for Blender addon for DreamStudio integration.
Setup
After installing the appropriate add-on ZIP file, enable the add-on and expand its preferences. There you will find further instructions for setup.
See the setup guide for more detailed instructions.
What's New
ControlNet
ControlNet gives you a lot more control over image generation. It has been fully integrated into the new render engine, as well as in the Image Editor and texture projection panel.
Here are some things you can do with it.
- Turn a pose into an image
- Colorize a Grease Pencil sketch
- Render a scene from a basic mesh
- Improved texture projection fidelity, and image editing with ip2p
Optimizations
PyTorch 2.0 is now bundled with the release. This brings the new SDP attention which reduces memory and generates faster. This new optimization is enabled by default.
A new CFG End optimization is also included which can be used to disabled classifier-free guidance after a certain percentage of steps. This can be great for quick prototyping.
The optimization UI is also improved to provide a better overview of what each option does. The time each generation takes is now displayed below the "Generate" button.
Render Engine
A dedicated "Dream Textures" render engine is now available. It provides the node system and acts as an alternative to engines like Cycles or Eevee.
Learn more about the render engine and node system in the wiki.
Full Changelog
- Add ControlNet by @carson-katri in https://github.com/carson-katri/dream-textures/pull/585
- Optimization Fixes and Improvements by @NullSenseStudio in https://github.com/carson-katri/dream-textures/pull/575
- Add segmentation ControlNet support by @carson-katri in https://github.com/carson-katri/dream-textures/pull/614
- Support Inpainting with ControlNet by @carson-katri in https://github.com/carson-katri/dream-textures/pull/625
- Add CFG End Optimization by @carson-katri in https://github.com/carson-katri/dream-textures/pull/617
- Bump Torch ROCm version to 2.0 by @cornpo in https://github.com/carson-katri/dream-textures/pull/636
- Add normal map generation by @carson-katri in https://github.com/carson-katri/dream-textures/pull/632
- Release v0.2.0 by @carson-katri in https://github.com/carson-katri/dream-textures/pull/638
New Contributors
- @cornpo made their first contribution in https://github.com/carson-katri/dream-textures/pull/636
Full Changelog: https://github.com/carson-katri/dream-textures/compare/0.1.0...0.2.0
0.1.0
1 year agoThis update has so many bug fixes. It also includes AMD support, seamless axis detection, projection baking, optimizations and UI enhancements, and more.
Join the Dream Textures Discord server to discuss the add-on, share your art, and get help from other users.
Choose Your Installation
Several versions are available. Find the one that will work for you.
Windows
NVIDIA GPU
-
Dream Textures for Windows (CUDA) - Local and cloud rendering with NVIDIA CUDA
- Due to file size limits on GitHub, the add-on ZIP file is contained in a 7-Zip archive.
- Install 7-Zip, right click on the downloaded
dream_textures-windows-cuda.7zarchive, select "7-Zip" > "Extract Here" to get thedream_textures-windows-cuda.zipfile. - In Blender preferences open "Add-ons" > "Install...", then choose the
dream_textures-windows-cuda.zipfile.
- Dream Textures for DreamStudio (Windows) - Cloud rendering with DreamStudio
AMD GPU
- Dream Textures for Windows (DirectML) - Local and cloud rendering with DirectML
- Dream Textures for DreamStudio (Windows) - Cloud rendering with DreamStudio
macOS
Apple Silicon (M1/M2)
- Dream Textures for Apple Silicon - Local and cloud rendering for Apple Silicon Macs
- Dream Textures for DreamStudio (Apple Silicon) - Cloud rendering with DreamStudio
Intel
- Dream Textures for DreamStudio (Intel) - Cloud rendering with DreamStudio
Note Local generation is not available for Intel Macs.
Linux
Installation must be completed manually. Follow the instructions to install manually for more details.
Blender Market
You can optionally purchase it for a small fee on Blender Market.
The version on Blender Market is identical to the free download available here. It is simply a way to support my work on this tool.
Setup
After installing the appropriate add-on ZIP file, enable the add-on and expand its preferences. There you will find further instructions for setup.
See the setup guide for more detailed instructions.
What's New
Automatic Seamless Detection
The axes the open image is seamless along is automatically detected for better upscaling and image to image results.

Batch Size Optimization
Increase the batch size for significantly faster generation of multiple iterations, file batch, or upscaling.
Automatic Projection Baking / Better UV handling
Enable the "Bake" option to project back onto the mesh's original UV map.
Dream Textures will now preserve your original UV map instead of overwriting it.


AMD Support via DirectML
All DirectX 12-capable GPUs are now compatible with Dream Textures! Download the directml version of the add-on if you have a non-NVIDIA GPU.
UI Improvements
Image names now include the prompt alongside the seed.

Many common issues are now caught before you ever press "Generate".

Size options are now disabled by default, and will use the model's preferred size.

Full Changelog
- Always use spawn multiprocessing context by @NullSenseStudio in https://github.com/carson-katri/dream-textures/pull/435
- Stop reusing the first UV map slot for texture projection by @Dekker3D in https://github.com/carson-katri/dream-textures/pull/480
- Automatic Seamless Detection by @NullSenseStudio in https://github.com/carson-katri/dream-textures/pull/410
- CUDA fixes by @NullSenseStudio in https://github.com/carson-katri/dream-textures/pull/484
- Fix Iterations and File Batch by @NullSenseStudio in https://github.com/carson-katri/dream-textures/pull/485
- Batch Size Optimization by @NullSenseStudio in https://github.com/carson-katri/dream-textures/pull/486
- Automatic Projection Baking by @carson-katri in https://github.com/carson-katri/dream-textures/pull/495
- Properly handle
fp16branches by @carson-katri in https://github.com/carson-katri/dream-textures/pull/479 - Fix link in Doc by @playerla in https://github.com/carson-katri/dream-textures/pull/521
- Add Readme Troubleshooting Tips by @JasonHoku in https://github.com/carson-katri/dream-textures/pull/519
- DirectML Execution by @NullSenseStudio in https://github.com/carson-katri/dream-textures/pull/507
- Add Prompt String To Material And Texture Names by @JasonHoku in https://github.com/carson-katri/dream-textures/pull/499
- Add DreamPrompt validation by @carson-katri in https://github.com/carson-katri/dream-textures/pull/530
- Release v0.1.0 by @carson-katri in https://github.com/carson-katri/dream-textures/pull/551
New Contributors
- @playerla made their first contribution in https://github.com/carson-katri/dream-textures/pull/521
- @JasonHoku made their first contribution in https://github.com/carson-katri/dream-textures/pull/519
Full Changelog: https://github.com/carson-katri/dream-textures/compare/0.0.9...0.1.0
0.0.9
1 year agoThis update includes texture projection, inpainting model support, depth to image for the render pass, and a lot more. The internals have also been reimplemented to use 🤗 Diffusers.
Join the Dream Textures Discord server to discuss the add-on, share your art, and get help from other users.
Choose Your Installation
Several versions are available. Find the one that will work for you.
Windows
NVIDIA GPU
-
Dream Textures for Windows (CUDA) - Local and cloud rendering with NVIDIA CUDA
- Due to file size limits on GitHub, the add-on ZIP file is contained in a 7-Zip archive.
- Install 7-Zip, right click on the downloaded
dream_textures-windows-cuda.7zarchive, select "7-Zip" > "Extract Here" to get thedream_textures-windows-cuda.zipfile. - In Blender preferences open "Add-ons" > "Install...", then choose the
dream_textures-windows-cuda.zipfile.
- Dream Textures for DreamStudio (Windows) - Cloud rendering with DreamStudio
AMD GPU
- Dream Textures for DreamStudio (Windows) - Cloud rendering with DreamStudio
Note Local generation is not available for AMD GPUs.
macOS
Apple Silicon (M1/M2)
- Dream Textures for Apple Silicon - Local and cloud rendering for Apple Silicon Macs
- Dream Textures for DreamStudio (Apple Silicon) - Cloud rendering with DreamStudio
Intel
- Dream Textures for DreamStudio (Intel) - Cloud rendering with DreamStudio
Note Local generation is not available for Intel Macs.
Linux
Installation must be completed manually. Follow the instructions under Contributing for more details.
Blender Market
You can optionally purchase it for a small fee on Blender Market.
The version on Blender Market is identical to the free download available here. It is simply a way to support my work on this tool.
Setup
After installing the appropriate add-on ZIP file, enable the add-on and expand it's preferences. There you will find further instructions for setup.
See the setup guide for more detailed instructions.
What's New
Texture Projection
Texture an entire scene at once using the depth to image model.

Full Changelog
- Release v0.0.8 by @carson-katri in https://github.com/carson-katri/dream-textures/pull/359
- Add link to video tutorial by @carson-katri in https://github.com/carson-katri/dream-textures/pull/375
- Linux Fixes by @NullSenseStudio in https://github.com/carson-katri/dream-textures/pull/384
- Show the seed in history to easier match generated images to their promts by @GottfriedHofmann in https://github.com/carson-katri/dream-textures/pull/396
- UI enhancement: When recalling a promt, open the corresponding image … by @GottfriedHofmann in https://github.com/carson-katri/dream-textures/pull/403
- 🤗 Diffusers Backend by @carson-katri in https://github.com/carson-katri/dream-textures/pull/405
- Outpainting for #405 by @carson-katri in https://github.com/carson-katri/dream-textures/pull/412
- Checkpoint File Import by @carson-katri in https://github.com/carson-katri/dream-textures/pull/413
- Update preferences.py by @eltociear in https://github.com/carson-katri/dream-textures/pull/416
- Stability SDK for #405 by @carson-katri in https://github.com/carson-katri/dream-textures/pull/411
- Add Project Dream Texture operator by @carson-katri in https://github.com/carson-katri/dream-textures/pull/409
- v0.0.9 documentation updates by @carson-katri in https://github.com/carson-katri/dream-textures/pull/417
- Release v0.0.9 by @carson-katri in https://github.com/carson-katri/dream-textures/pull/418
New Contributors
- @GottfriedHofmann made their first contribution in https://github.com/carson-katri/dream-textures/pull/396
- @eltociear made their first contribution in https://github.com/carson-katri/dream-textures/pull/416
Full Changelog: https://github.com/carson-katri/dream-textures/compare/0.0.8...0.0.9
0.0.8
1 year agoThis update includes seamless upscaling, an improved render pass, a redesigned "Source Image" panel, model switching, DreamStudio integration, and more!
Join the Dream Textures Discord server to discuss the add-on, share your art, and get help from other users.
You can get the add-on for free here. If you would like to support my work on this tool, you can purchase it on Blender Market or become a GitHub sponsor.
Choose Your Installation
Several versions are available. Find the one that will work for you.
Windows
NVIDIA GPU
-
Dream Textures for Windows (CUDA) - Local and cloud rendering with NVIDIA CUDA
- Due to file size limits on GitHub, the add-on ZIP file is contained in a 7-Zip archive.
- Install 7-Zip, right click on the downloaded
dream_textures-windows-cuda.7zarchive, select "7-Zip" > "Extract Here" to get thedream_textures-windows-cuda.zipfile. - In Blender preferences open "Add-ons" > "Install...", then choose the
dream_textures-windows-cuda.zipfile.
- Dream Textures for DreamStudio (Windows) - Cloud rendering with DreamStudio
AMD GPU
- Dream Textures for DreamStudio (Windows) - Cloud rendering with DreamStudio
Note Local generation is not available for AMD GPUs.
macOS
Apple Silicon (M1/M2)
- Dream Textures for Apple Silicon - Local and cloud rendering for Apple Silicon Macs
- Dream Textures for DreamStudio (Apple Silicon) - Cloud rendering with DreamStudio
Intel
- Dream Textures for DreamStudio (Intel) - Cloud rendering with DreamStudio
Note Local generation is not available for Intel Macs.
Linux
Installation must be completed manually. Follow the instructions under Contributing for more details.
Setup
After installing the appropriate add-on ZIP file, enable the add-on and expand it's preferences. There you will find further instructions for setup.
Local Generation
To setup local generation, you will need a model checkpoint file, such as:
-
Stable Diffusion v1.4
- Download the file
sd-v1-4.ckpt, and import it in the add-on preferences
- Download the file
-
Stable Diffusion v1.5
- Download the file
v1-5-pruned-emaonly.ckpt, and import it in the add-on preferences
- Download the file
- Fine-tuned model
- Other fine-tuned models compatible with Stable Diffusion can be imported as well.
DreamStudio Generation
To setup DreamStudio integration, find your API key and enter it in the add-on preferences.
What's New
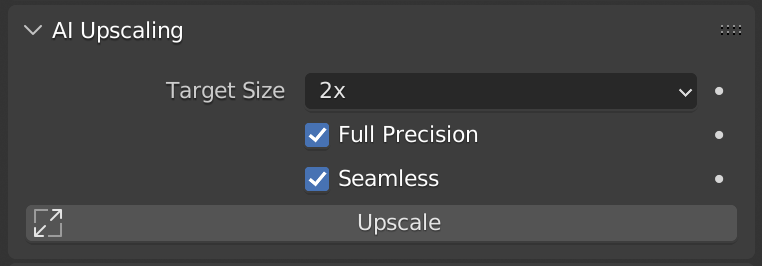
Seamless Upscaling
Check "Seamless" to ensure tileable results from the AI upscaler.
Render Pass Color Management
Color Management settings are now correctly applied when using the Dream Textures render pass. This change is automatically applied, and ensures results match between manual runs of Dream Textures and automated runs via the render pass.
Advanced Presets
Choose defaults and create your own presets for advanced configuration.

File Batch and Iterations
Use a text file to run multiple prompts in a row, and set Iterations above 1 to try multiple seeds without interacting with the UI.

Init Image Redesign and Outpainting
The redesigned "Source Image" panel makes manipulating images easier to use. Various bugs regarding the "Mark Inpaint Area" brush have been resolved. Outpainting allows images to be extended beyond their original size. The "Prompt" mask source when inpainting allows you to choose a region to inpaint with a simple text prompt instead of a manual alpha-channel mask.

Asymmetric Tiling
Tile along a single axis, or both for the original behavior. This can give interesting results for images such as infinitely scrolling backgrounds, decals, and more.


DreamStudio Integration
Connect your DreamStudio account to generate in the cloud. This is optional, and separate lighter builds with the DreamStudio backend only are provided for users with incompatible hardware.
Model Switching
Import multiple models and switch between them quickly to experiment with fine-tuned and updated checkpoints.

Full Changelog
- Add documentation on various features by @carson-katri in https://github.com/carson-katri/dream-textures/pull/252
- Clear Modules from a Previous Install by @NullSenseStudio in https://github.com/carson-katri/dream-textures/pull/261
- More Subprocess Refactoring and Cancel Generate Operator by @NullSenseStudio in https://github.com/carson-katri/dream-textures/pull/274
- delete pointers before closing shared memory by @timmyL17 in https://github.com/carson-katri/dream-textures/pull/299
- Import Fixes by @NullSenseStudio in https://github.com/carson-katri/dream-textures/pull/317
- Upscale Seamless Fix by @NullSenseStudio in https://github.com/carson-katri/dream-textures/pull/318
- Apply OpenColorIO Transformations in Render Pass by @carson-katri in https://github.com/carson-katri/dream-textures/pull/319
- render pass set pixels fix by @NullSenseStudio in https://github.com/carson-katri/dream-textures/pull/323
- Advanced Presets by @carson-katri in https://github.com/carson-katri/dream-textures/pull/324
- Check Weights Installed Fix by @NullSenseStudio in https://github.com/carson-katri/dream-textures/pull/327
- Add File Batch and Re-Enable Iterations by @carson-katri in https://github.com/carson-katri/dream-textures/pull/332
- Fix InpaintAreaBrush behavior by @carson-katri in https://github.com/carson-katri/dream-textures/pull/333
- Init Image Redesign and Outpainting by @carson-katri in https://github.com/carson-katri/dream-textures/pull/334
- Add Asymmetric Tiling by @carson-katri in https://github.com/carson-katri/dream-textures/pull/335
- Add section linking to GH contributors by @carson-katri in https://github.com/carson-katri/dream-textures/pull/336
- DreamStudio integration by @carson-katri in https://github.com/carson-katri/dream-textures/pull/348
- Model switching by @carson-katri in https://github.com/carson-katri/dream-textures/pull/350
- tqdm decorator fix by @NullSenseStudio in https://github.com/carson-katri/dream-textures/pull/369
- Render Pass Fix by @NullSenseStudio in https://github.com/carson-katri/dream-textures/pull/370
New Contributors
- @timmyL17 made their first contribution in https://github.com/carson-katri/dream-textures/pull/299
Full Changelog: https://github.com/carson-katri/dream-textures/compare/0.0.7...0.0.8
0.0.7
1 year agoNewer Versions Available
Please update for the best experience.
0.0.7 Release Notes
This version contains some awesome new features:
- AI Upscaling with Real-ESRGAN
- A Dream Textures render pass in Cycles
- Negative prompts
- Prompt import/export as JSON
- and many bug fixes and improvements
See the list of guides for more information on every feature of the addon.
If you want to discuss the addon, join the Dream Textures Discord server.
Windows Installation
Note Blender 3.1 or higher is required for the addon to function properly
If you had a previous version of the addon, click Remove in Blender to delete it before installing the update. Then restart Blender to ensure the old modules are unloaded.
- Download the file
dream_textures-win32-cuda.7zfrom the Assets section below. - Due to file size limits on GitHub, the addon
.zipfile is contained in the 7-Zip archive. Download 7-Zip if you don't have it already. - Right click the file and select
7-Zip>Extract Here - Open Blender > Preferences > Add-ons > Install..., then select the file
dream_textures-win32-cuda.zipextracted from the 7z previously. The addon may take a minute to be copied into Blender. - Follow the instructions in the addon preferences window to setup the model weights.
macOS Installation
Note Blender 3.1 or higher is required for the addon to function properly
- Download the file
dream_textures-darwin-arm64.zipfrom the Assets section below. - Open Blender > Preferences > Add-ons > Install..., then select the zip file. It may take a minute to be copied into Blender.
- Follow the instructions in the addon preferences window to setup the model weights.
Other Platforms Installation
Other platforms are not officially supported by this addon. However, you can install it manually by following the steps under Contributing in the README.
What's Changed
- Fixed context bug "AttributeError: 'SpaceDopeSheetEditor' object has … by @blastframe in https://github.com/carson-katri/dream-textures/pull/160
- Fix some install issues by @NullSenseStudio in https://github.com/carson-katri/dream-textures/pull/186
- Subprocess IPC improvements by @NullSenseStudio in https://github.com/carson-katri/dream-textures/pull/204
- Fix sampler argument by @carson-katri in https://github.com/carson-katri/dream-textures/pull/230
- Add Real-ESRGAN integration by @carson-katri in https://github.com/carson-katri/dream-textures/pull/233
- UI Refactor by @carson-katri in https://github.com/carson-katri/dream-textures/pull/240
- Add "Dream Textures" render pass to Cycles by @carson-katri in https://github.com/carson-katri/dream-textures/pull/229
Full Changelog: https://github.com/carson-katri/dream-textures/compare/0.0.6...0.0.7
0.0.6
1 year agoNewer Versions Available
Please update for the best experience.
0.0.6 Release Notes
Dependencies are now packaged with the addon, making installation much simpler! Just download the correct file for your platform below, and install it in Blender.
A Dream Textures Discord server has also been created.
Windows Installation
If you had a previous version of the addon, click Remove in Blender to delete it before installing the update. You may need to run Blender as an administrator to remove the old version of the addon successfully.
- Download the file
dream_textures-win32-cuda.7zfrom the Assets section below. - Due to file size limits on GitHub, the addon
.zipfile is contained in the 7-Zip archive. Download 7-Zip if you don't have it already. - Right click the file and select
7-Zip>Extract Here - Open Blender > Preferences > Add-ons > Install..., then select the file
dream_textures-win32-cuda.zipextracted previously. The addon may take a minute to be copied into Blender. - Follow the instructions in the addon preferences window to setup the model weights.
If you want to remove the old dependencies to free up space on your computer, navigate to
C:\Program Files\Blender Foundation\Blender 3.3\3.3\python\lib\site-packagesand delete the addon's previous packages, but ensure you leave any preinstalled Blender packages. You can also simply delete the fullBlender 3.3folder and reinstall Blender.
macOS Installation
- Download the file
dream_textures-darwin-arm64.zipfrom the Assets section below. - Open Blender > Preferences > Add-ons > Install..., then select the zip file. It may take a minute to be copied into Blender.
- Follow the instructions in the addon preferences window to setup the model weights.
Other Platforms Installation
Other platforms are not officially supported by this addon. However, you can install it manually by following the steps under Contributing in the README.
UI Changes
Dream Textures has moved to the side panel of the Image Editor and Shader Editor:

What's Changed
- Dream Texture: UI Changes by @blastframe in https://github.com/carson-katri/dream-textures/pull/39
- Add simple progress indicator by @carson-katri in https://github.com/carson-katri/dream-textures/pull/57
- Improved seed selector by @NullSenseStudio in https://github.com/carson-katri/dream-textures/pull/69
- Fixed AttributeError with NoneType in context.area.regions by @blastframe in https://github.com/carson-katri/dream-textures/pull/74
- Generator subprocess by @NullSenseStudio in https://github.com/carson-katri/dream-textures/pull/96
- Remove dependency installation requirement by @carson-katri in https://github.com/carson-katri/dream-textures/pull/98
- History and Troubleshooting Panels by @carson-katri in https://github.com/carson-katri/dream-textures/pull/132
- Direct users who downloaded source to download release by @NullSenseStudio in https://github.com/carson-katri/dream-textures/pull/134
- Add preload models step by @carson-katri in https://github.com/carson-katri/dream-textures/pull/150
New Contributors
- @blastframe made their first contribution in https://github.com/carson-katri/dream-textures/pull/39
- @NullSenseStudio made their first contribution in https://github.com/carson-katri/dream-textures/pull/69
Full Changelog: https://github.com/carson-katri/dream-textures/compare/0.0.5...0.0.6
0.0.5
1 year agoNewer Versions Available
Please update for the best experience.
0.0.5 Release Notes
This update includes troubleshooting steps for Windows (#15 by @gregnr) and fixes an error with macOS installation.
See the latest additions from v0.0.4.
0.0.4
1 year agoNewer Versions Available
Please update for the best experience.
0.0.4 Release Notes
One week later, and we already have some awesome additions!
If you already had
dream-texturesinstalled, you shouldn’t need to install dependencies again. You may need to put themodel.ckptfile back, however. I would recommend moving the weights out of the current addon, then moving them into the new one after installation.
Seamless Image Generation
Check the 'Seamless' box to get a perfectly tileable result with no seams.

Prompt: "fall leaves texture" with seamless checked
Inpainting
Open an image in the Image Editor and switch to Paint mode. Then select the "Inpaint Area" brush, or use the normal Draw brush with the "Erase Alpha" blend mode to paint out an area.


History
Dream Textures now keeps track of every prompt you've given it across .blend files. This lets you recall a previous prompt to tweak and run it again.

Image Editor Integration
The Shader Editor and Image Editor both have the "Dream Textures" menu now.
Smaller Changes and Fixes
- "Concept Art" prompt preset for generating environment, character, vehicle, and more concepts
- Simple progress indicator cursor is now shown when generating
- "Show Steps" option to disable intermediate results. This can improve performance significantly.
- Init Image now supports packed textures, not just textures from the filesystem. This means you can feed a generated image back into the generator.
- Linux AMD installation is now an option. This is untested so your mileage may vary.
- VRAM optimizations from upstream dependencies enable 512x512 generation on cards with just 4GB of VRAM
- Faster startup time after the model is loaded on the first image generation. This makes iteration much faster. Note that the model needs to be reloaded whenever the "Full Precision" option is changed.
- Troubleshooting help in the menu
Installation
Download the dream_textures.zip file below.