Django Coleman Save
A very simple Task Management web app written with Django Admin
.. image:: https://media.giphy.com/media/vQ2YjH4KCDRSM/giphy-downsized.gif
Django Coleman
Django Coleman: A very simple Task Management web app written with Django Admin.
Features
- Simple task manager that allows to define a tasks with title, partner (customer, provider...), description, responsible of the task, priority...
- Each task may have items: sub-tasks to be done.
- The built-in Django Authentication and Authorization system to manage users and groups, login, etc.
- Module
django-adminfilters <https://github.com/mrsarm/django-adminfilters>_ that allows multiselection searches. - Send emails when a task is created.
- Spanish translations.
- Basic Rest API configuration (disabled by default, check the
INSTALLED_APPSsetting). - Optionally, you can use Django Coleman along with
Django Coleman Viewer <https://github.com/mrsarm/tornado-dcoleman-mtasks-viewer>_ to allows users to follow the orders. - Pytest with some tests as example and code coverage reports configured.
- Docker and Docker Compose configurations (images published in
Docker Hub <https://hub.docker.com/r/mrsarm/django-coleman>_). - CI environment, and E2E tests written with Playwright:
dcoleman-e2e <https://github.com/mrsarm/dcoleman-e2e>_. CI is executed with GitHub Actions, and executed on each push in this project, the viewer repo, or the E2E repo itself. The task also releases the image in the Docker Registry. - Ready to use "production" configurations as reference.
.. image:: docs/source/_static/img/django-coleman.png :alt: Django Coleman
Requirements
Docker, or:
- Python 3.8+ (tested with Python 3.8 and 3.11).
- Django 4.2 LTS and other dependencies declared in
the
requirements.txtfile (use virtual environments or containers!). - A Django compatible database like PostgreSQL (by default uses the Python's built-in SQLite database for development purpose).
Install and Run
Using Docker, check the section below. Otherwise:
Create a virtual environment and activate it with (Optional)::
$ python3 -m venv .venv && source .venv/bin/activate
Install dependencies with::
$ pip install --upgrade pip wheel
$ pip install -r requirements.txt
Create the database with::
$ python3 manage.py migrate
You should run first the makemigrations task if changes in the models were made.
To create an admin user::
$ python3 manage.py createsuperuser
Then run in development mode with::
$ python3 manage.py runserver
Add at the end 0:5000 if you want to open the port 5000
instead of the default 8000, and the 0: prefix is to
let Django accepts connection outside localhost (optional).
Or use the following script to startup in "production" mode, with a uWSGI server::
$ uwsgi uwsgi.ini
Procfile and Honcho ^^^^^^^^^^^^^^^^^^^
The project also include a <Procfile>, ready to use
in platforms that support it like Heroku, or with
command line tools like Honcho <https://honcho.readthedocs.io>
or Foreman.
Honcho has the advantage of loading the environment variables
from an .env file automatically (see section below). To install
it execute pip3 install honcho. Once installed, to run
the app with Honcho::
$ honcho start web
There are other shortcuts in the Procfile, like a command to create both the user and database (you have to provide the "master" password from the user "postgres" in an env variable)::
$ POSTGRES_PASSWORD=postgres honcho start createdb
And here is the command to automatically creates an "admin" user with password "admin1234"::
$ honcho start createadmin
Docker
A reference <Dockerfile>_ is provided, and the image published
in Docker Hub <https://hub.docker.com/r/mrsarm/django-coleman>_.
Also compose.yaml and .env.example files are provided in the
dcoleman-e2e <https://github.com/mrsarm/dcoleman-e2e>_ project, you
can run all from there, Django Coleman, the viewer app and Postgres,
and the E2E tests.
First, copy the .env.example file as .env files from the E2E repo,
and edit whatever value you want to::
$ cp ../dcoleman-e2e/.env.example .env
Then before run for the first time the containers, you have to either download the images from Docker Hub or build them from the source code. To build the images from the source code, execute::
$ ./docker-build.sh
Or to get the images from Docker Hub, execute from the dcoleman-e2e repo::
$ docker compose pull
Once the images are installed in your local machine, create the containers and run all of them with::
$ docker compose up
The first time it runs some errors about the DB are shown, that's because you need to create the DB and the structure (tables, indexes), all can be created in another terminal executing::
$ docker compose run django-coleman-provision
Even a user admin with password admin1234 is created.
Access the apps and the DB ^^^^^^^^^^^^^^^^^^^^^^^^^^
The URL to access the app is the same than running it with Python locally: http://localhost:8000/admin/ .
Once created an order, if the id is 1, it can be viewed
by the viewer with http://localhost:8888/1?t=porgs .
If you want to then open a psql session for the DB from the
containers: docker compose run psql.
Local persistence ^^^^^^^^^^^^^^^^^
By default a local volume django-coleman_data is attached
to the Postgres container so even executing docker compose down
won't delete the data, but if you want to start from scratch::
$ docker compose down
$ docker volume rm django-coleman_data
Add changes in the code ^^^^^^^^^^^^^^^^^^^^^^^
When adding changes in the code, the image needs to be updated::
$ docker compose build
Then run again. A script docker-build.sh with more advance
features and without using docker compose is also provided
to re-build the image.
Settings
Most settings can be overwritten with environment variables. For example to overwrite the language translations of the application and set debug options to false::
$ DEBUG=False LANGUAGE_CODE=es-ar python3 manage.py runserver
Also in development environments an .env file can be used to setup
the environment variables easily, checkout the <.env.example>_ as example.
You can copy the example file and edit the variables you want to change::
$ cp .env.example .env $ vi .env
Some available settings:
-
DEBUG: set the DjangoDEBUGoption. DefaultTrue. -
TIME_ZONE: defaultUTC. Other example:America/Buenos_Aires. -
LANGUAGE_CODE: defaulten-us. Other example:es-ar. -
SITE_HEADER: Header title of the app. Default to "Django Coleman - A Simple Task Manager". -
DATABASE_URL: Database string connection. Default uses SQLite database. Other example:postgresql://dcoleman:postgres@localhost/dcoleman_dev. - More settings like email notifications, check the
settings.pyfile for more details, any variable that is set withenv('...is able to be configured using environment variables.
To run in a production environment, check the <README-production.rst>_ notes, or
see the official Django documentation.
Access the application
Like any Django app developed with Django Admin, enter with: http://localhost:8000/admin
Tests
Tests run with Pytest::
$ pytest
Or use the Honcho task that also generates a report with
the tests coverage: honcho start --no-prefix test.
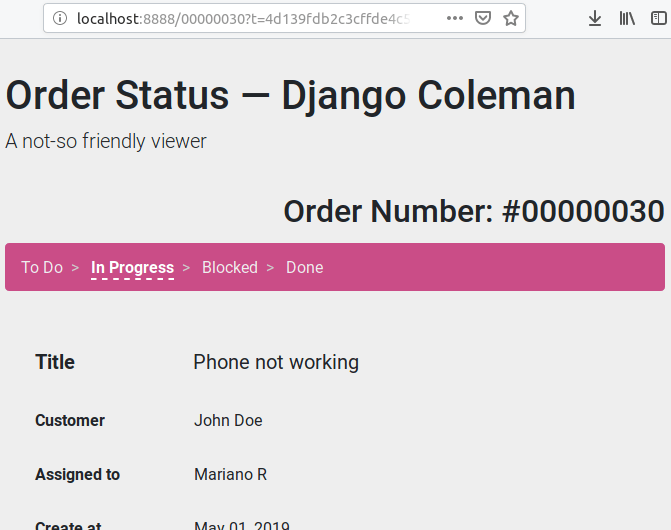
Django Coleman Viewer
Django Coleman Viewer <https://github.com/mrsarm/tornado-dcoleman-mtasks-viewer>_ is a
small webapp that can be used along with Django Coleman to allow "partners" (customers, employees,
providers...) to see their orders anonymously, without access to the Django Admin.
You need to enable the email notifications and set TASKS_VIEWER_ENABLED and REST_ENABLED
settings to True to send the emails with the viewer order URL. See more configurations in the
coleman/settings_emails.py file, and checkout the viewer project.
Development
Some tips if you are improving this application.
Translations ^^^^^^^^^^^^
After add to the source code new texts to be translated, in the command
line go to the module folder where the translations were edited, e.g.
the "mtasks" folder, and execute the following replacing LANG
by a valid language code like es::
$ django-admin makemessages -l LANG
Then go to the .po file and add the translations. In the
case of the "mtasks" module with es language, the file is
located at mtasks/locale/es/LC_MESSAGES/django.po. Finally
execute the following to compile the locales::
$ django-admin compilemessages
Oldest Django versions ^^^^^^^^^^^^^^^^^^^^^^
The master branch works with Django 4.2 LTS, and
the are a few more branches (though unmaintained):
-
django/3.2 -
django/2.2 -
django/2.0 -
django/1.11
Each has the source code that works for each version of Django, and maybe tweaking some configurations Django Coleman can works with other versions too.
Some screenshots
.. image:: docs/source/_static/img/django-coleman-task-change.png :alt: Django Coleman - Task Chance View
.. image:: docs/source/_static/img/django-coleman-task-change-mobile.png :alt: Django Coleman - Task Chance View, mobile version
About
Project: https://github.com/mrsarm/django-coleman
Authors: (2017-2024) Mariano Ruiz [email protected]
License: AGPL-v3
