Cronyxllc DeveloperConsole Save
A lightweight, in-game developer console for Unity
DeveloperConsole


![]()
A lightweight, in-game developer console for Unity
Features
- Easy to use and extendable in-game developer console!
-
Quickly add new commands by marking a method with
[Command]:[Command("cube")] public static void CreateCube (Vector3 pos, float scale) { var cube = GameObject.CreatePrimitive(PrimitiveType.Cube); cube.transform.position = pos; cube.transform.localScale = Vector3.one * scale; } // $ cube (1 2 3) 2 // Creates a cube at (1, 2, 3) with scale 2.0f -
Parsing support for all basic C# types,
IEnumerable,List,Dictionary, and many more. -
Fully customizable
GetOptcommand syntax and automatic help text generation:[Command("showcase", Description = "Showcases the flexibility of the command parser.")] public static void CustomCommand( [Positional(Description = "The first positional", Meta = "FOO")] Vector3 posOne, [Positional(Description = "The second positional", Max = 4, Meta = "BAR", Optional = true)] IEnumerableposTwo, [Switch('a', LongName = "flag", Description = "A flag")] bool flag, [Switch('b', LongName = "switch", Description = "A switch", Meta = "STR")] string @switch) { // Command implementation } // Automatically generated help text: // $ help showcase // showcase: Showcases the flexibility of the command parser // // usage: showcase FOO [BAR] [-a] [-b STR] // Format: // FOO Vector3 (x y z) // BAR IEnumerable [foo bar ...] // STR string // // Mandatory Parameters: // FOO The first positional // // Optional Parameters: // BAR The second positional // Can have at most 4 elements // -a, --flag A flag // -b, --switch A switch -
Seamless parsing support for nested generic types, such as
List.- >
-
Define parsers for custom types by extending the
ParameterParser. -
Add custom widgets, images, and media by extending the
ConsoleEntryclass. -
Implement custom command line parsing through the
IConsoleCommandinterface.[Command("cmd")] public class MyCommand : IConsoleCommand { public void Invoke(string data) { // Parse command line input passed to this command } } -
Access filesystem through built-in commands like
lsandpwd. -
A detailed documentation of all of these features and more over at the wiki!
Installation
Prerequisites
- Unity
2020.2or greater - TextMeshPro package
3.0.1or greater installed in your project. Comes built-in with Unity2020.2or greater.
Installation Guides
Via PackageInstaller (drag-and-drop)
- Download the installer
.unitypackageto your machine. - Import the
.unitypackageby dragging and dropping it onto the Unity window or by going to Assets > Import Package > Custom Package... and selecting the package. - Import everything by clicking Import.
- Give the installer a moment to add the appropriate OpenUPM registries to your project.
- You're all set!
Via OpenUPM
Run:
~/MyProject $ openupm add com.cronyx.console
from within your project directory.
Via UPM (Tarball)
- Navigate to Releases and choose a release.
- Download the DeveloperConsole_v*.tar.gz file for that release.
- Open the Package Manager window (Window > Package Manager), click the ➕, and then click
Add package from tarball... - Select the tarball file you just downloaded, and then click Open.
- You're all set!

Via UPM (Git)
- Open the Package Manager window (Window > Package Manager), click the ➕, and then click
Add package from git... - Enter
https://github.com/cronyxllc/DeveloperConsole.git#upmfor the URL when prompted. - Click Add and wait a moment.
- You're all set!

Getting started
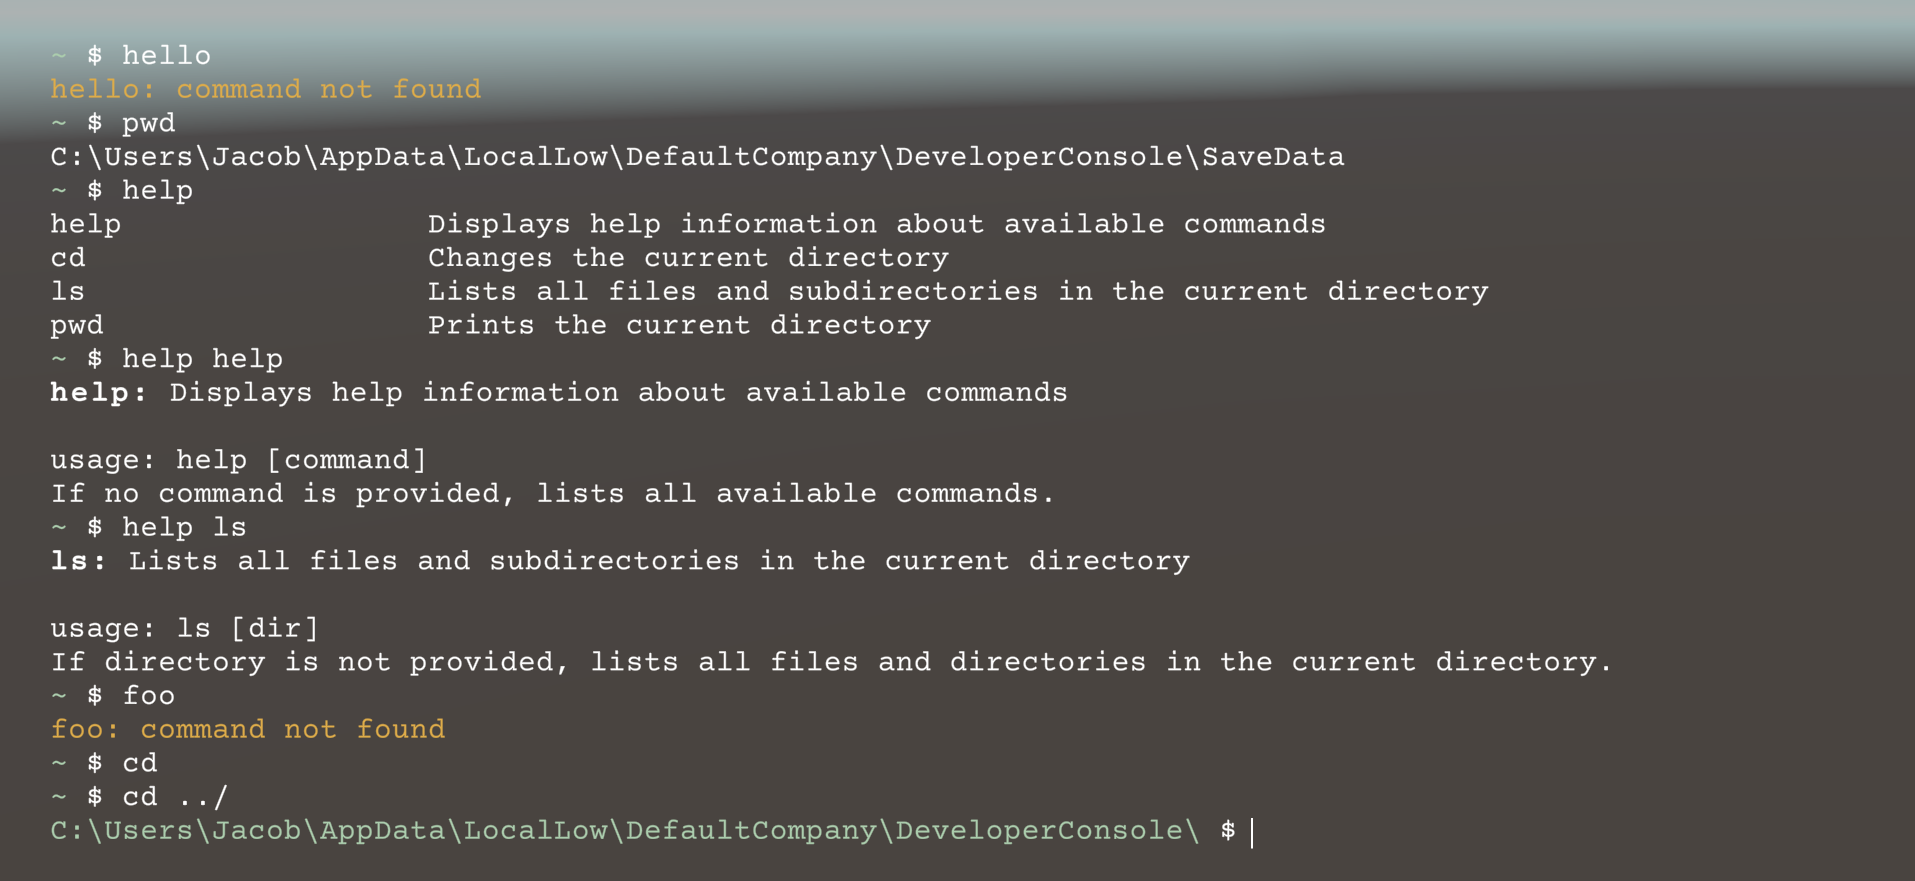
Using the console
By default, you can open the in-game console by pressing the backquote key (`) (or tilde, ~, on QWERTY keyboards). This will open the console UI and allow you to start entering commands. For your first command, try printing the working directory:
~ $ pwd
C:\Users\MyUser\AppData\LocalLow\DefaultCompany\DeveloperConsole
~ $ █
Just like in a Bash console, past inputs can be cycled through using the up and down arrow keys. For a list of all commands that can be called, enter $ help.
Customizing the console
To customize the console's settings, go to Window > DeveloperConsole > Settings. This will create a ConsoleSettings asset in your projects directory. Hover over any of the settings to get a description of what that feature does. For a more detailed description of the console's settings, see the settings documentation.
Adding commands to the console
The DeveloperConsole package was created with the intention that you would extend its functionality by creating console commands specific to your own project. Creating a console command can be as simple as tagging a static method with a CommandAttribute:
[Command("cmd")]
public static void MyCommand (Vector3 v)
{
    // Your command's code
}
and calling it like so:
~ $ cmd (1 2 3)
~ $ █
or as complicated as creating a custom class that manually parses command-line arguments. See the documentation on console commands for more information on creating your own commands.
Contributing
Please feel free to contribute to this project! If you'd like to contribute, please do any of the following:
- ‼️ Let others know about this project! We'd like to get the word out!
- 🐛 Open an issue with a bug report or feature request.
- ➕ Open a pull request with a change or new feature. Please let us know before you start working to prevent development conflicts.
