Codersaur SmartThings Save
Samsung SmartThings SmartApps and Device Handlers
SmartThings
https://github.com/codersaur/SmartThings
Copyright (c) 2017 David Lomas
Overview
This repository contains device handlers and SmartApps for use with Samsung's SmartThings home automation platform.
SmartApps
Evohome (Connect) - BETA:
- This SmartApp connects your Honeywell Evohome System to SmartThings.
- Note, the Evohome Heating Zone device handler (below) must also be installed.
InfluxDB Logger:
- This SmartApp logs SmartThings device attributes to an InfluxDB database.
SmartApp Installation Procedure
Part One: Install the code using the SmartThings IDE
- Within the SmartThings IDE, click 'My SmartApps', then '+ New SmartApp'.
- Select the 'From Code' tab and paste in the contents of the relevant groovy file.
- Click 'Create', and then 'Publish' (For Me).
Part Two: Create a SmartApp instance
- Using the SmartThings app on your phone, navigate to the 'Marketplace'.
- Select 'SmartApps', then browse to 'My Apps' at the bottom of the list.
- Select the new SmartApp, complete the configuration options and press 'Done'.
Note: Some SmartApps may support multiple instances, whereas others may only allow one instance.
Device Handlers
Aeon Home Energy Meter (GEN2 - UK - 1 Clamp):
- This device handler is written specifically for the Aeon Home Energy Meter Gen2 UK version, with a single clamp.
- It supports live reporting of energy, power, current, and voltage, as well as energy and cost statistics over multiple pre-defined periods.
Evohome Heating Zone - BETA:
- This device handler is required for the Evohome (Connect) SmartApp.
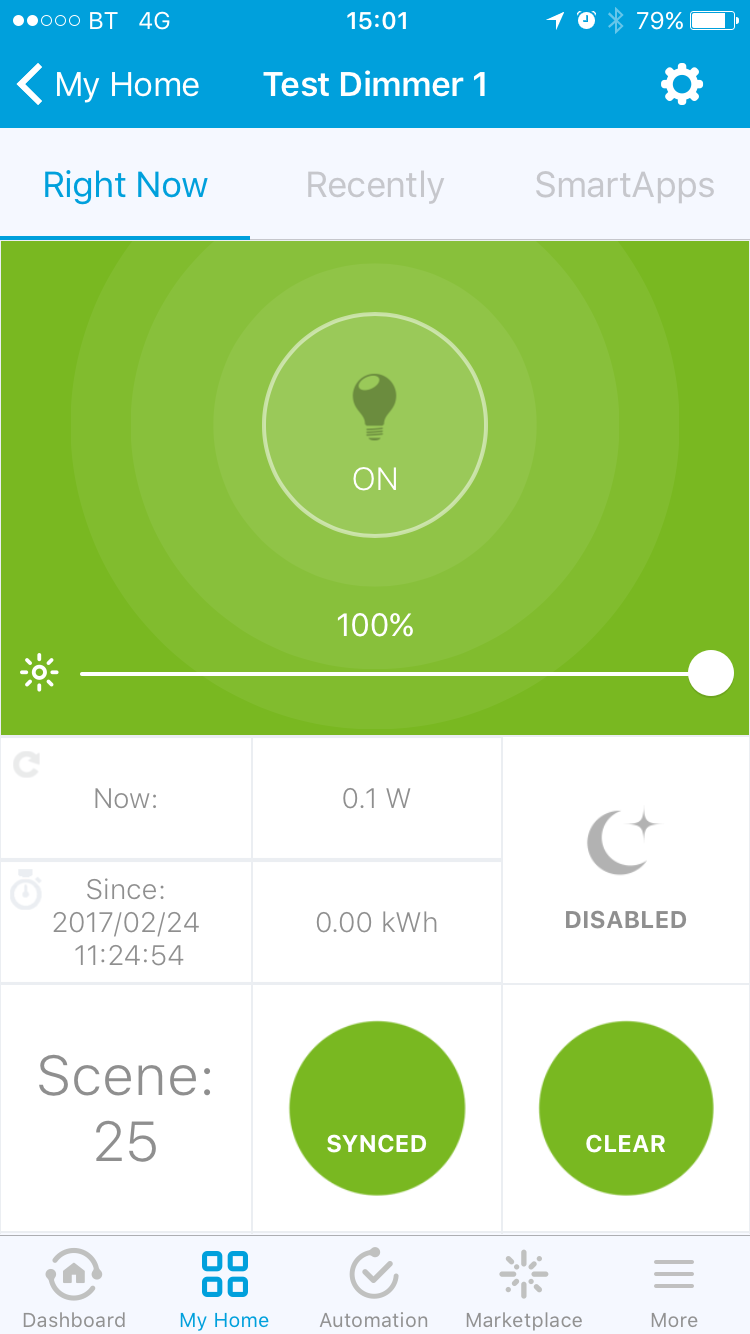
Fibaro Dimmer 2 (FGD-212):
- An advanced device handler for the Fibaro Dimmer 2 (FGD-212) Z-Wave Dimmer, with support for full parameter synchronisation, multi-channel device associations, protection modes, fault reporting, and advanced logging options.
- The Nightmode function forces the dimmer to switch on at a specific level (e.g. low-level during the night). It can be enabled/disabled manually using the Nightmode tile, or scheduled from the device's settings.
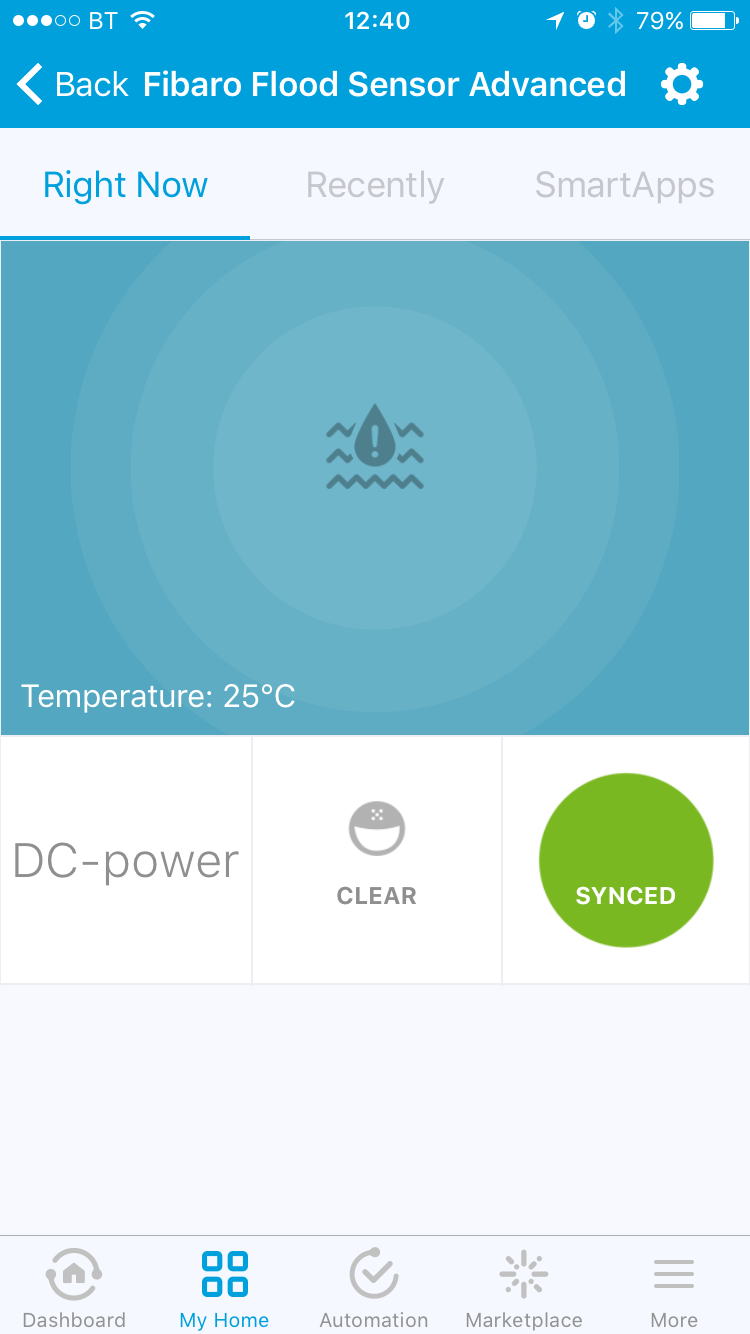
Fibaro Flood Sensor (FGFS-101):
- An advanced SmartThings device handler for the Fibaro Flood Sensor (FGFS-101) (EU), with support for full parameter synchronisation, multi-channel device associations, and advanced logging options.
Fibaro RGBW Controller (FGRGBWM-441):
- This device handler is written specifically for the Fibaro RGBW Controller (FGRGBWM-441).
- It extends the native SmartThings device handler to support editing the device's parameters from the SmartThings GUI, and to support the use of one or more of the controller's channels in IN/OUT mode (i.e. analog sensor inputs).

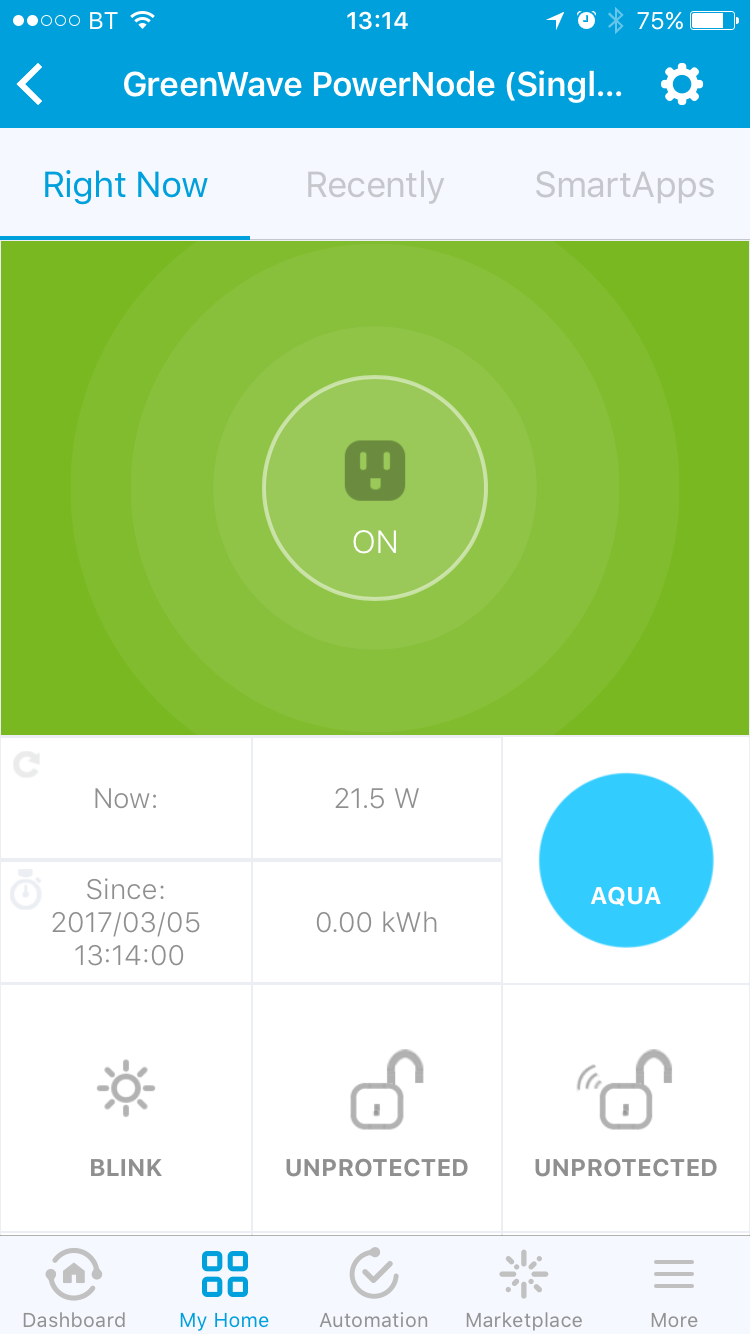
GreenWave PowerNode (Single) (NS210-G-EN):
- An advanced SmartThings device handler for the GreenWave PowerNode (Single socket) Z-Wave power outlet, with support for power and energy reporting, the Room Colour Wheel, local and RF protection modes, an Auto-off Timer, full parameter synchronisation, and advanced logging options.
Philio Dual Relay (PAN04):
- This device handler is written specifically for the Philio Dual Relay (PAN04), when used as a single switch/relay only.
- It supports live reporting of energy, power, current, voltage, and power factor, as well as energy and cost statistics over multiple pre-defined periods.
TKB Metering Switch (TZ88E-GEN5):
- This device handler is written specifically for the TKB Metering Switch (TZ88E-GEN5).
- It supports live reporting of energy, power, current, voltage, and power factor, as well as energy and cost statistics over multiple pre-defined periods.
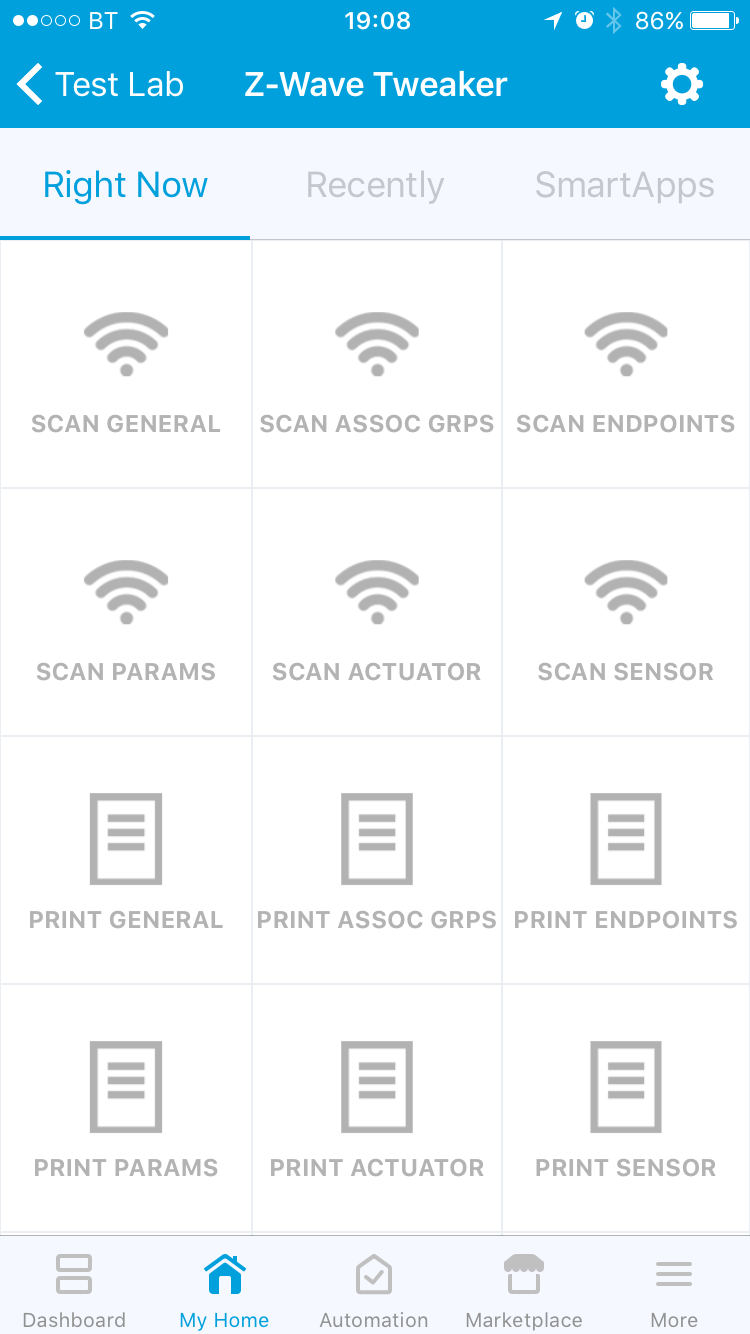
Z-Wave Tweaker:
- A SmartThings device handler to assist with interrogating and tweaking Z-Wave devices. Useful for end-users and SmartThings developers.
Device Handler Installation Procedure
Part One: Install the device handler code using the SmartThings IDE
- Within the SmartThings IDE, click on 'My Device Handlers'.
- Click the '+ Create New Device Handler' button.
- Select the 'From Code' tab and paste in the contents of the relevant groovy file.
- Click 'Create'.
- Click 'Publish' (For Me).
Part Two: Connect your device to SmartThings
If your device is already connected to SmartThings, you can skip straight to part three, however if your physical device is not yet connected to SmartThings, you will need to follow these instructions to Add a Thing.
During the joining process SmartThings will select an appropriate device handler, if the correct device handler (installed in part one) is selected, you can skip to part four, otherwise you will need to change the handler as described in part three.
Part Three: Update existing device types
When you add new devices, SmartThings will automatically select the device handler with the closest-matching fingerprint. However, this process is not perfect and it often fails to select the desired device handler. You may also have pre-existing devices you want to switch to new device handler. In these cases, you need to change the device type of each device instance from the IDE.
- Within the SmartThings IDE, click on 'My Devices'.
- Click on the appropriate device to bring up its properties.
- Click the 'Edit' button at the bottom.
- Change the 'Type' using the drop-down box (custom devices will be near the bottom of the list).
- Hit the 'Update' button at the bottom.
Part Four: Update existing device settings
If you have changed the type of an existing device, it is very important to update the device's settings to ensure the device instance is fully initialised and ready for use with the new device handler.
- Within the SmartThings IDE, click on the 'Live Logging' tab to monitor an messages generated by the following steps.
- In the SmartThings app on your phone, navigate to the device (you should find the GUI has changed to reflect the new tiles configuration).
- Press the gear icon to edit the device's settings.
- Review each setting to ensure it has a suitable value, then press 'Done'.
- Back in the SmartThings IDE, review any messages from the device in the 'Live Logging' screen.
Note: Android users may encounter some errors in the SmartThings app after a device type has been changed. This can usually be resolved by completely closing the SmartThings app and restarting it.
License
Licensed under the Apache License, Version 2.0 (the "License"); you may not use this file except in compliance with the License. You may obtain a copy of the License at:
http://www.apache.org/licenses/LICENSE-2.0
Unless required by applicable law or agreed to in writing, software distributed under the License is distributed on an "AS IS" BASIS, WITHOUT WARRANTIES OR CONDITIONS OF ANY KIND, either express or implied. See the License for the specific language governing permissions and limitations under the License.
