BubbleCollectionViewLayout Save
Create bubble layout of UICollectionView using custom layout
BubbleCollectionViewLayout
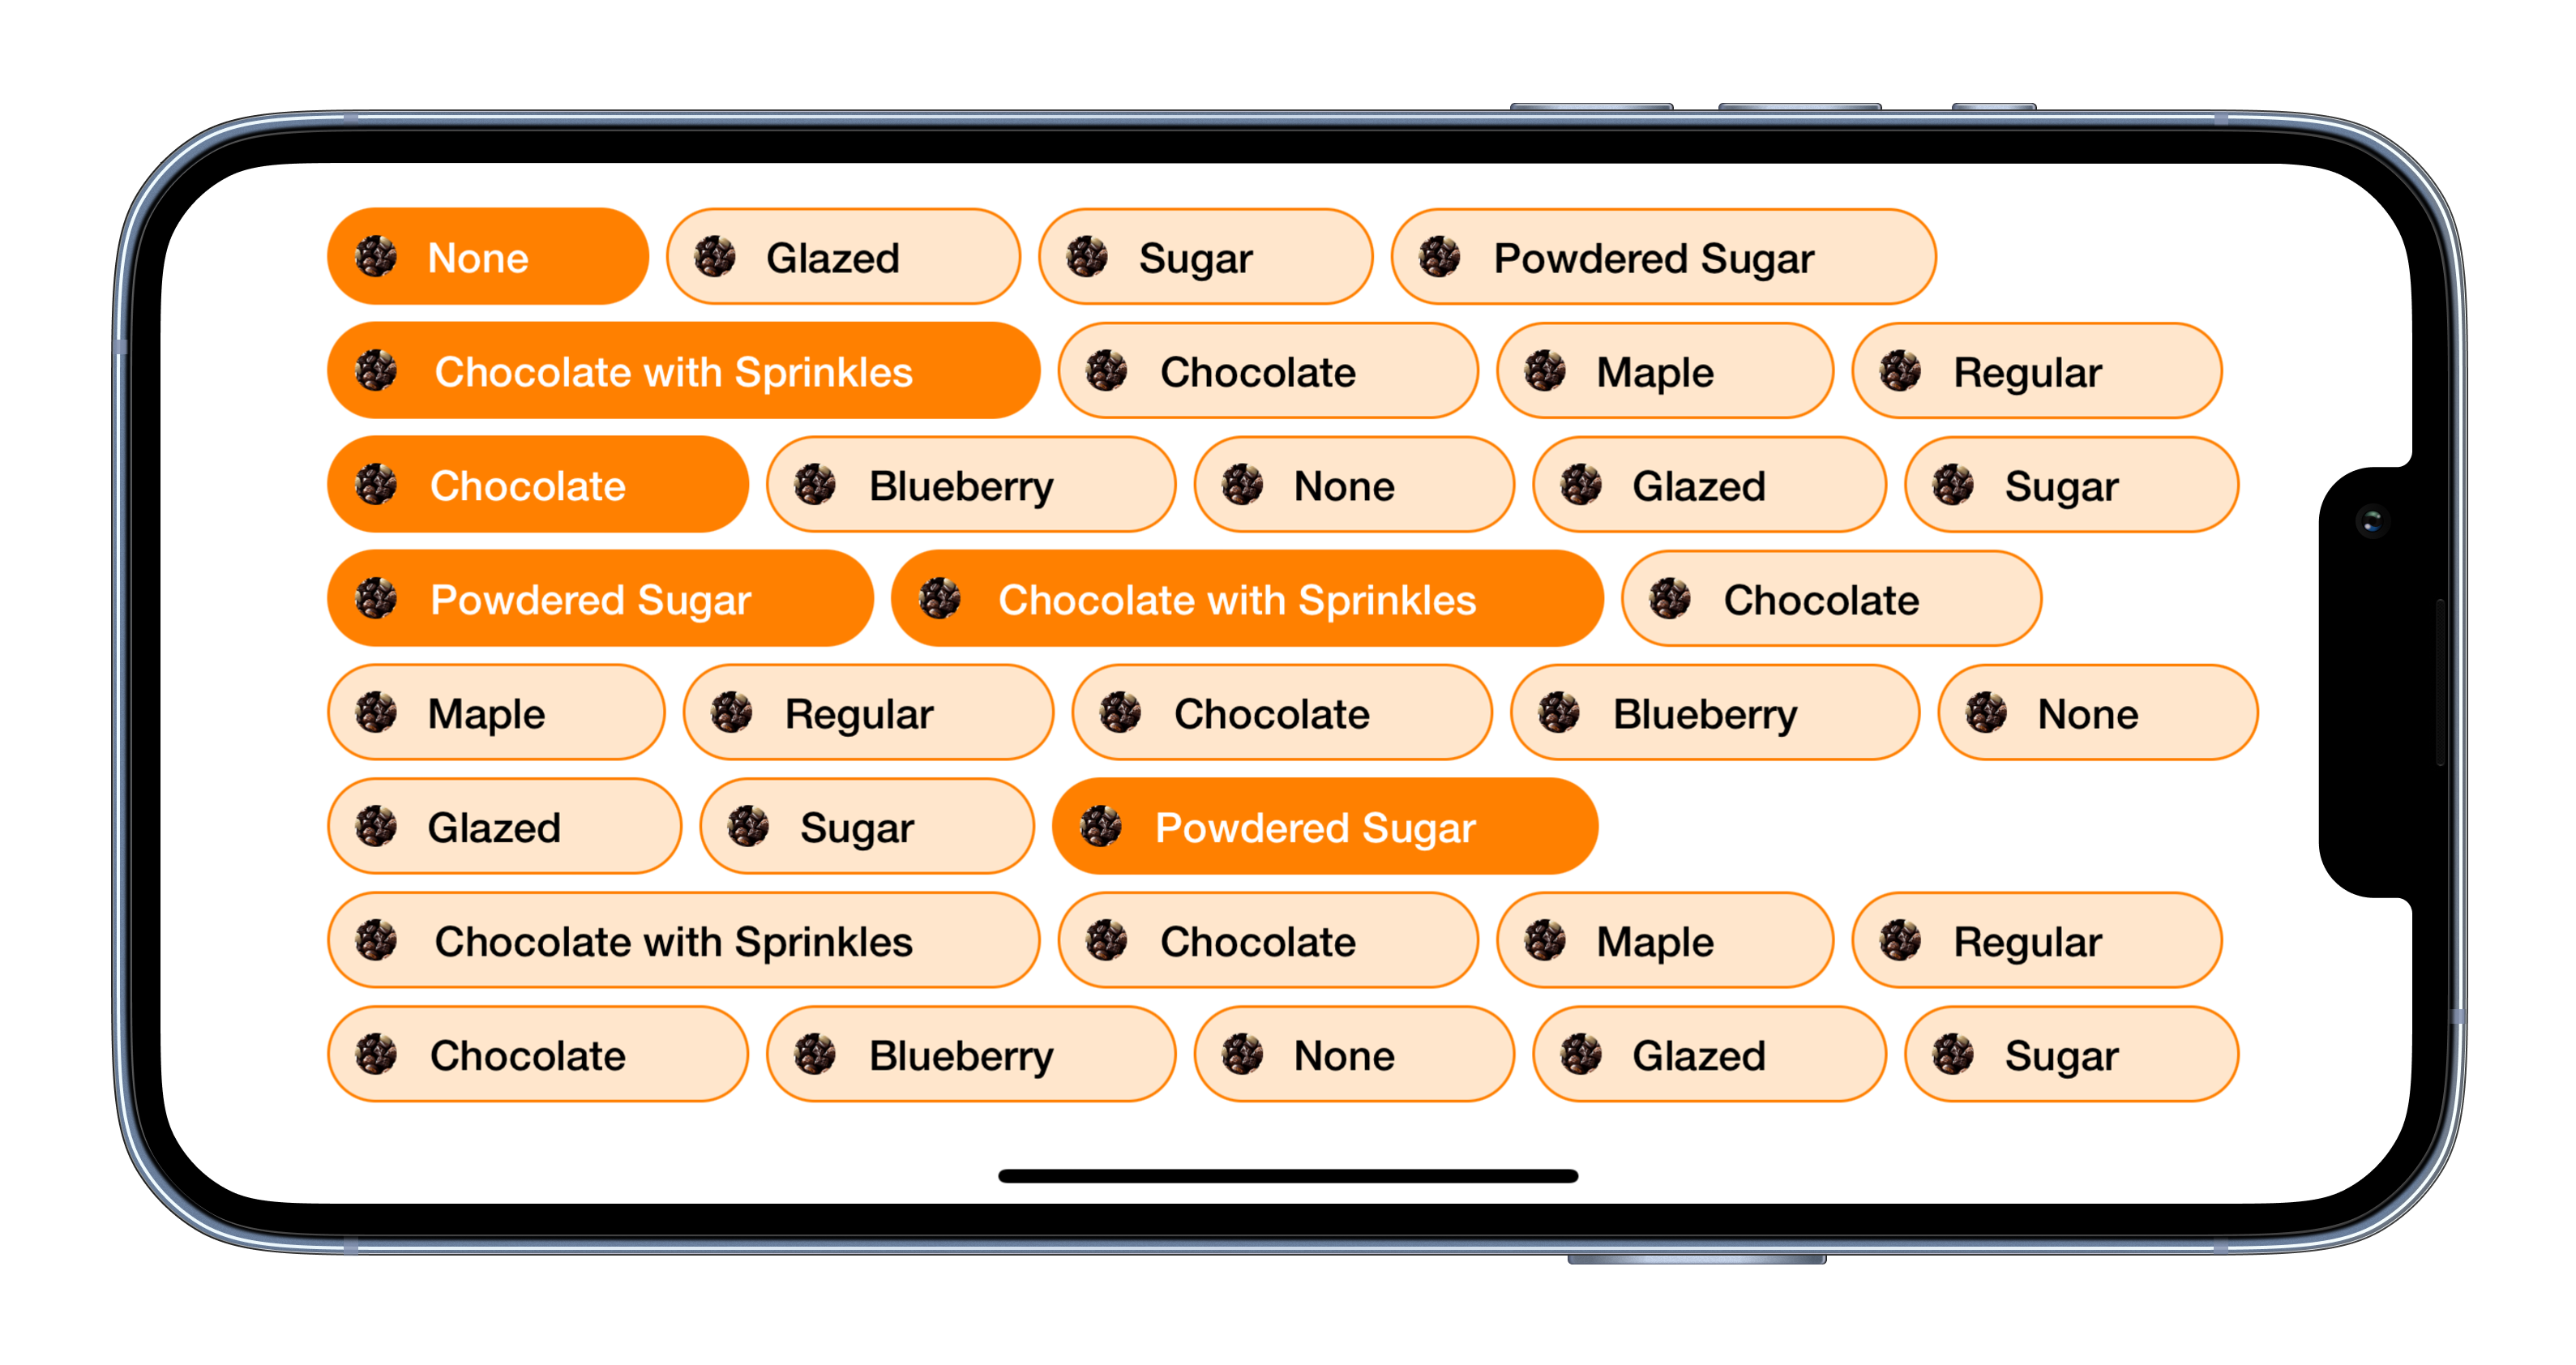
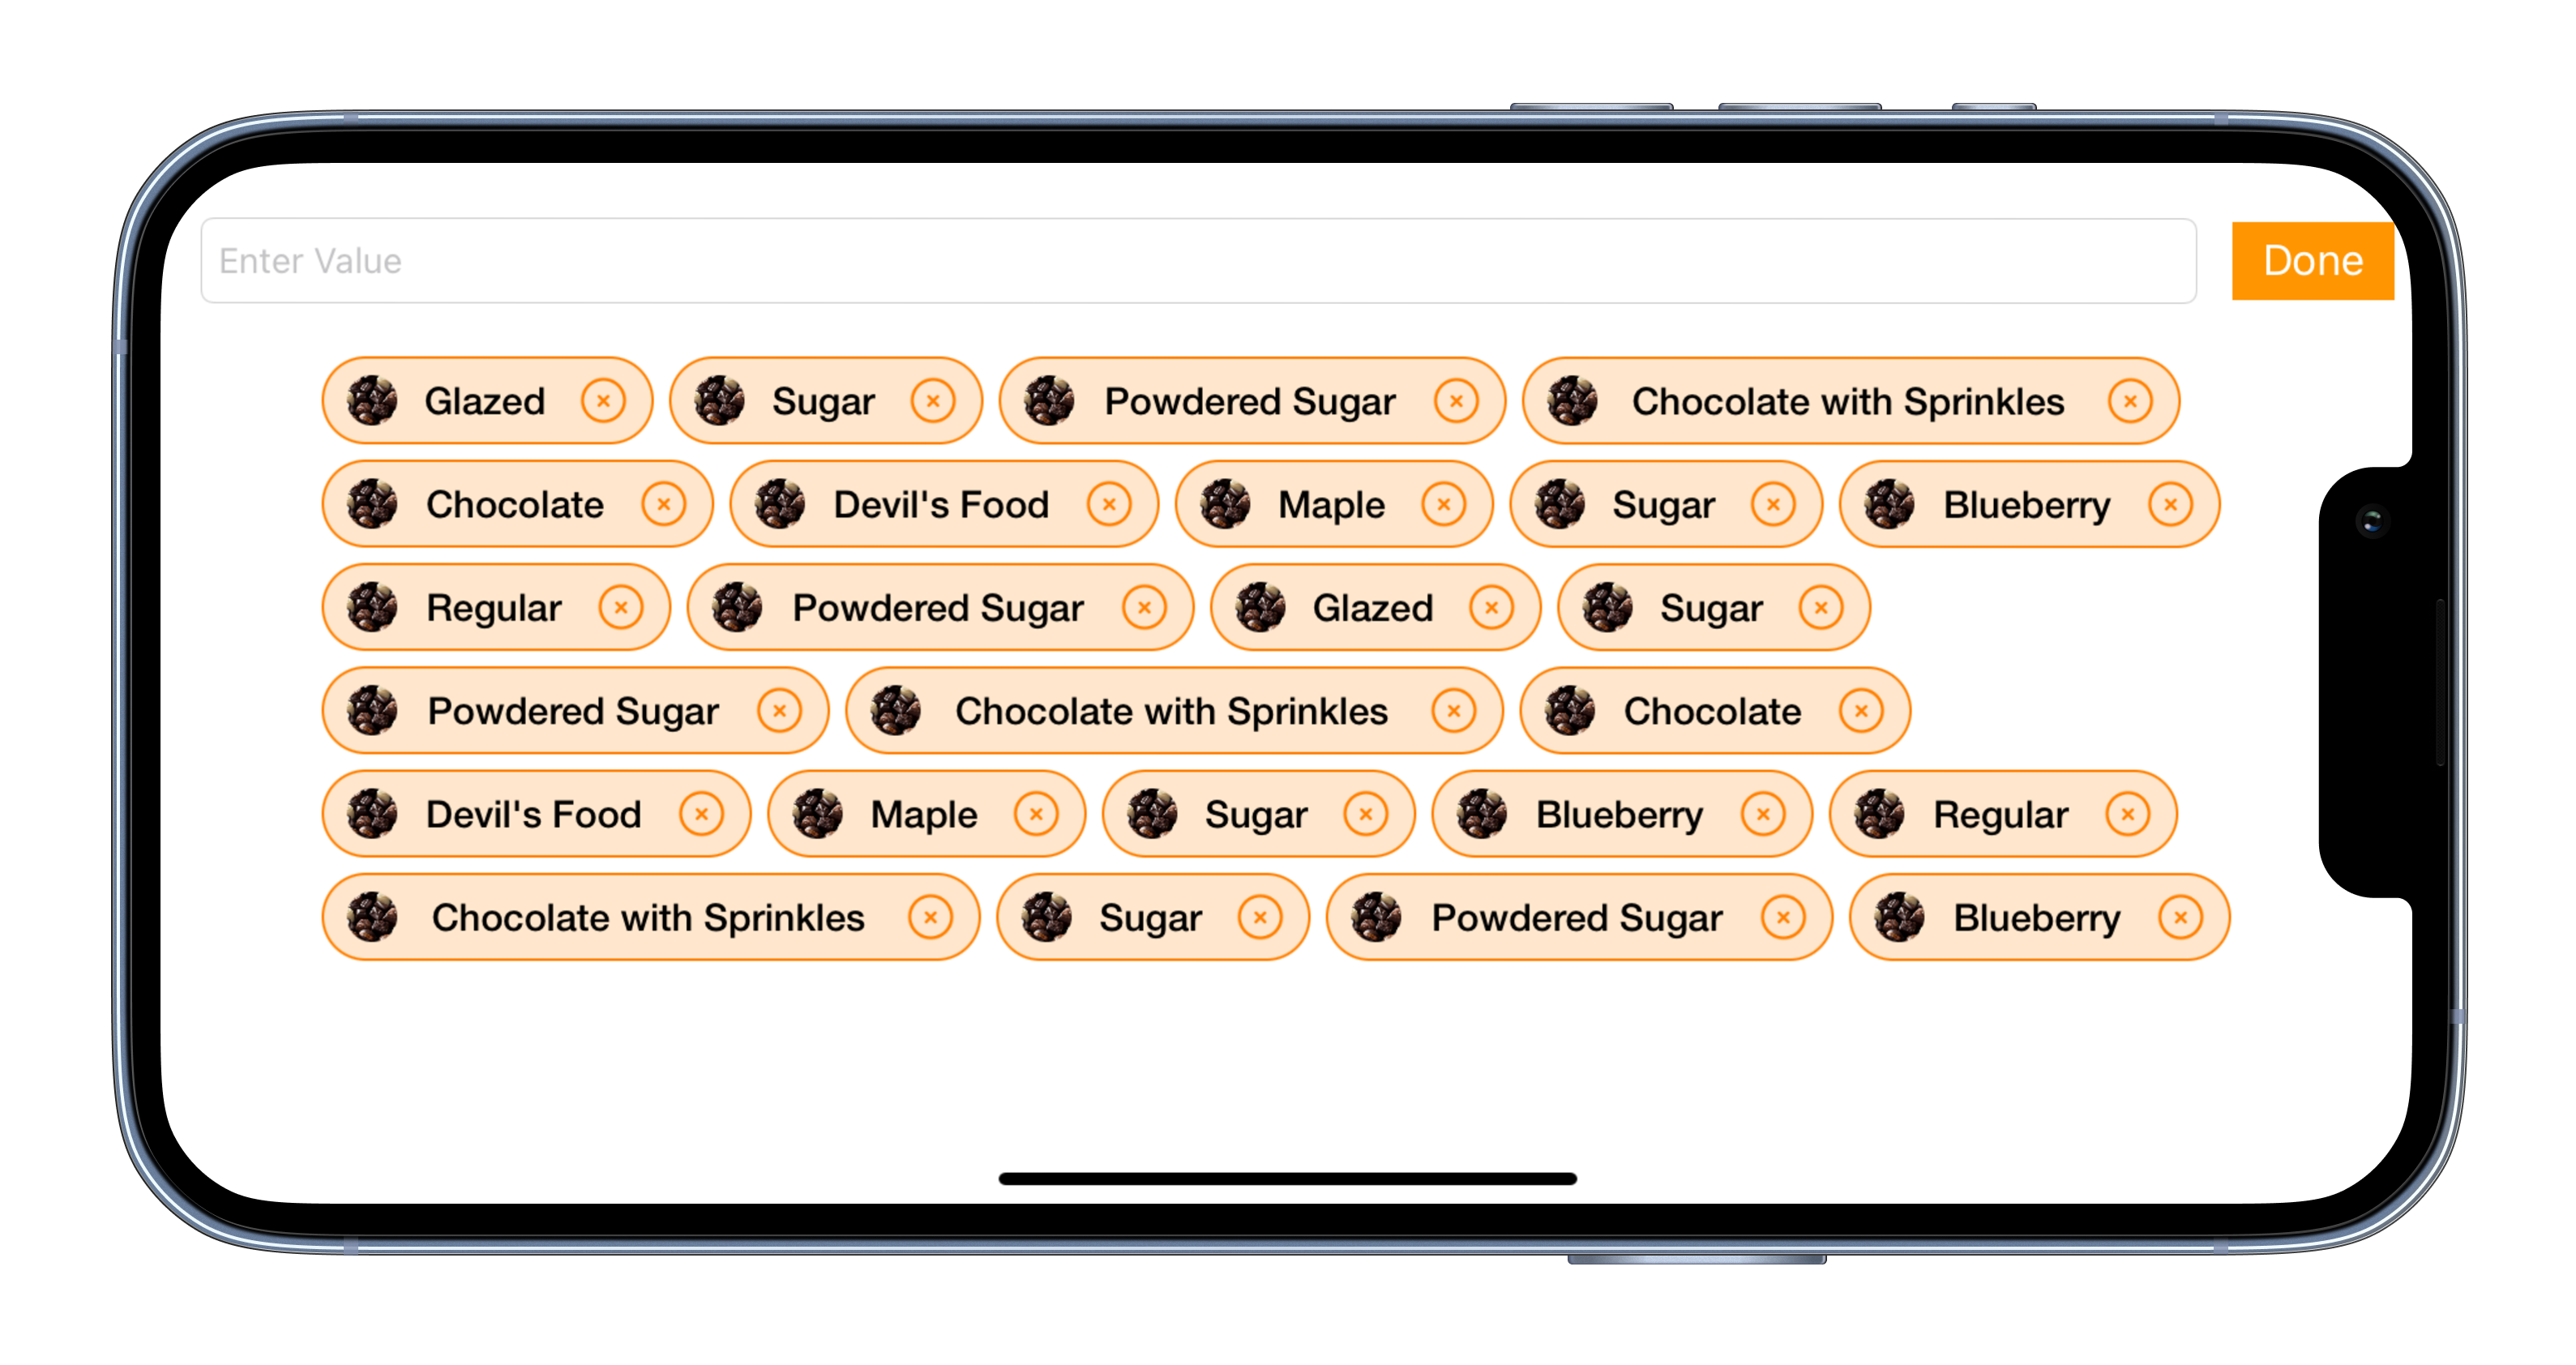
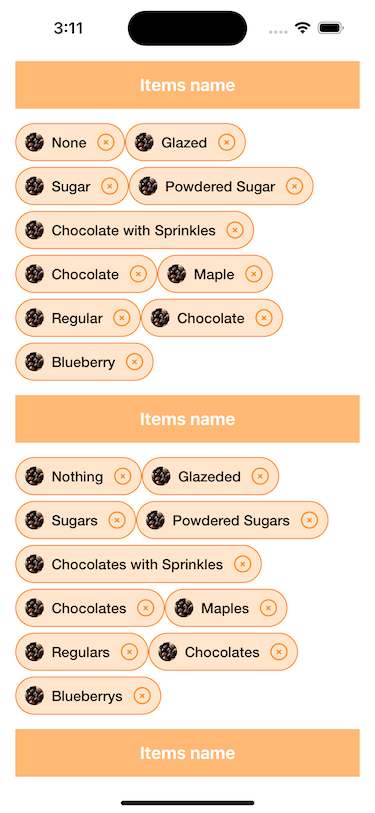
Used to get layout like following screens in UICollectionView using custom layout.
Requirements
Minimum OS 8.1 and later
Manual Installation
You can directly add Below the source files from Class folder to your project.
Objective C
- MIBubbleCollectionViewCell.h
- MIBubbleCollectionViewCell.m
- MICollectionViewBubbleLayout.h
- MICollectionViewBubbleLayout.m
Swift
- MIBubbleCollectionViewCell.swift
- MICollectionViewBubbleLayout.swift
- RoundImageView.swift
- HeaderView.swift
Introduce
MICollectionViewBubbleLayout is subclass of UICollectionViewFlowLayout with the custom layout.
Usage
- The easy way is to use UICollectionViewFlowLayout as it is. You can also subclass it if you intend to change the default behaviour.
- Either use it as a list to select the different tags and it's values or add the tags or value and show it in a list
Here is the instruction of how to use UICollectionViewFlowLayout in the Storyboard.
- Add native UICollectionView to the storyboard, establish relationships with its view controllers.
- Add UICollectionViewCell in the UICollectionView to the storyboard. 3)Chose the MIBubbleCollectionViewCell as a custom class inside the UICollectionViewCell to the storyboard. Configuration for change DefaultInterItemSpacing & DefaultLineSpacing of collecttionview cell you just have to change the value of below two constant in MICollectionViewBubbleLayout.h
#define kDefaultInterItemSpacing 5.0f
#define kDefaultLineSpacing 5.0f
Objective C -
-
Add "MICollectionViewBubbleLayout" ObjectiveC files to your project.
-
Conform delegate "MICollectionViewBubbleLayoutDelegate" to your class.
-
Set bubble layout in collectionview.
MICollectionViewBubbleLayout *layout = [[MICollectionViewBubbleLayout alloc] initWithDelegate:self]; [layout setMinimumLineSpacing:6.0f]; [layout setMinimumInteritemSpacing:6.0f]; [collVData setCollectionViewLayout:layout]; -
Implement MICollectionViewBubbleLayoutDelegate method to return size according to your text content.
 - (CGSize)collectionView:(UICollectionView *)collectionView itemSizeAtIndexPath:(NSIndexPath *)indexPath {

     NSString *title = arrData[indexPath.row];
     CGSize size = [title sizeWithAttributes:@{NSFontAttributeName:[UIFont fontWithName:@"HelveticaNeue-Bold" size:15]}];
     size.width = ceilf(size.width + CTitlePadding * 2);
     size.height = 24;

     //...Checking if item width is greater than collection view width then set item width == collection view width.
     if (size.width > collectionView.frame.size.width)
         size.width = collectionView.frame.size.width;
      return size;
 }
Swift -
-
Add "MICollectionViewBubbleLayout" Swift file to your project.
-
Conform delegate "MICollectionViewBubbleLayoutDelegate" to your class.
-
Set bubble layout in collectionview.
let bubbleLayout = MICollectionViewBubbleLayout() bubbleLayout.minimumLineSpacing = 6.0 bubbleLayout.minimumInteritemSpacing = 0 bubbleLayout.horizontalAlignment = .leading collVData.setCollectionViewLayout(bubbleLayout, animated: false) bubbleLayout.estimatedItemSize = UICollectionViewFlowLayout.automaticSize -
Implement MICollectionViewBubbleLayoutDelegate method to return size according to your text content.
func collectionView(_ collectionView:UICollectionView, itemSizeAt indexPath:NSIndexPath) -> CGSize { let title = arrData[indexPath.row].name var size = title.size(withAttributes: [NSAttributedString.Key.font: UIFont(name: "HelveticaNeue-Bold", size: 15)!]) let closeButtonWidth = 20.0 let imageWidth = 20.0 let spacing = 18.0 let totalWidth = Float(size.width + closeButtonWidth + imageWidth + spacing + CGFloat(kItemPadding * 2)) size.width = CGFloat(ceilf(totalWidth)) size.height = 40 //...Checking if item width is greater than collection view width then set item width == collection view width. if size.width > collectionView.frame.size.width { size.width = collectionView.frame.size.width } return size; } -
If require to add header view
 func collectionView(_ collectionView: UICollectionView, viewForSupplementaryElementOfKind kind: String, at indexPath: IndexPath) ->             UICollectionReusableView {
         switch kind {
         case UICollectionView.elementKindSectionHeader:

         let headerView = collVData.dequeueReusableSupplementaryView(ofKind: kind, withReuseIdentifier: "HeaderView", for: indexPath) as! HeaderView
         headerView.lblTitleText.text = arrData[indexPath.section].title
         headerView.lblTitleText.sizeToFit()
         return headerView

         default:
           return UICollectionReusableView()

         }
 }
LICENSE!
BubbleCollectionViewLayout is MIT-licensed.
Let us know!
We’d be really happy if you send us links to your projects where you use our component. Just send an email to [email protected] And do let us know if you have any questions or suggestion regarding our work.
