Azure Databricks Dev Ops Save
Complete end to end sample of doing DevOps with Azure Databricks
Azure-Databricks-Dev-Ops
Complete end to end sample of doing DevOps with Azure Databricks. This is based on working with lots of customers who have requested that they can reference a documented apporach. The included code utilizes KeyVault for each environement and uses Azure AD authorization tokens to call the Databricks REST API.
This will show you how to deploy your Databricks assests via GitHub Actions and Azure Dev Ops Pipelines so that your Notebooks, Clusters, Jobs and Init Scipts are automatically deployed and configured per environment.
![]()
Videos

| Description | URL |
|---|---|
| Overview of the Databricks DevOps solution | Right click here and Open Link in New Tab |
| Setting up a Service Principal in Azure and then configuring for GitHub Action and Azure DevOps Pipeline | Right click here and Open Link in New Tab |
| Initialize Azure with KeyVault and Secrets using the GitHub Action | Right click here and Open Link in New Tab |
| Deploy your Databricks artifacts using the GitHub Action | Right click here and Open Link in New Tab |
| Detailed Deployment Review of GitHub Action and Git Setup | Right click here and Open Link in New Tab |
| Configuring GitHub Integration with Databricks | Right click here and Open Link in New Tab |
How to deploy this in your subscription
- Create a service principal that will be used for your DevOps pipeline.
- Option A (easy security)
- Add the service principal to the Contributor role to your Subscription.
- Option B (fine grain security)
- Create three resource groups
- Databricks-MyProject-Dev
- Databricks-MyProject-QA
- Databricks-MyProject-Prod
- Grant the service principal to the Contributor role to each Resource Group
- Create three resource groups
- Option A (easy security)
Using GitHub Actions
-
Clone this repo to your GitHub
-
Click on Settings | Secrets and create a secret named: AZURE_CREDENTIALS
- Add this values of your Service Principal
{
  "clientId": "REPLACE:00000000-0000-0000-0000-000000000000",
  "clientSecret": "REPLACE: YOUR PASSWORD/SECRET",
  "subscriptionId": "REPLACE:00000000-0000-0000-0000-000000000000",
  "tenantId": "REPLACE:00000000-0000-0000-0000-000000000000",
  "activeDirectoryEndpointUrl": "https://login.microsoftonline.com",
  "resourceManagerEndpointUrl": "https://management.azure.com/",
  "activeDirectoryGraphResourceId": "https://graph.windows.net/",
  "sqlManagementEndpointUrl": "https://management.core.windows.net:8443/",
  "galleryEndpointUrl": "https://gallery.azure.com/",
  "managementEndpointUrl": "https://management.core.windows.net/"
}
- Add this values of your Service Principal
-
NOTE: When you click on actions you will not see the action if you forked/cloned this repo. I have requested the ability to "import" an existing action. For now you need to create a new action (blank one) and then copy the YAML from the .github/workflows/pipeline.yml file.
-
Click on
Actionsand clickDatabricks-CI-CDand clickRun workflow-
Fill in the fields (only bold are not the defaults)
- Notebooks Relative Path in Git:
notebooks/MyProject - Notebooks Deployment Path to Databricks:
/MyProject - Resource Group Name:
Databricks-MyProject(NOTE: "-Dev" will be appended) - Azure Region:
EastUS2 - Databricks workspace name:
Databricks-MyProject - KeyVault name:
KeyVault-MyProject** NOTE: You need to put a 1 or 2, etc on the end of this to make it globally unique** - Azure Subscription Id: replace this
00000000-0000-0000-0000-000000000000 - Deployment Mode:
Initialize KeyVault - Click "Run workflow"
- Notebooks Relative Path in Git:
-
The pipeline will create 3 Azure resource groups
-
-
The pipeline will create 3 Databricks workspaces
-
The pipeline will create 3 Azure KeyVaults (you can use your own KeyVault, see later in this document)
-
In the Azure Portal
- Go to the KeyVault created in each Azure resource group (repeat this for Dev, QA, Prod)
- Click on Access Policies
- NOTE: You might have to wait a few minutes to add the policies, mine gave a error at first and then was okay.
- Click
Add Access Policy- Configure from template:
Secret Management - Key Permissions
0 Selected - Secret Permissions
2 Selected(select just Get and List) - Certificate Permissions
0 Selected - Select your Azure Pipeline Service Principal (you can enter the Client ID (Guid) in the search box)
- Click Add
- Click Save
- Configure from template:
- Repeat the above steps and add yourself as a Full Secret management. You need to add yourself so you can set the secrets.
- Select the template
Secret Management - Leave all the Secret Permissions selected
- Select yourself as the Principal
- Click Add
- Click Save
- Select the template
- Click on Secrets
- Click Generate / Import
- You should see 4 secrets:
- databricks-dev-ops-subscription-id
- databricks-dev-ops-tenant-id
- databricks-dev-ops-client-id
- databricks-dev-ops-client-secret
- You need to set these values. These values for a Service Principal that will call over to the Databricks workspace to authenicate to the Databricks REST API.
- Option 1 (Create a new service principal)
- Option 2 (Use the same DevOps service principal)
- In either case you need to make the service principal a contributor of the Databricks workspace or a contributor in the resource group in which the workspace resides. You need to set this in Azure.
- Click on each secret and click "New Version" and set the secret value
- databricks-dev-ops-subscription-id:
00000000-0000-0000-0000-000000000000 - databricks-dev-ops-tenant-id:
00000000-0000-0000-0000-000000000000 - databricks-dev-ops-client-id:
00000000-0000-0000-0000-000000000000 - databricks-dev-ops-client-secret:
some crazy string
- databricks-dev-ops-subscription-id:
-
-
Re-run the pipeline
- Set the parameters
- Azure Subscription Id: replace this
00000000-0000-0000-0000-000000000000 - Deployment Mode:
Databricks(this is the default, so you really do not need to select it)
- Azure Subscription Id: replace this
- The pipeline should now deploy your Databricks artifacts
- Set the parameters
Using Azure DevOps Pipeline
-
Create an Azure Dev Ops project
-
Click on the Repo icon on the left menu
- Select "Import"
- Enter the URL:
https://github.com/AdamPaternostro/Azure-Databricks-Dev-Ops
-
Click on the Pipeline icon on the left menu
- Click "Create Pipeline"
- Click "Azure Repos Git"
- Click on your Repo
- Click the down arrow on the "Run" button and select Save (don't run it, just save it)
-
Click on the Gear icon (bottom left)
- Click Service Connections
- Click Create Service Connection
- Click Azure Resource Manager
- Click Service Principal (manual)
- Fill in the Fields
- You will need the values from when you created a service principal
- You can name your connection something like "DatabricksDevOpsConnection". Note the name you use.
- NOTE: You can also create a service connection per subscription if you would be deploying to different subscriptions. You would typically have three service principals set for this apporach.
- Click Verify and Save
-
Click on the Pipeline icon on the left menu
- Select your pipeline
- Click Run
- Fill in the fields (only bold are not the defaults)
- Notebooks Relative Path in Git:
notebooks/MyProject - Notebooks Deployment Path to Databricks:
/MyProject - Resource Group Name:
Databricks-MyProject(NOTE: "-Dev" will be appended) - Azure Region:
EastUS2 - Databricks workspace name:
Databricks-MyProject - KeyVault name:
KeyVault-MyProject** NOTE: You need to put a 1 or 2, etc on the end of this to make it globally unique** - Azure Subscription Id: replace this
00000000-0000-0000-0000-000000000000 - Azure Resource Connection Name:
DatabricksDevOpsConnection - Deployment Mode:
Initialize KeyVault -

- Click "Run"
- Notebooks Relative Path in Git:
- Fill in the fields (only bold are not the defaults)
-
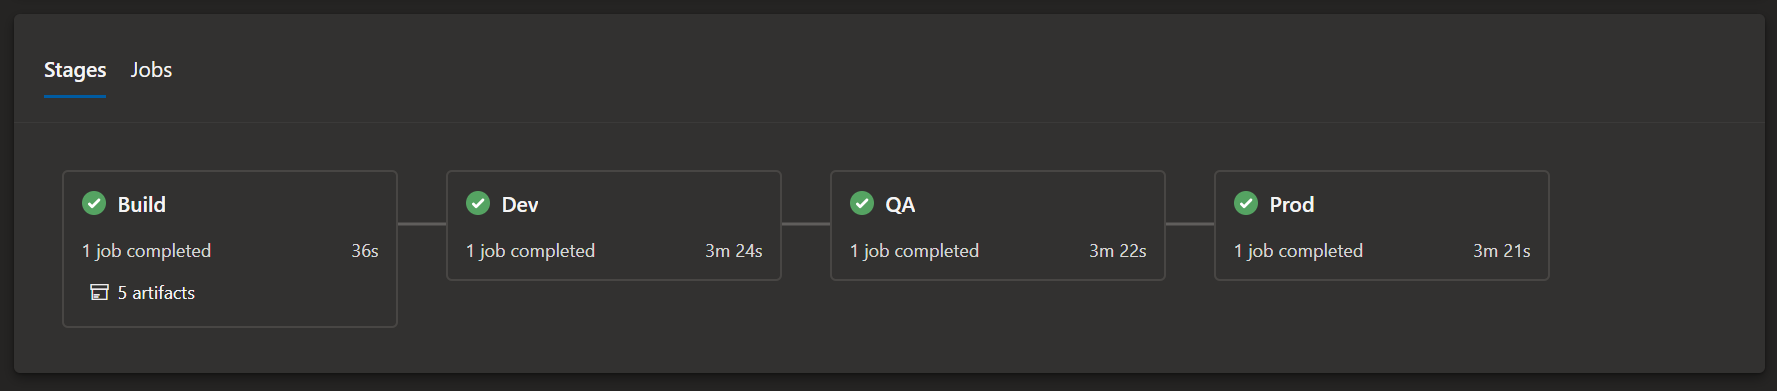
You should see the following
-
The first time the pipeline runs it will create your Databricks workspace and KeyVault. It will skip all the other steps!
- The pipeline will create 3 environment Dev, QA, Prod in Azure DevOps
- The pipeline will create 3 Azure resource groups
-
- The pipeline will create 3 Databricks workspaces
- The pipeline will create 3 Azure KeyVaults (you can use your own KeyVault, see later in this document)
- In the Azure Portal
- Go to the KeyVault created in each Azure resource group (repeat this for Dev, QA, Prod)
- Click on Access Policies
- NOTE: You might have to wait a few minutes to add the policies, mine gave a error at first and then was okay.
- Click
Add Access Policy- Configure from template:
Secret Management - Key Permissions
0 Selected - Secret Permissions
2 Selected(select just Get and List) - Certificate Permissions
0 Selected - Select your Azure Pipeline Service Principal (you can enter the Client ID (Guid) in the search box)
- Click Add
- Click Save
- Configure from template:
- Repeat the above steps and add yourself as a Full Secret management. You need to add yourself so you can set the secrets.
- Select the template
Secret Management - Leave all the Secret Permissions selected
- Select yourself as the Principal
- Click Add
- Click Save
- Select the template
- Click on Secrets
- Click Generate / Import
- You should see 4 secrets:
- databricks-dev-ops-subscription-id
- databricks-dev-ops-tenant-id
- databricks-dev-ops-client-id
- databricks-dev-ops-client-secret
- You need to set these values. These values for a Service Principal that will call over to the Databricks workspace to authenicate to the Databricks REST API.
- Option 1 (Create a new service principal)
- Option 2 (Use the same DevOps service principal)
- In either case you need to make the service principal a contributor of the Databricks workspace or a contributor in the resource group in which the workspace resides. You need to set this in Azure.
- Click on each secret and click "New Version" and set the secret value
- databricks-dev-ops-subscription-id:
00000000-0000-0000-0000-000000000000 - databricks-dev-ops-tenant-id:
00000000-0000-0000-0000-000000000000 - databricks-dev-ops-client-id:
00000000-0000-0000-0000-000000000000 - databricks-dev-ops-client-secret:
some crazy string
- databricks-dev-ops-subscription-id:
-
Re-run the pipeline
- Set the parameters
- Azure Subscription Id: replace this
00000000-0000-0000-0000-000000000000 - Azure Resource Connection Name:
DatabricksDevOpsConnection - Deployment Mode:
Databricks(this is the default, so you really do not need to select it)
- Azure Subscription Id: replace this
- The pipeline should now deploy your Databricks artifacts
- Set the parameters
Setting Approvals
You shoudl set approvals on each environment so the pipeline does not deploy to QA or Prod without an Approval.
- In Azure DevOps click on the Environments menu on the left
- Click on an Environment
- Clickon the "..." in the top right
- Select on Approvals and checks
- Click on Approvals
- Select a user or group that can approve the deployment to the environment
What Happens during the Pipeline (GitHub Actions / Azure Pipeline)
I typically use the same exact name for each of my Azure resources for each of my environments. I simply append a "-Environment (Dev, QA, Prod)" to make my deployments easy to author in my pipelines. I always suggust an easy naming standard per environment to make your DevOps code easy to write.
-
Azure Resource Groups are created (if they do not exist)
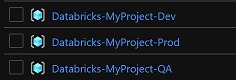
- The Dev stage creates a resouce group named "Databricks-MyProject-Dev"
- The QA stage creates a resouce group named "Databricks-MyProject-QA"
- The Prod stage creates a resouce group named "Databricks-MyProject-Prod"
- You can change these to your naming schema if you prefer
-
Azure Databricks are created or existing ones are set to the state in the ARM template
- The Dev stage creates a Databricks workspace named "Databricks-MyProject-Dev"
- The QA stage creates a Databricks workspace named "Databricks-MyProject-QA"
- The Prod stage creates a Databricks workspace named "Databricks-MyProject-Prod"
- You can change these to your naming schema if you prefer
-
Azure KeyVaults are created or existing ones are set to the state in the ARM template
- The Dev stage creates a KeyVault named "KeyVault-MyProject-Dev"
- The QA stage creates a KeyVault named "KeyVault-MyProject-QA"
- The Prod stage creates a KeyVault named "KeyVault-MyProject-Prod"
- You can change these to your naming schema if you prefer
-
KeyVault Secrets are downloaded by DevOps
- This allows you to have a KeyVault per Environemnt (Dev, QA, Prod)
- A lot of customers deploy QA and Prod to different Azure Subscriptions, so this allows each environment to be secured appropriately. The Pipeline Template just references KeyVault secret names and each environment will be able to obtain the secrets is requires.
- If you re-run the KeyVault mode of the pipeline all your secrets and access policies will be overwritten. That is why you just want to run it once. If you mess up, no big deal, just redo the settings.
-
Init Scripts are deployed
- The script obtains an Azure AD authorization token using the Service Principal in KeyVault. This token is then used to call the Databricks REST API
- A DBFS path of
dbfs:/init-scriptsis created - All init scripts are then uploaded
- Init scripts are deploy before clusters since clusters can reference them
-
Clusters are deployed
- The script obtains an Azure AD authorization token using the Service Principal in KeyVault. This token is then used to call the Databricks REST API
- New clusters created
- Existing clusters are updated
- Clusters are then Stopped.
- If you deploy with active jobs, you might not want to run the stop code.
- You might get a cores quota warning (meaning you do not have enough cores in your Azure subscription to start that many clusters), but the code will stop the clusters anyway, so it might not be an issue.
-
Notebooks are deployed
- The script obtains an Azure AD authorization token using the Service Principal in KeyVault. This token is then used to call the Databricks REST API
- The notebooks are deployed to the
/Usersfolder under a new folder that your specify. The new folder is not under any specific user, it will be at the root. I consider notebooks under a user as experimental and should not be used for official jobs.

-
Jobs are deployed
- The script obtains an Azure AD authorization token using the Service Principal in KeyVault. This token is then used to call the Databricks REST API
- Jobs are deployed as follows:
- Get the list of Jobs and Clusters (we need this for cluster ids)
- Process the each jobs.json
- Search the list of jobs based upon the job name
- If the jobs does not exists
- If the attribute "existing_cluster_id" exists in the JSON (it does not have to), the script replace the value by looking up the Cluster Id and call "Create"
- NOTE: YOU DO NOT PUT YOUR CLUSTER ID in the existing cluster id field. You need to put the Cluster Name and this script will swap it out for you. Your cluster id will change per environment.
- If the attribute "existing_cluster_id" exists in the JSON (it does not have to), the script replace the value by looking up the Cluster Id and call "Create"
- If the job exists
- If the attribute "existing_cluster_id" exists in the JSON (it does not have to), the script replace the value by looking up the Cluster Id and call "Create"
- NOTE: YOU DO NOT PUT YOUR CLUSTER ID in the existing cluster id field. You need to put the Cluster Name and this script will swap it out for you. Your cluster id will change per environment.
- The script will take the entire JSON (in your file) and place it under a new attribute named "new_settings"
- The script will inject the attribute "job_id" and set the value
- Call "Reset" which is "Update"
- If the attribute "existing_cluster_id" exists in the JSON (it does not have to), the script replace the value by looking up the Cluster Id and call "Create"
Adding your own items
- You might want to deploy policies, upload JAR files, etc.
- You start by placing these in source control
- You edit the pipeline to place the item in an artifact
- You can should created a new script under the
deployment-scriptsfolder.- Borrow some code from one of the other tasks.
- Look up the Databricks REST API and see what JSON you need
- Some calls have a Create and a seperate Update with slightly different JSON
- Think about the order of operations. If you are creating a Databricks Job and it references a cluster, then you should deploy the Job after the clusters.
- NOTE: If you need to inject a value (e.g. Databricks "cluster_id"), you can see the technique in the deploy-clusters.sh script. Some items require you to reference an internal Databricks value during your deployment.
How to use with your own existing Databricks environment
- Your existing workspace will mostlikely be your "work area" that you need to tie to source control.
- In my example I would create a resource group in Azure named
Databricks-MyProject-WorkArea - Create a Databricks workspace in Azure named
Databricks-MyProject-WorkAreain the resource groupDatabricks-MyProject-WorkArea
- In my example I would create a resource group in Azure named
- Link your Databricks to source control
- Create or import some notebooks
- I imported some test notebooks from Databricks for this test repo
- Link the Notebook to the Azure DevOps repo
- Save your Notebook
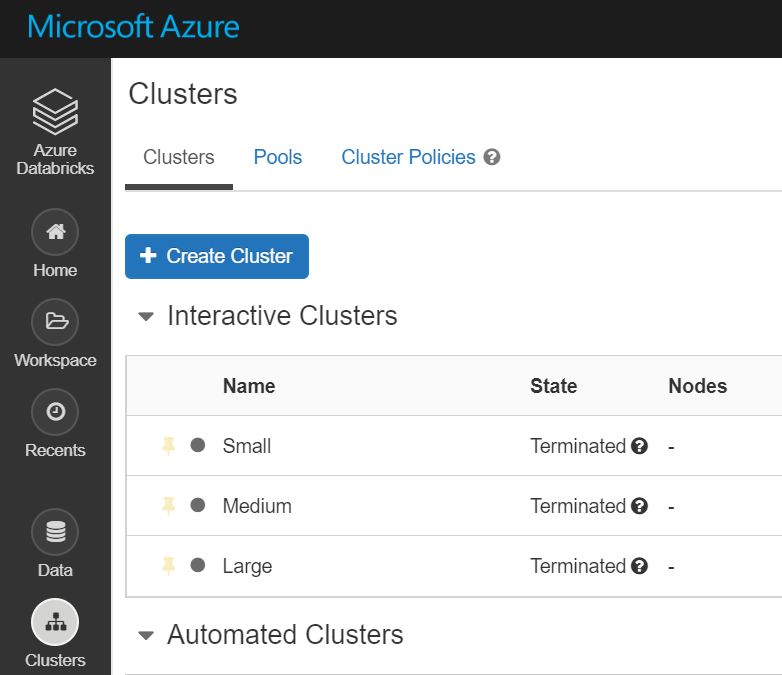
- Create a cluster
- Int the cluster UI there is a "JSON" link that will show you the JSON to create the cluster. You can cut and paste that as your cluster defination. You will need to remove the "cluster_id" since Databricks determines this, you cannot send it in your JSON.
- Re-run the pipeline and the Notebook should be pushed to Dev, QA and Prod
Important Details
- You can test everything locally. Open a bash prompt and change to the directory of the items you want to deploy and call the appropriate deployment script.
- The deployment scripts expect to have their
working directoryset to be in the folder as theartifacts(e.g. if deploying jobs then run from jobs folder)- You can run via command line locall to test
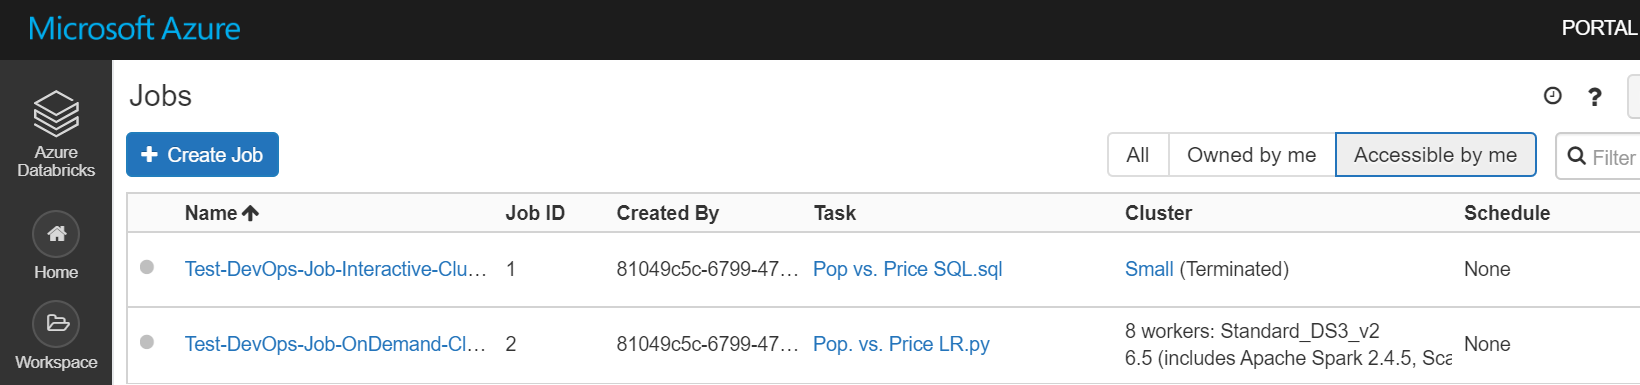
# Change the below path cd ./Azure-Databricks-Dev-Ops/notebooks/MyProject ../../deployment-scripts/deploy-notebooks.sh \ '00000000-0000-0000-0000-000000000000 (tenant id)' \ '00000000-0000-0000-0000-000000000000 (client id)' \ '... (client secret)' \ '00000000-0000-0000-0000-000000000000 (subscription id)' \ 'Databricks-MyProject-Dev' \ 'Databricks-MyProject-Dev' '/ProjectFolder' - In the Test-DevOps-Job-Interactive-Cluster.json, note the code
"existing_cluster_id": "Small". The existing cluster id says "Small" which is NOT an actual cluster id. It is actually the name field in the small-cluster.json ("cluster_name": "Small",). During deployment the deploy-jobs.sh will lookup the existing_cluster_id value in the name field and populate the jobs JSON with the correct Databricks cluster id.{ "name": "Test-DevOps-Job-Interactive-Cluster", "existing_cluster_id": "Small", <- this gets replaced with the actual cluster id "email_notifications": {}, "timeout_seconds": 0, "notebook_task": { "notebook_path": "/MyProject/Pop vs. Price SQL.sql", "revision_timestamp": 0 }, "max_concurrent_runs": 1 } - You do not need to use the Resource Groups names with just a suffix of "-Dev", "-QA" or "-Prod", you can edit the azure-pipelines.yml to make these values whatever you like.
Notes
- You can used your own KeyVault
- The DevOps service principal just needs access to read the keys.
- Just add the secrets to your KeyVault and grant the service principal access via a policy.
- I do not use the Databricks CLI.
- I know there are some DevOps Marketplace items that will deploy Notebooks, etc. The reason for this is that customers have had issues with the CLI installing on top of one another and their DevOps pipelines break. The Databricks REST API calls are simple and installing the CLI adds a dependency which could break.
- To get the JSON to deploy, you can use the script
Sample-REST-API-To-Databricks.shto call theListoperation to get existing items from a workspace. If you create a new Job in Databricks, then run this script calling thejobs/listto grab the JSON to place in source control.
Potential Improvements
- This does not deleted items removed from source control from the Databricks workspace. At the end of each script you would need to add code to get a list of items and then remove any that are no longer under source control.
- Change pipeline test for the existance of a KeyVault if you want to eliminate the Mode parameter (Intialize-KeyVault | Databricks). If the KeyVault exists, then just skip the KeyVault ARM template task.
- Seperate the tasks into another repo and call then from this pipeline. This would make the tasks more re-useable, especially accross many differnet Git repos.
- This architecture needs to be updated this based upon the new Data Science Git Projects instead of using the Notebook per Git integration.
- Databricks has a new feature where Notebooks do not need to be indiviually linked.
- This should make deploying notebooks easier, but existing customers might need time to migrate
- Deploy Hive/Metastore table changes/scripts
- The above pipeline does not deploy Hive tables.
- You could deploy a notebook with you Hive CREATE tables in the notebook and then execute the notebook
- Deal with deploying Mount Points.
- Most customers tha use mount ponits will run a Notebook, one time, and then delete it. This configures the mount points and then the notebook is deleted to hide the secrets.
- Databricks does not have a REST API to configure Azure KeyVault to be the backing store of your Databricks Secrets.
- https://docs.microsoft.com/en-us/azure/databricks/security/secrets/secret-scopes#--create-an-azure-key-vault-backed-secret-scope
- When there is one, this should be updated to include a sample.
- You could try using a Selenium Task to automate a browser experience
- You can deploy your Databricks to a VNET. See here for how to update the include Databricks ARM template (Link)
- The Bash scripts could be re-written in PowerShell Core for users who are more familiar with PowerShell.
What about Data Thrist and Azure Docs
- Some people have asked if they should use Data Thrist from the Azure Dev Ops marketplace
- https://marketplace.visualstudio.com/items?itemName=DataThirstLtd.databricksDeployScriptsTasks
- If this works for you then it is a good choice.
- I prefer the Databricks REST API calls since I can use Azure Dev Ops Pipelines or GitHub Actions
- What about this advice on Azure Docs: https://docs.microsoft.com/en-us/azure/databricks/dev-tools/ci-cd/ci-cd-azure-devops
- Great reading around packaging up a Python library and deploying to a cluster
- If you prefer Python versus Bash "deployment-scripts" then grab these for your DevOps
- I like how they do a test and ingest the results back into Azure Dev Ops
