Alphicc Brick Save
🧱 Brick - Multiplatform navigation library for Compose.
Brick
Take control of your apps
Brick is a lightweight library to make navigation.
Features
- Framework free (Router can be injected in any layer of project. Navigate from any place you want. Example: UI-navigation or business logic navigation)
- Child component navigation (easy BottomSheet navigation, Tab navigation, Dialogs navigation)
- Composite navigation (build component from many mini-components.)
- Decompose everything (Decompose component by buttons, text fields etc.!)
- Nested navigation
- Lifecycle
- Multi-module navigation (provide router instance from any module to any module or just implement all app navigation inside one module or something else)
- Deep-link support
- Arguments support
- components communication support
- Current component check
- Transition animations
- Overlay navigation
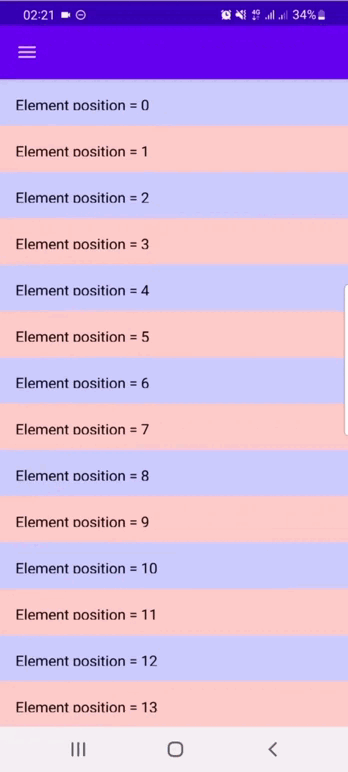
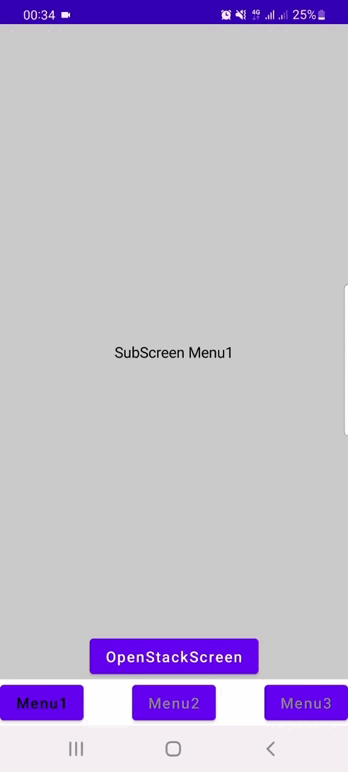
Samples
|
|
|
|
| Overlay sample | Transition Animation | Small sample | Large sample |
|
| Desktop sample |
Installation
Add repository in your project
repositories {
    mavenCentral()
    maven {
        url "https://maven.pkg.jetbrains.space/public/p/compose/dev"
    }
}
Add the dependency in your build.gradle
dependencies {
    //Brick
    implementation 'io.github.alphicc:brick:2.3.0'
}
Android: Set jvmTarget in your build.gradle
kotlinOptions {
    jvmTarget = '11'
}
Thats all!
Usage
- Create Router in any place of your project (Note: router contains all information about component. Router destroyed = all navigation/components data destroyed).
val router: TreeRouter = TreeRouter.new()
- Create Component. Component != UI. Component has lifecycle, channels to communicate between other components. Component can live without UI. UI - part of Component.
val component1 = Component<Unit>(
    key = "1",
    content = { _, _ -> SimpleComponent(1, "new") { smallSampleRouter.addComponent(component2) } } // content - ui
)
- Provide ContainerConnector to %PLATFORM%AnimatedComponentsContainer or %PLATFORM%ComponentsContainer . Your Router implements ContainerConnector.
class SmallSampleActivity : ComponentActivity() {

    val containerConnector: ContainerConnector = ... //inject or provide from application class

    override fun onCreate(savedInstanceState: Bundle?) {
        super.onCreate(savedInstanceState)

        setContent {
            AndroidComponentsContainer(containerConnector) {
                //on router empty callback
                //called only one router
                //e.g. : [ParentRouter] (has [ChildRouter1], [ChildRouter2] )
                //ChildRouter1.cleanRouter -> onRouterEmpty called only inside ChildRouter1
                //ParentRouter.cleanRouter -> onRouterEmpty called only inside ParentRouter
                //When you called newRootComponent inside ParentRouter, ChildRouter# onRouterEmpty method didn't called
            }
        }
    }
}
- Navigate!
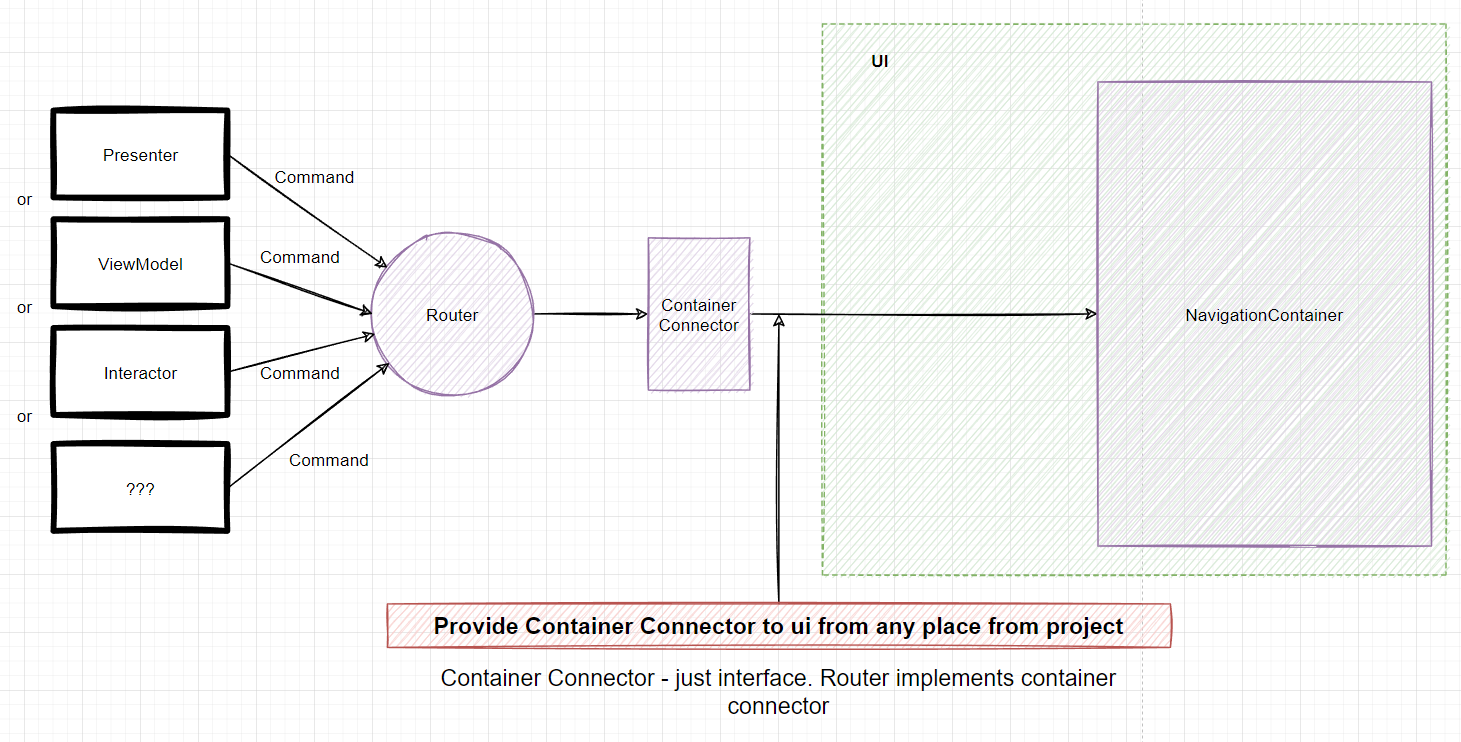
Work representation
Integration schema
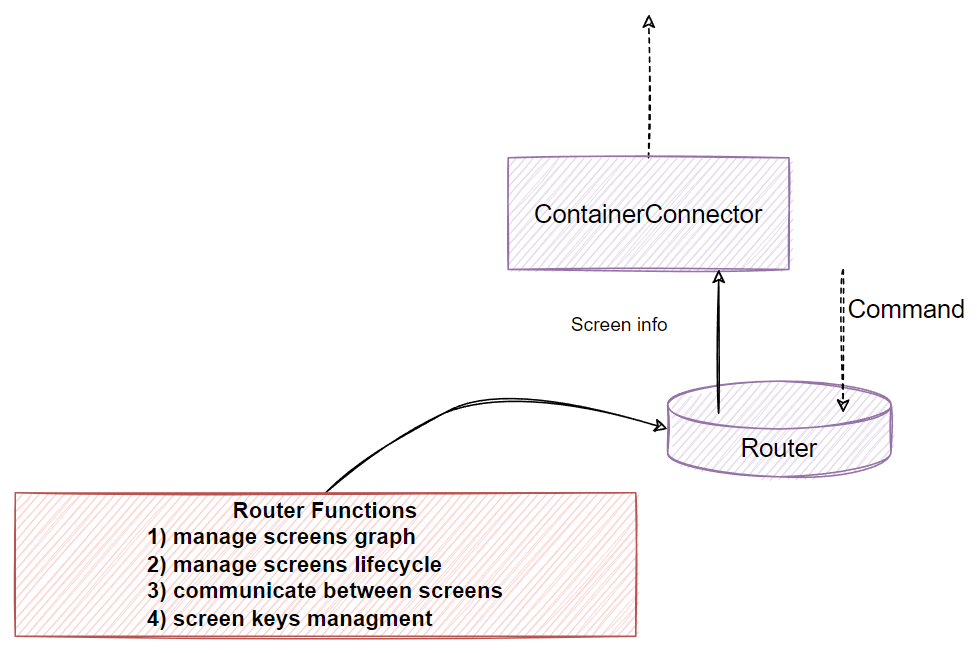
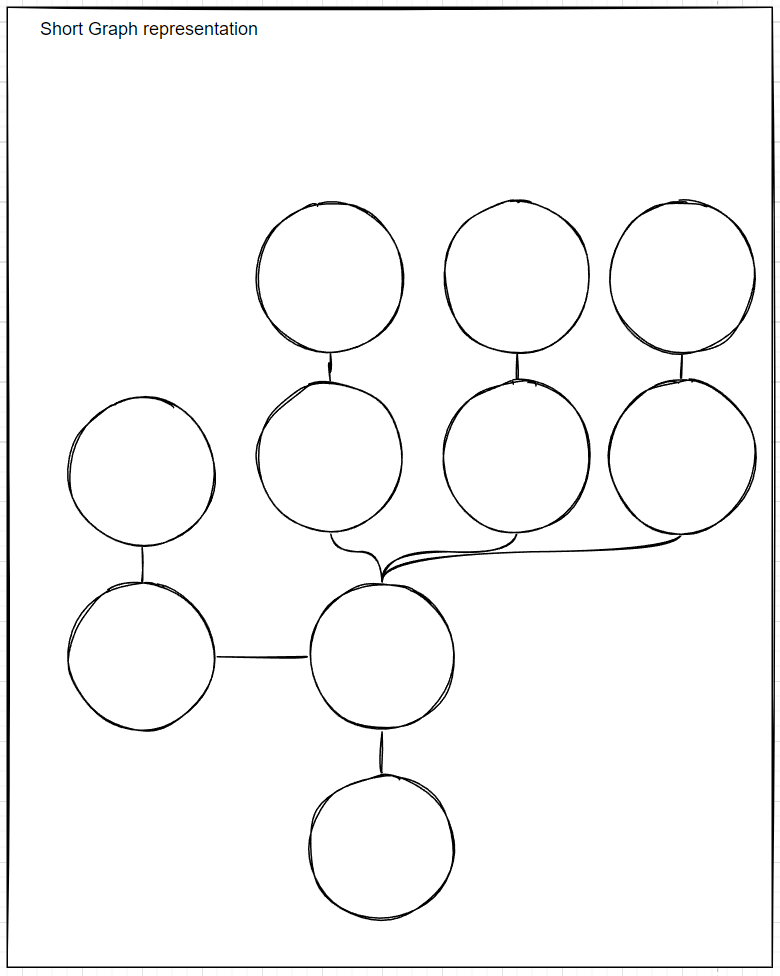
Work schema
Lifecycle sample

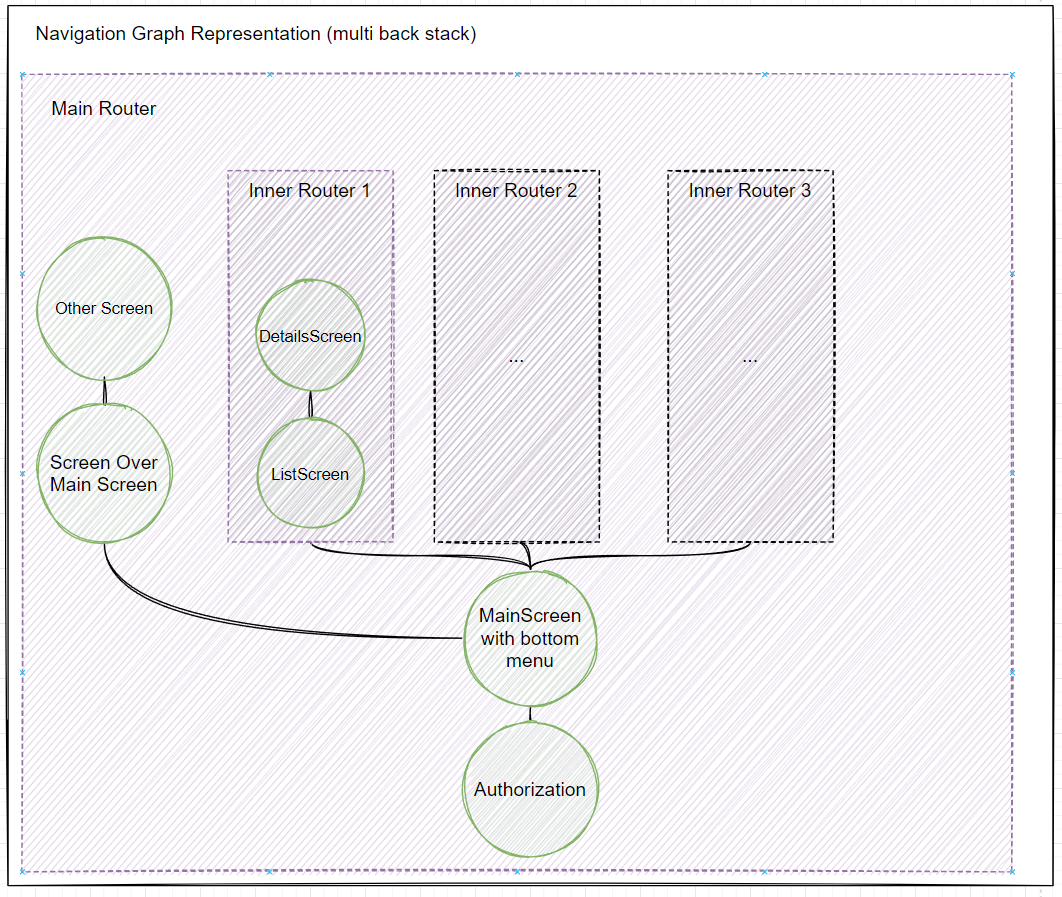
Multistack navigation
- Create nested router using branch method.
//Components.bottomMenuComponent.key - component key that contains nested container
private val firstMenuRouter = mainRouter.branch(Components.bottomMenuComponent.key).apply {
    addComponent(Components.innerNavigationComponent, this)//initial navigation sample
}
- Pass created nested router to your nested %PLATFORM%ComponentsContainer.
//inside your composable function
%PLATFORM % AnimatedComponentsContainer(firstMenuRouter)
- Use your nested router to make nested navigation!
Multistack graph sample (simple)
Multistack graph sample (extended)
Composite navigation
Starting with version 2.* and above, you can extract small UI components to the Component and paste this small components in any place of other Component you want. Thus making them reusable. It also makes it possible to further decompose work when working in the team. Allowing you to work on one small UI component (like button, text field etc.) without affecting other components.
Screen sample
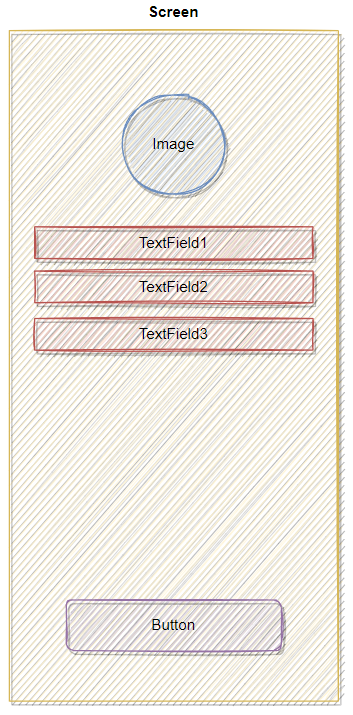
Decompose your screen by components
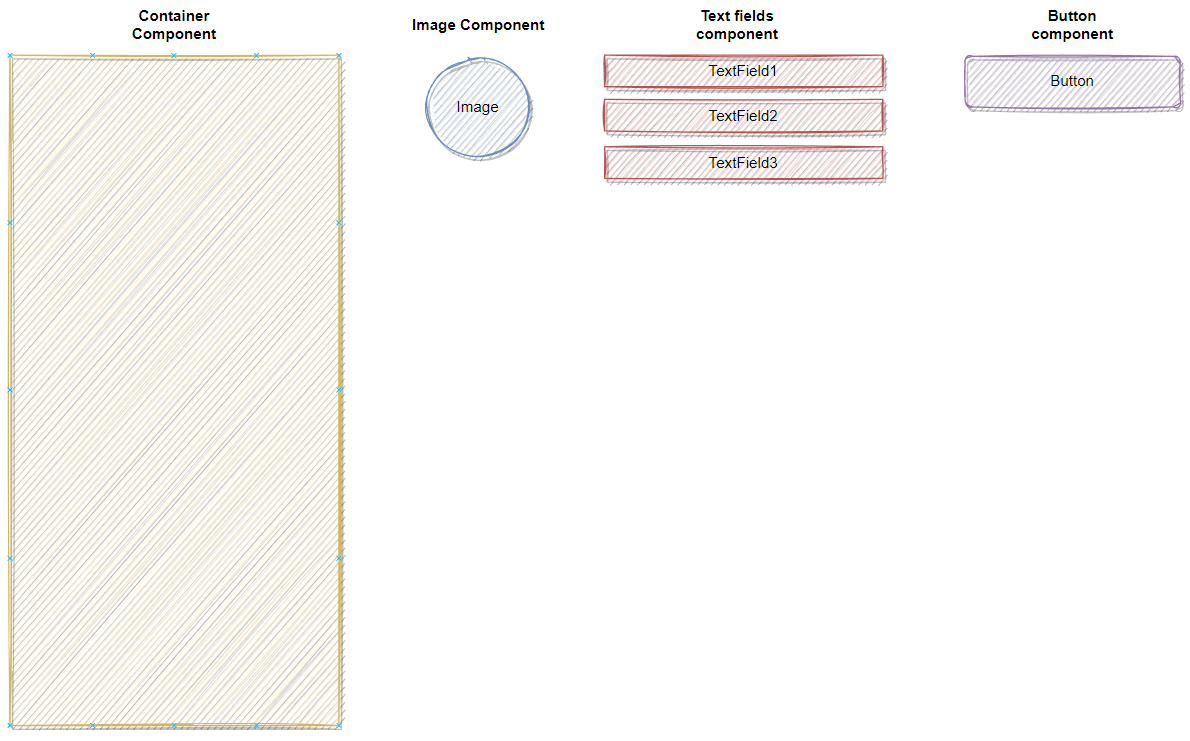
Code sample
Main screen component
val compositeScreen = Component<Unit>(
    key = "CompositeScreen",
    content = { _, compositeContainer ->
        Box(modifier = Modifier.fillMaxSize()) {
            Box(modifier = Modifier.align(Alignment.TopCenter)) {
                compositeContainer.place(component1.key)//use place method to define position of your component
            }

            Box(modifier = Modifier.align(Alignment.Center)) {
                compositeContainer.place(component3.key)
            }

            Box(modifier = Modifier.align(Alignment.BottomCenter)) {
                compositeContainer.place(component2.key)
            }
        }
    }
)
Components.
val component1 = Component<Unit>(
    key = "CompositeScreenInternal 1",
    keepAliveCompose = true, //to keep compose ui in the graph (NOTE!!! ANIMATION DIDN'T WORK WITH keepAliveCompose = true. default = false)
    onCreate = { _, _ -> }, lifecycle of your componentg
    onDestroy = { _ -> },
    content = { _, _ -> Text("CompositeScreenInternal 1") }
)

val component2 = Component<Unit>(
    key = "CompositeScreenInternal 2",
    content = { _, _ -> Text("CompositeScreenInternal 2") }
)

val component3 = Component<Unit>(
    key = "CompositeScreenInternal 3",
    content = { _, _ ->
        Button({}) {
            Text("CompositeScreenInternal 3")
        }
    }
)
Attach your components to main component (screen)
compositeSampleRouter.addComponent(compositeScreen) // default navigation method. like addScreen method in 1.*.*
compositeSampleRouter.attachCompositeComponent(component1, "321") // attach component into compositeScreen
compositeSampleRouter.attachCompositeComponent(component2) //composite components will be attached to current main component (screen)
compositeSampleRouter.attachCompositeComponent(component3)
compositeSampleRouter.detachCompositeComponent(component3) // use to detach composite component from main component
Note: composite components are shared between the component they are added to and its child components
Communicate between components
Pass data
// router - is your TreeRouter
// Screens.channelArgumentReceiveComponent.key - key of your destination component
// counter - argument
router.passArgument(Screens.channelArgumentReceiveComponent.key, counter)
// Also you can pass broadcast argument to SharedFlow
val argument: CustomArgumentType = CustomArgumentType()
router.passBroadcastArgument(argument) // Use it to pass argument to SharedFlow

router.broadcastFlow // Use it to receive arguments from SharedFlow
    .filterIsInstance<CustomArgumentType>()
    .onEach { argument ->

    }
    ...
Receive data
...
onCreate = { channel, _ -> return@Component ChannelArgumentReceiveViewModel(channel) }, //channel it is a SharedFlow that located in component onCreate lifecycle method
...

// Use method get<T> to receive your data
channel.onEach { _count.value = it.get() }.launchIn(scope)
Navigation methods list
- currentComponentKey
- backComponent
- backToComponent
- replaceComponent
- addComponent
- lastChildKey
- backChild
- backToChild
- replaceChild
- addChild
- cleanRouter
- setOverlay
- removeOverlay
- newRootComponent
- attachCompositeComponent
- detachCompositeComponent
Migrate from 1.* to 2.* version
- Rename AndroidAnimatedScreensContainer to AndroidAnimatedComponentsContainer
- Rename AndroidScreensContainer to AndroidComponentsContainer
- Rename DesktopAnimatedScreensContainer to DesktopAnimatedComponentsContainer
- Rename DesktopScreensContainer to DesktopComponentsContainer
- To handle router empty action provide onRouterEmpty callback into %PLATFORM%ComponentsContainer
- Rename Screen<T> to Component<T>
- Inside Component<T> change
...
content = { dataContainer ->  }
...
//to
...
content = { dataContainer, compositeContainer ->  }
...
- Rename currentScreenKey to currentComponentKey
- Rename backScreen to backComponent
- Rename backToScreen to backToComponent
- Rename replaceScreen to replaceComponent
- Rename addScreen to addComponent
- Rename newRootScreen to newRootComponent
- To fix other package changes just reimport
