RyanZotti Self Driving Car Save
Self Driving (Toy) Ferrari


Web App
I built a web app with the goal of being able to go from nothing (no data or model) to collected data, a trained and deployed model, and a fully autonomous vehicle all in under an hour. The web app runs locally on your laptop and facilitates every part of the model development life cycle.
I have a strong background in data science, machine learning, data engieering, and devops, but I'm new to front-end, javascript, and UX design work, so I paid $50 for a bootstrap js template that I heavily modified.
The app persists all data to a local Postgres Docker container with a mounted file system (a folder shared between the local container and your laptop). I'm still working on dockerizing the web app. Right now if you try to run it anywhere other than my laptop you'll get a lot of import and dependency errors.
Once you collect driving data with a PS3 controller, you can click a button on the app to transfer the data from the Pi to the laptop.

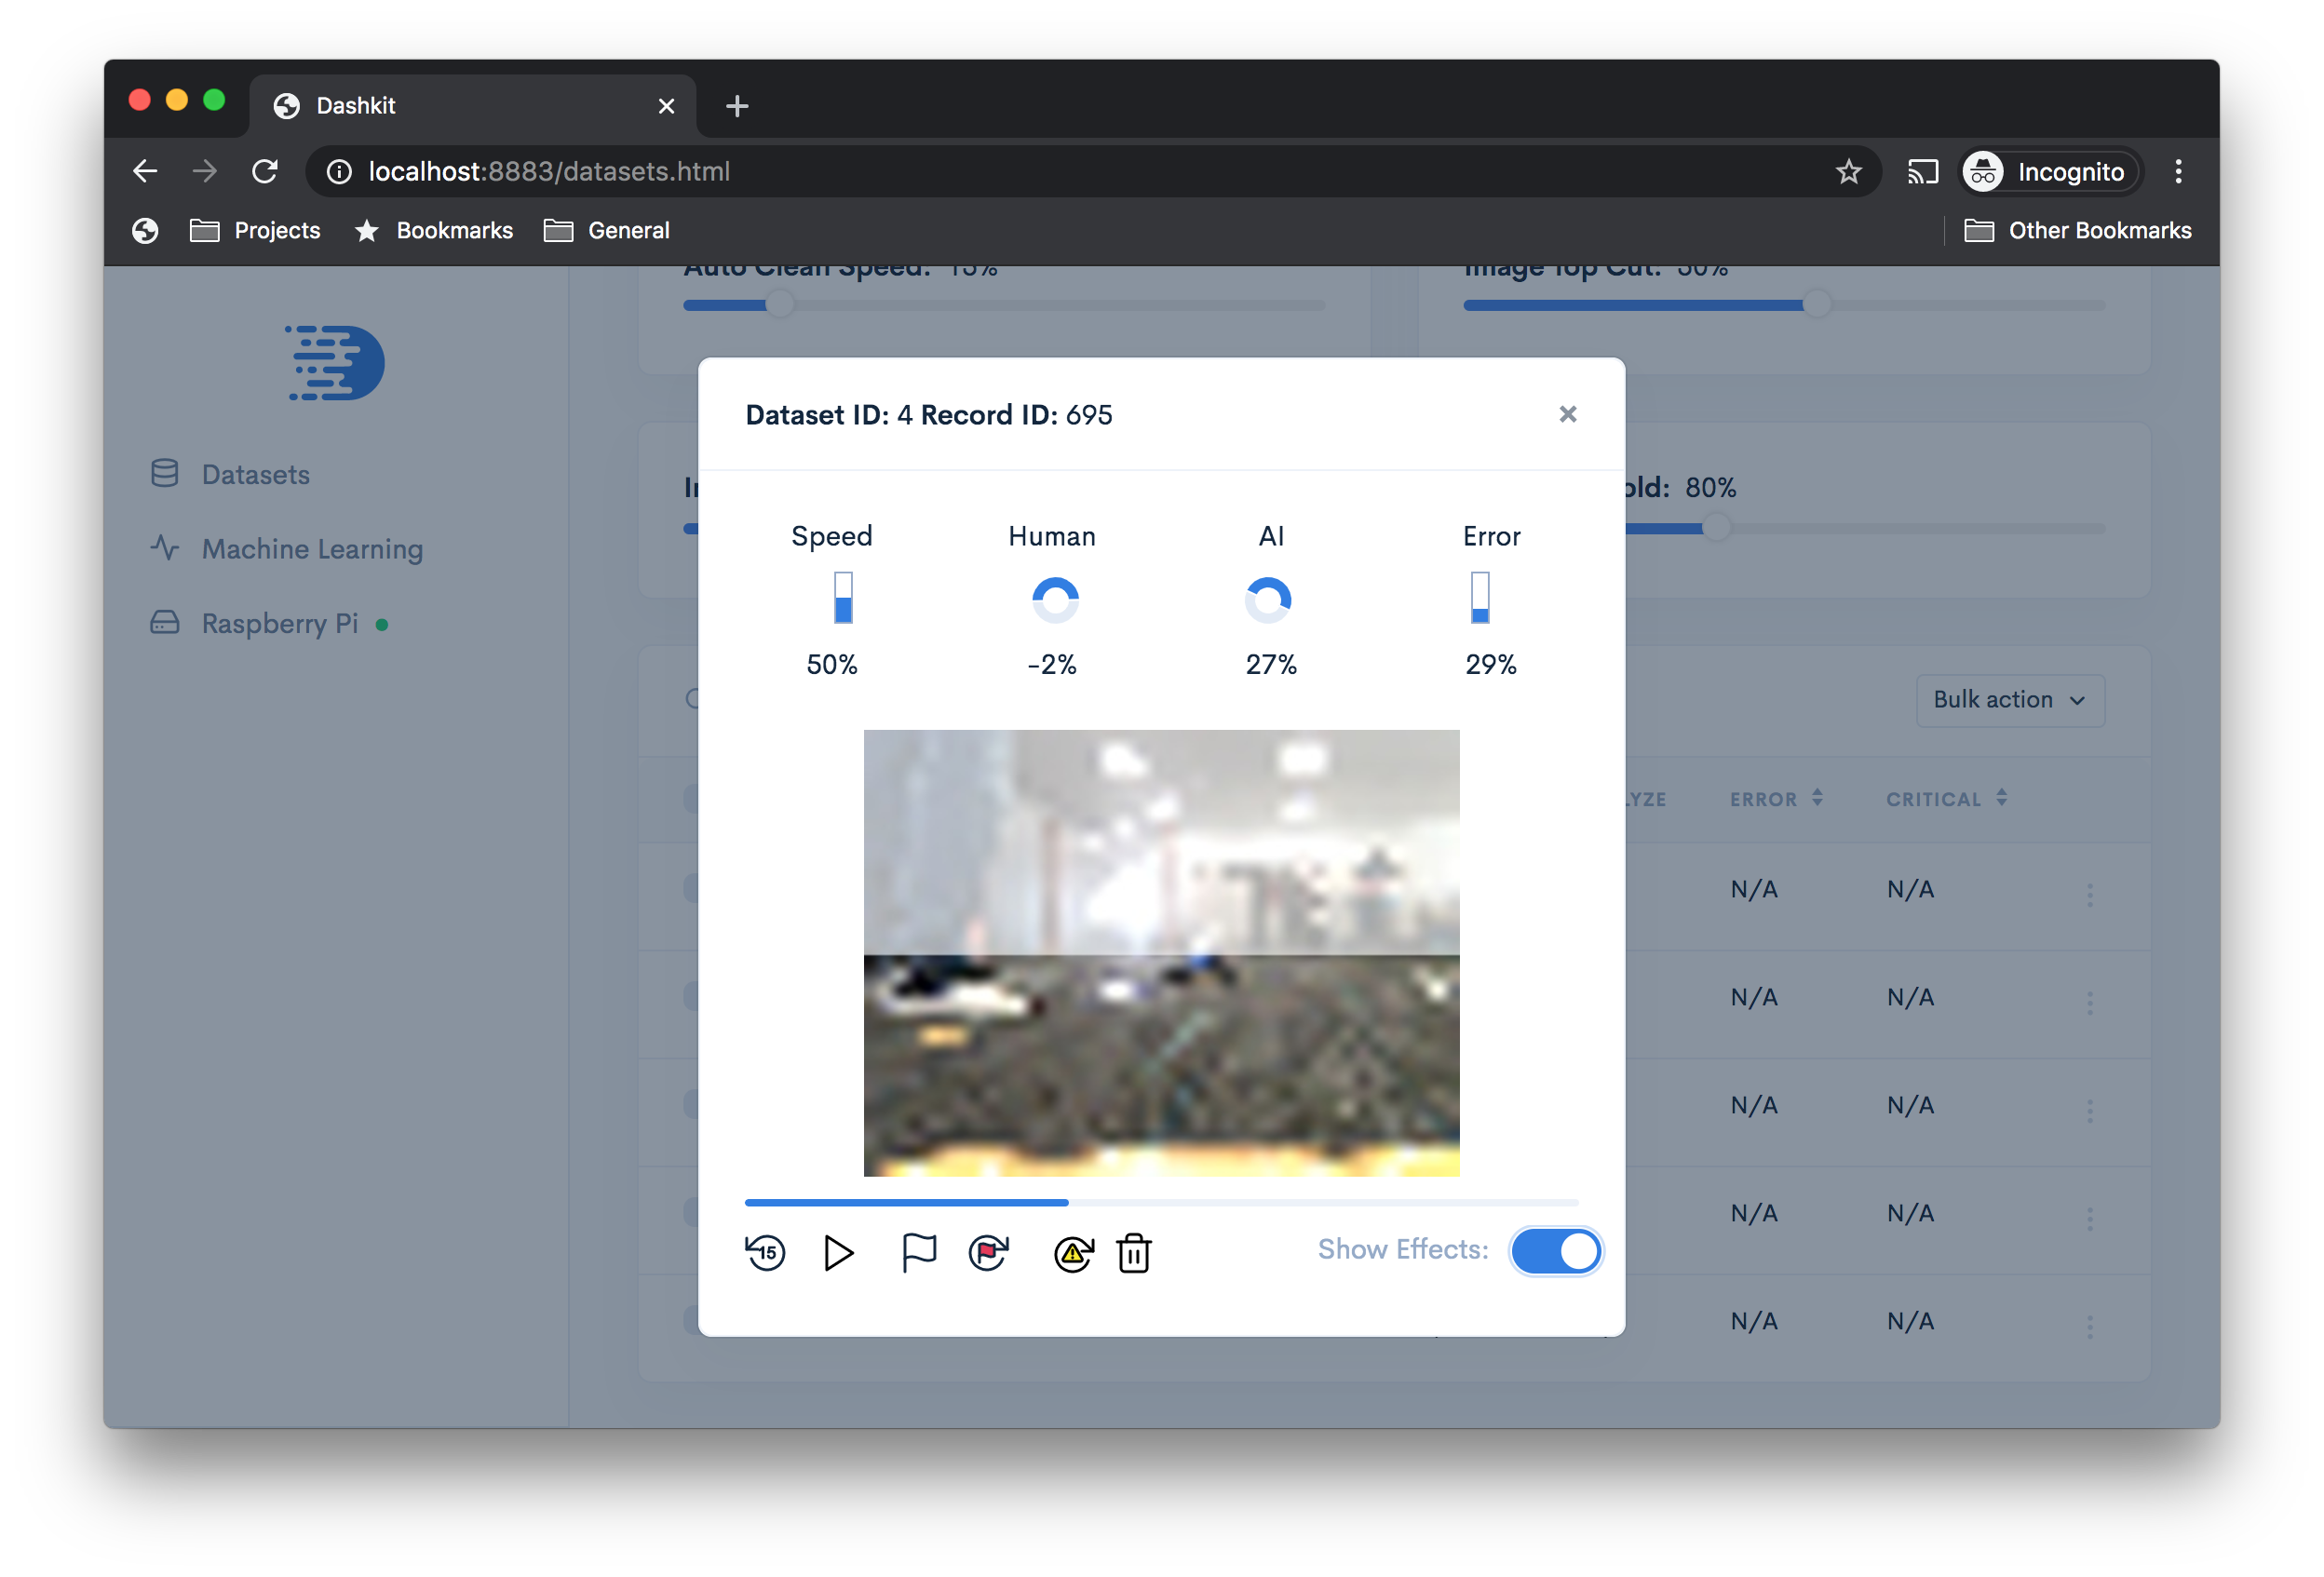
Review the data you've collected to delete bad records caused by video latency or hardware failures on the PS3 controller.

You can also adjust the size of the image for substantially faster training and inference, or chop off the top portion of an image so that the model is less distracted by background noise (helpful if you're in a time crunch and don't have time to collect a lot of data). The app lets you see the effect of these changes so that you can see what the model sees.
The app makes it easier to select model training and test datasets.

Train a new or existing model (transfer learning), and apply image size and crop settings.

The app shows you training progress and model performance over time.

Once you stop training you can deploy the model to your dockerized app on your laptop or the Pi.

I also simplified the interaction with the Pi (where to save the data, the model, etc). The "dashboard" section allows you to see model predictions in real-time and toggle between human data gathering (with the PS3), and model inference (i.e., autonomous driving).

The app also tracks the health of all the dockerized part services that the Pi runs.

It even facilities PS3 controller pairing.

SD Card Setup
You're going to end up with a lot of software and data on your Pi. If you're really frugal with storage, it's possible you might be able to get by with the SD card (8 GB?) that was shipped with your Pi. I choose to buy a 64 GB SD card to be safe, but that meant that I had to format it. There are lots of tutorials available elsewhere that explain how to do this.
I have a Mac and followed the steps here: https://stackoverflow.com/a/44205432/554481. If your SD card has more than 32 GB, you'll have to do a few additional steps, as noted here: https://www.raspberrypi.org/documentation/installation/sdxc_formatting.md. Basically the extra steps involve preformatting the SD card with Apple's built-in Disk Utility tool.
Hostname and SSH Configuration
Follow the steps here to turn on SSH.
If your Pi and laptop are on the same wifi network you can test a connection to the Pi from your laptop with the command below:
# Run this command
ping raspberrypi.local

# And you should see results like this:
PING raspberrypi.local (192.168.1.11): 56 data bytes
64 bytes from 192.168.1.11: icmp_seq=0 ttl=64 time=12.195 ms
64 bytes from 192.168.1.11: icmp_seq=1 ttl=64 time=155.695 ms
64 bytes from 192.168.1.11: icmp_seq=2 ttl=64 time=49.939 ms
64 bytes from 192.168.1.11: icmp_seq=3 ttl=64 time=31.751 ms

# If you're able to ping the Pi, you should also be able to ssh into it
ssh [email protected]
All Raspberry Pis should respond to the raspberrypi.local hostname, but this becomes problematic if you have multiple Pis on the same wifi network (e.g., if you're using the same wifi as other autonomous Pi cars during a race at a public event). You should change the hostname to avoid these name collisions, otherwise you might not be able to find and connect to your car. On the Pi, open this file: /etc/hosts. Before making any edits, the file should look something like this:
127.0.0.1       localhost
::1             localhost ip6-localhost ip6-loopback
ff02::1         ip6-allnodes
ff02::2         ip6-allrouters

127.0.1.1       raspberrypi
Replace raspberrypi with whatever new name you want to use. In my case, I'm choosing ryanzotti. Next, edit the following file /etc/hostname. By default this file should only contain the text raspberrypi. Replace it with the new name, then save the file. Now commit the changes to the system and reboot:
# Commit the change
sudo /etc/init.d/hostname.sh

# Reboot the Pi
sudo reboot
You should now be able to log into your Pi like so:
ssh [email protected]
Circuitry
I specialize in machine learning, not hardware, and this was my first time working with circuits. If you have prior circuitry experience and come across something I've done that doesn't make sense, go with your instinct because I could be wrong. I followed tutorials from here:
Note that you won't be able to follow the tutorials verbatim. One of the tutorials uses a Raspberry Pi 2 whereas I use a 3. The differences are not significant, so you should be able to figure it out. Both tutorials give much better explanations than I can, but if you're curious exactly how I did the wiring, see my diagram below.

Useful Links
- TensorFlow Timeslines example: Show execution time for each node in your TensorFlow graph
- Raspberry Pi motor circuitry: Tutorial for connecting DC motors to your Raspberry Pi
- Raspberry Pi range sensor circuitry: Tutorial for connecting an ultrasonic range sensor to your Pi
- https://www.howtogeek.com/167195/how-to-change-your-raspberry-pi-or-other-linux-devices-hostname/: Tutorial to give your Pi a hostname so that it's easier to find on wifi
- http://docs.donkeycar.com/ Docs for DonkeyCar, a DIY Meetup group in San Francisco.
- http://docs.donkeycar.com/: The GitHub repo for the winner of the DIYRobors meetup in San Francisco and Oakland
- https://makezine.com/projects/build-autonomous-rc-car-raspberry-pi/ Donkeycar overview
