Kikpad Save
KiKPad : the Midiplus SmartPad reinvented !
  __ __|   |           |  /_) |     ___|             |           |
       |   __ \   _ \  ' /  | |  / |      _ \ __ \   |      _` | __ \   __|
       |   | | |  __/  . \  |   <  |   |  __/ |   |  |     (   | |   |\__ \
      _|  _| |_|\___| _|\_\_|_|\_\\____|\___|_|  _| _____|\__,_|_.__/ ____/
KIKPAD
KiKPad : the Midiplus SmartPad reinvented !


We did it again !
The KikGen Labs proposes again a firmware entirely rewritten for a commercial product. This time it is the Smartpad from Midiplus, which technical characteristics being very close to the Launchpad from Novation. That firmware allows now 64 pads, 64 RGB colors (instead 3 !), 8 encoders, all buttons operationals, and obviously usb midin in/out. It was written with the stm32duino platform, for the STM32F1 uC family.
The perspectives offered by this new open firmware are vast: fully custom0ized Ableton Live controller, chord generator, autonomous sequencer, master keyboard , etc....For example, I have developped an Akai Surface controller emulation for the MPC Live, allowing my Kikpad to be used as it was the native hardware.


For a quick start, you can check the "demo" module, transforming the Kikpad in a small midi keyboard and controller.
I want to thank here DerFetzer for his similar project (developed in Rust) and the inspiration for the launch of this project realized under "lockdown " ! have a look here : https://github.com/DerFetzer/open-cleverpad
Solenoid made also a great job by collecting a lot of information on the Midiplus Smartpad : https://github.com/s0len0id/smartpad-tester
This work is licensed under a Creative Commons Attribution-NonCommercial 4.0 International License.
How to flash
(pictures : credit to "de douby").
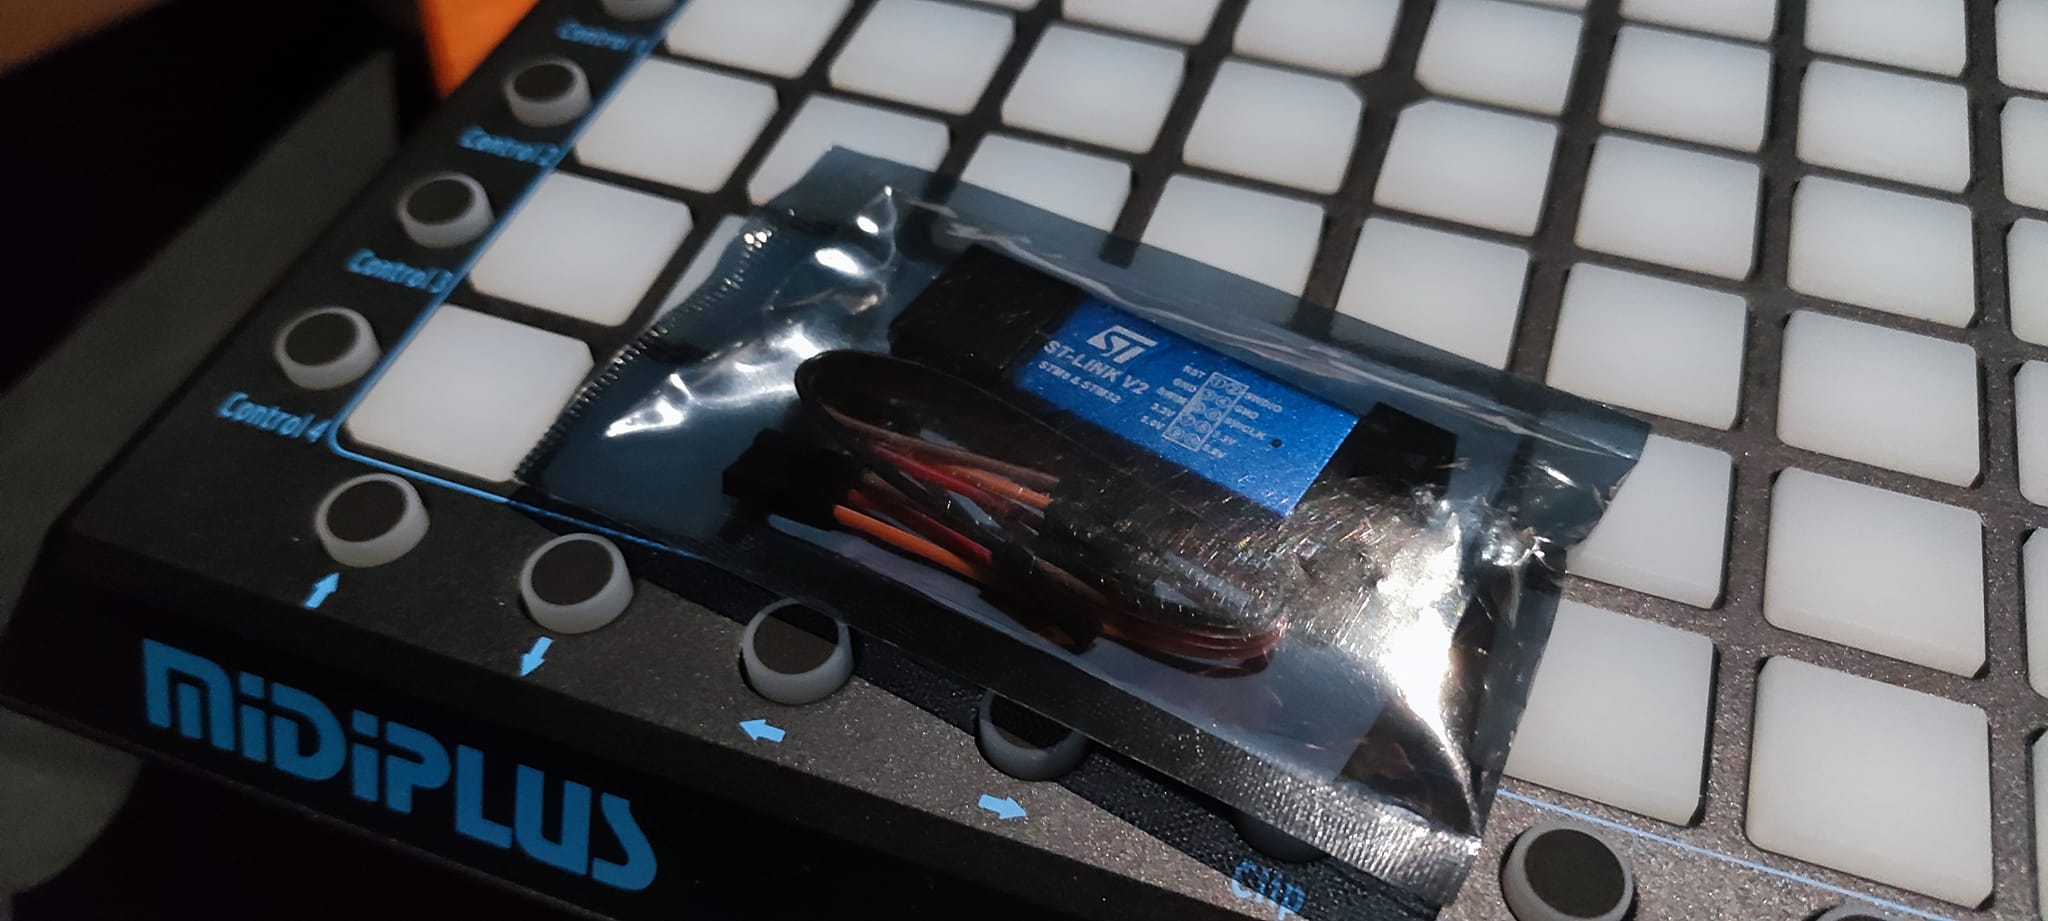
First, you must upload the bootloader at address 0x08000000, with STM-LINK UTILITY. You need an ST-LINK V2 stick to do that.
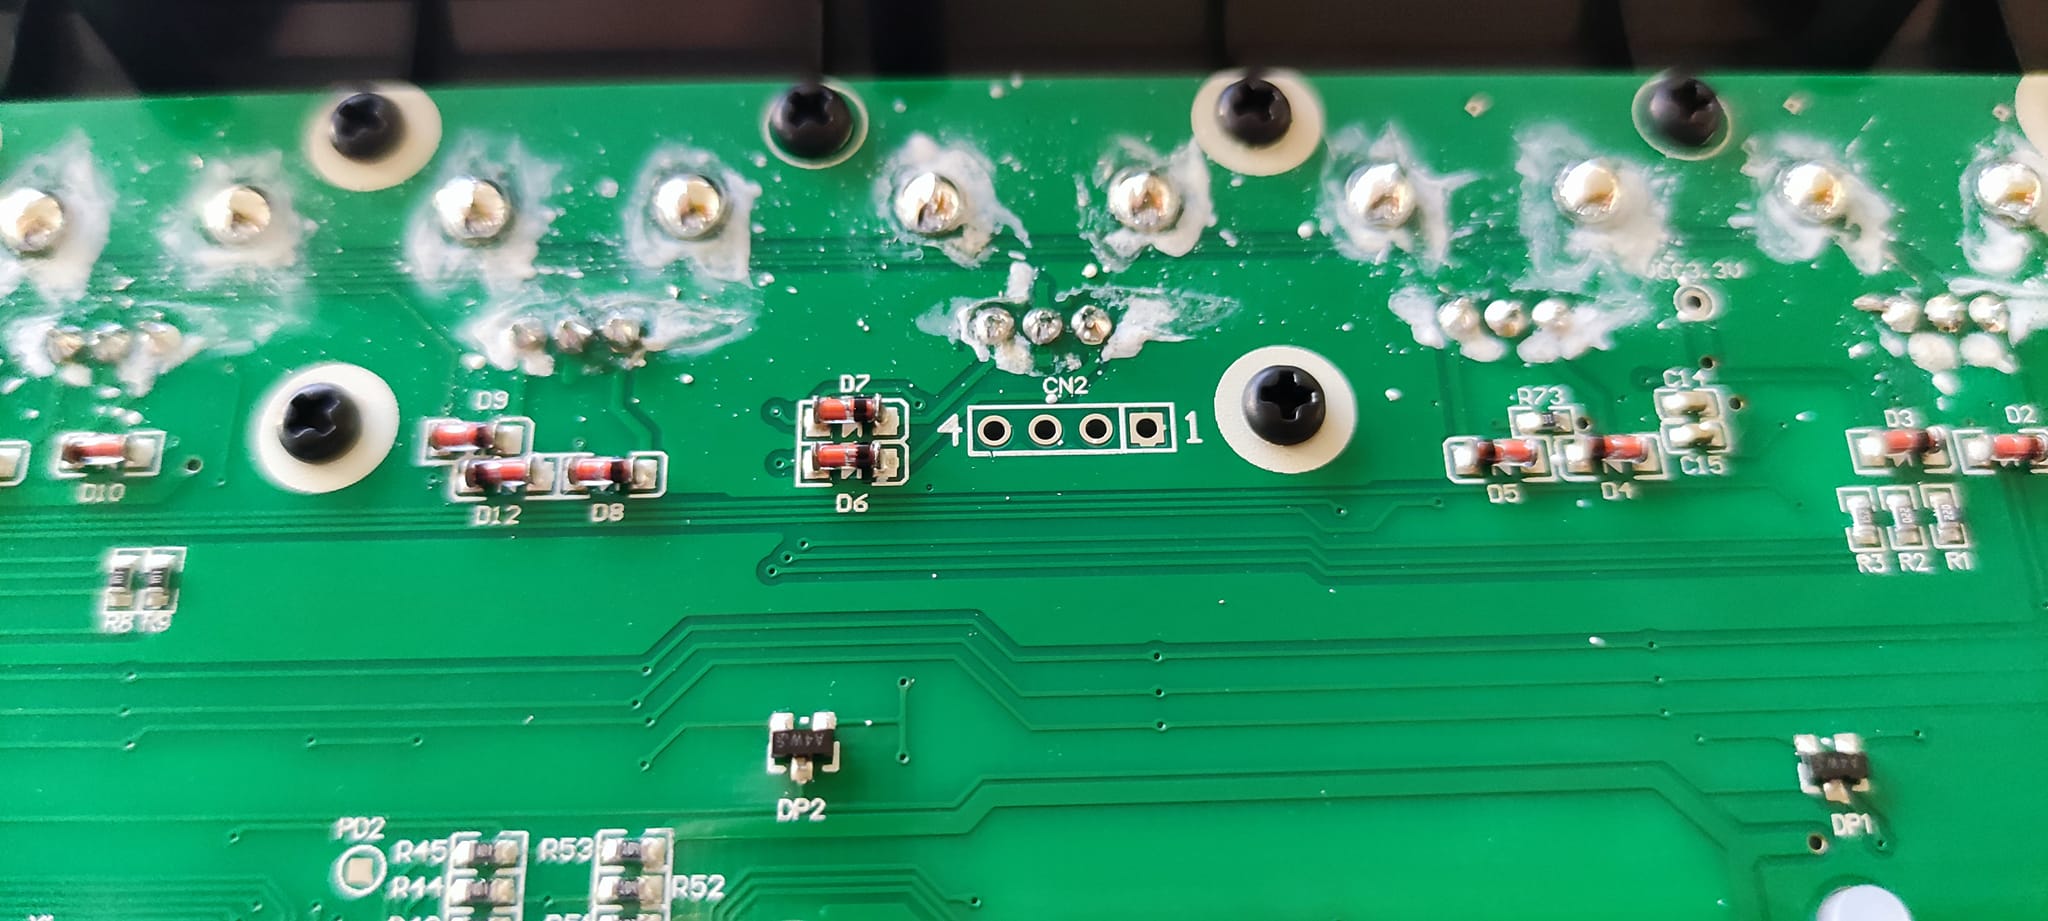
It is necessary to open the Smartpad (remove panel from the back), and connect the stick to the CN2 .
Pinout is :
- 1.GND
- 2.SWDIO
- 3.SWDCLK
- 4.RESET
You must also connect the USB cable for powering the Smartpad
Download the bootloader firmware here : https://github.com/TheKikGen/stm32-tkg-hid-bootloader/releases
Once the Kikpad is connected to the STLINK :
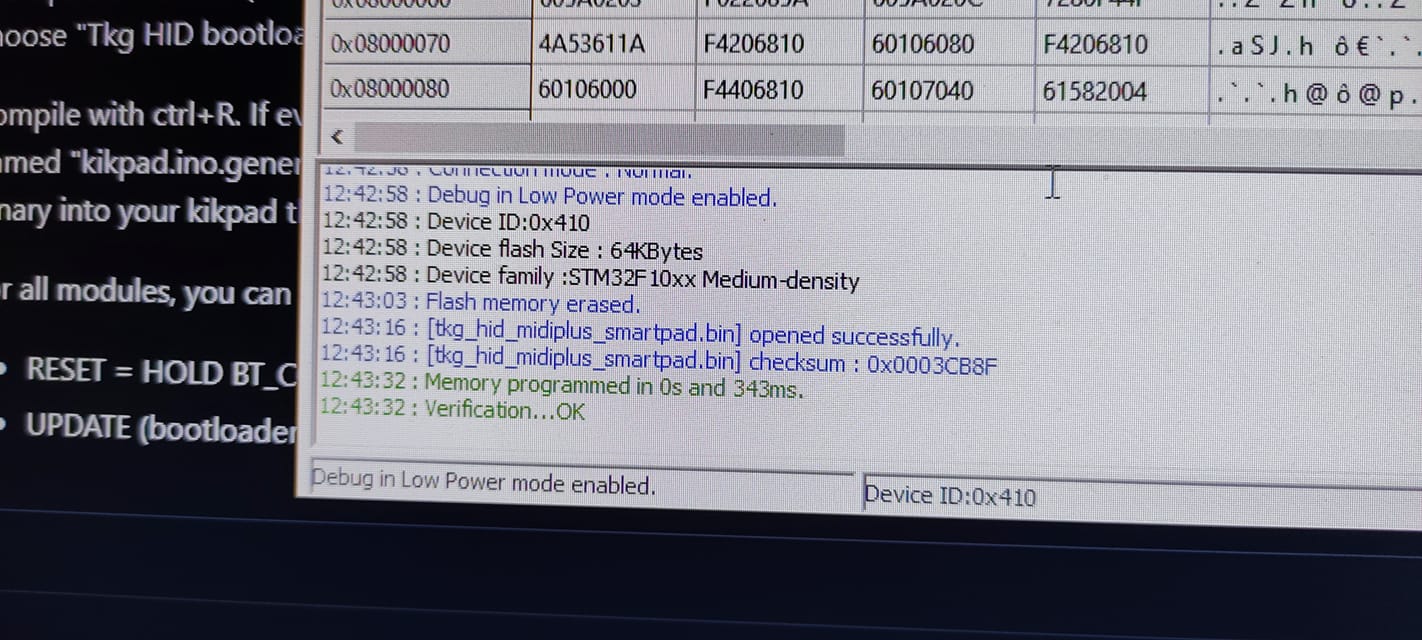
1/ Open the ST-LINK utility, and flash the bootloader "bootloader_only_binaries/tkg_hid_midiplus_smartpad.bin" file at 0x08000000. The original firmware from Midiplus is protected. So you will have to remove the protection check to erase and reflash the Kikpad firmware.
2/ Pickup one of the pre-compiled binary
kikpad.mod_MPC_stm32f103rb.bin
kikpad.mod_demo_stm32f103rb.bin
kikpad.mod_force_stm32f103rb.bin
3/ Upload the mod_x bin file with STLINK at 0x8001000 or use tkg_flash utility to do that for you in HID mode
4/ Disconnect Kikpad from USB and remove STLINK connector. Plug again in your computer. You should see a "KIKPAD" midi device.
Hacking around
About Arduino environment : I use the Roger's core for stm32.
Follow the instructions there to install this core after the Arduino platform setup. Install the midixparser library in your Arduino libraries directory : https://github.com/TheKikGen/midiXparser/archive/refs/heads/master.zip Try to compile some examples from the "File/examples" menu to check if the ARM compiler works.
The uC within the Smartpad is a STM32F103RBT6. I have adjusted the Roger's core configuration files for this uC + some tuning regarding upload methods. You will find here my full stm32duino package you can copy in your (home)/Arduino/hardware directory. You need to restart the Aduino IDE after that.
In the Arduino IDE, you need then to choose STM32F1 boards (stm32duino in sketchbook), then STM32F103RB variant.
At first use the simple module mod_kikpad_demo.h that is a basic midi keyboard sending notes to the usb midi port. Uncomment from the line #176
// Kikpad functionnal module.Uncomment only one.

#include "mod_kikpad_demo.h"
//#include "mod_kikpad_MPC.h"
//#include "mod_kikpad_MPCClipsTest.h"
//#include "mod_kikpad_MPCClipLauncher.h"
//#include "mod_kikpad_MPCForce.h"
The upload method (bootloader) changes the start address of your binary, during the linking process. So you need to choose "Tkg HID bootloader 3.1" in the tools/upload method menu.
Compile with ctrl+R. If everything is ok, get the binary in your working directory with ctrl+alt+S, the file shoud be named "kikpad.ino.generic_stm32f103rb.bin". At this point, use the tkgflash utility on the command line to upload the binary into your kikpad the first time, or if update, switch the Kikpad to update mode (see below).
For all modules, you can :
- RESET = HOLD BT_CONTROL4 & MASTER8 THEN PRESS SET
- UPDATE (bootloader mode) = HOLD MODE2 & MASTER7 THEN PRESS SET
