Aframe Heatmap3d Save
Terrain-like heatmap data viz component for AFrame
aframe-heatmap3d
Terrain-like heatmap data viz component for AFrame. Provide your data as an greyscale image, then choose a palette, opacity settings, and blur radius.

This component is totally indebted to Bryik's terrain component and the work by others that went into that. This component is separated from that one because the usage and internals have totally changed, but the basic approach is the same.
API
| Attribute | Description | Default |
|---|---|---|
| src | Data to visualize: image URL or AFrame asset (e.g. '#myImage') | |
| srcMobile | Alternative URL to use when viewing on mobile devices | |
| srcOpacity | URL or AFrame asset with a greyscale image to use for opacity values. | |
| srcOpacityMobile | URL or AFrame asset with a greyscale image to use for opacity values. | |
| palette | Color palette | redblue |
| flipPalette | Flip color palette upside-down? | false |
| scaleOpacity | Scale opacity of peaks? | true |
| scaleOpacityMethod | "log","log2", log10", "linear", or "const" scaling of opacity | "log2" |
| opacityMin | Minimum opacity | 0.2 |
| opacityMax | Max opacity | 1 |
| ignoreZeroValues | If true, zero values in the data will not be rendered (note: requires scaleOpacity be true) |
true |
| ignoreTransparentValues | If true, pixels with zero opacity will not be included in the terrain mesh | true |
| stretch | If true, we will stretch the image values so they fill the range 0-255. | false |
| stackBlurRadius | Blur effect. See below. | null |
| stackBlurRadiusMobile | Blur effect. See below. | =stackBlurRadius |
| invertElevation | Default: white=1, black=0. If this is true, white=0, black=1 | false |
| renderMode | "surface" or "particles" | surface |
| wireframe | Display as wireframe? | false |
| emissive | Emissive color for materials | #000000 |
| emissiveIntensity | EmissiveIntensity property for materials | 1 |
| shininess | Shininess property for phong material | 30 |
| metalness | Metalness property for standard material | 0.5 |
| roughness | Roughness property for standard material | 0.5 |
| particleSize | Particle size, for renderMode=particles | 1.0 |
| material | Material type: can be "lambert", "phong", or "standard". Ignored if per-vertex opacity is used | "standard" |
| blending | Blending mode (as string, eg "THREE.AdditiveBlending") | THREE.NormalBlending |
| specular | Specular highlights color | #111111 |
| loadingAnimDur | How long the loading animation runs, in ms | 1800 |
| unloadingAnimDur | Duration, in ms | 1500 |
| height | depth of component (on Z axis, not Y axis) | 1 |
| width | width of component, in AFrame units | (see below) |
Using
Supply a greyscale image (or a color image, in which case the Red pixel value is taken). Normally white=0 elevation and black=1 elevation, or use invertElevation to switch this. Greyscale values are respected, or use stretch:true to stretch the values so it fully covers elevation 0 to elevation 1.
If you specify just one of height or width, the other will be calculated based on the aspect ratio of the src image. The default height is 1. You can also specify both height and width to force a certain size. The map is always vertically 1 AFrame unit high, so adjust the entity's "scale" Y axis attribute to adjust the height.
You can exlcude zero values in the data by setting ignoreZeroValues:true. With this set to true the mesh will not contain any triangles/points over pixels with 0 value. This can result in visual 'islands', so you may wany to add a small nonzero offset to areas of the map (e.g. inside a region border) to avoid these.
The opacity/transparency logic is a bit complex. If you supply your own opacity values image as alphaSrc (this image is treated the same as src, ie. it will be StackBlurred, etc.) these will be used. Alpha values will be taken directly from this image, in the range 0-255, and not rescaled.
To use per-vertex opacity scaling, set scaleOpacity:true. This way you can make peaks more opaque and valleys more transparent. The min and max vertex opacity are controlled by opacityMin and opacityMax, and the function used to scale pixel values to opacity alpha values is given by scaleOpacityMethod. Set scaleOpacityMethod:const and scaleOpacity:true (the default) to set all vertices to use opacityMin as their alpha value.
If you're using per-vertex opacity with a opacity scaling method other than "const" then the material will be a custom shader material that supports per-vertex opacity. But if you don't have different alpha value per vertex we can use a regular THREE material, so you can set
material to phong, lambert, or standard (default). The metalicty, roughness, shininess, and blending attributes all apply to the selected material.
wireframe works as expected. Note that the mesh is quite tight-knit, so you may have to zoom in, provide a lower-resolution image, or change the scale to see the wireframe nicely.
If you want to stack several semi-tranparent maps, you have to place them in your AFrame scene (the HTML) in order from back toward the camera. AFrame seems to render things in the sequence they appear, so if you put something close to the camera, that will draw first and never do the Z-buffer opacity testing for items drawn behind it. You can also try blending: THREE.AdditiveBlending
Color Palettes
There are a few built-in palettes:
greypurple, aquablues, reds, terrain, redblue, RdYlBu, terrain, purples, grass, winter, greens, autumn, hot, viridis, plasma, inferno, parula, and cool.
These are taken from MATLAB and ColorBrewer. You can also specify a palette as a JSON array, as shown in the example. See also the MATLAB_PALETTE.m file to see how to convert MATLAB colormaps to JSON strings. To make a mono-colored surface, supply palette with a single entry, e.g "...; palette: ['#ff0000']; ..."
See the [aframe-hexgraph-hexmap example]((https://morandd.github.io/aframe-hexgraph-hexmap/example/) to see the palette options in action.
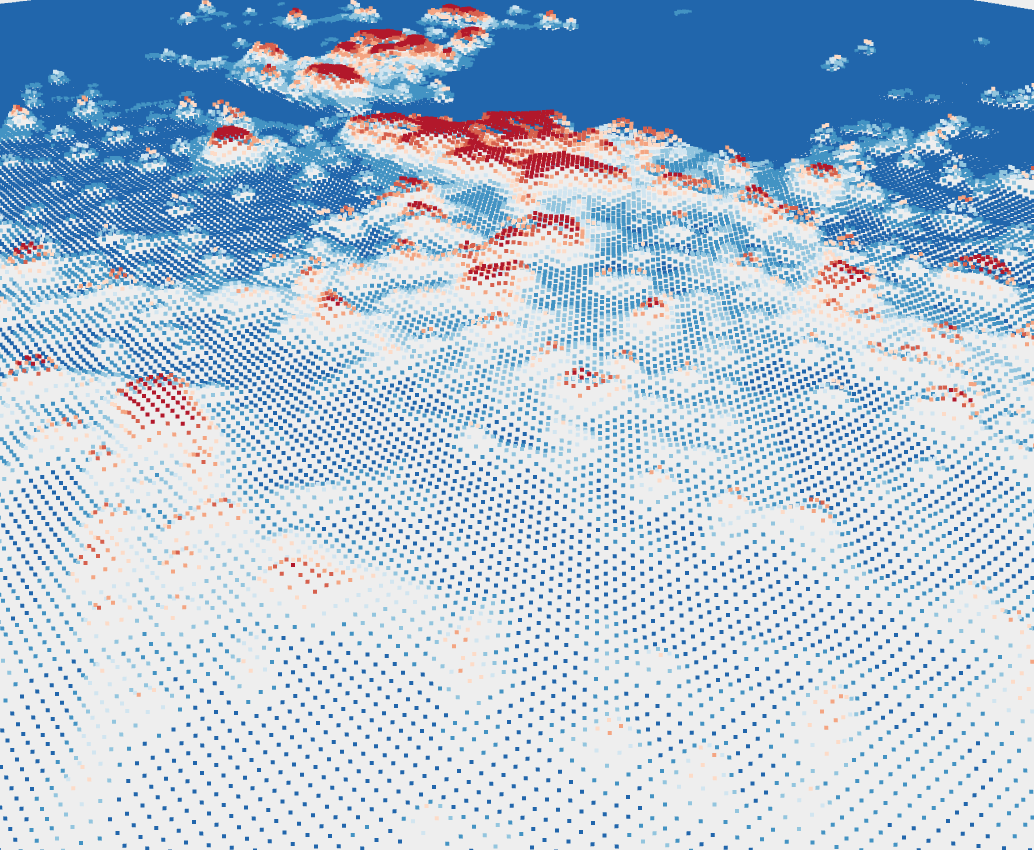
Particle mode
To render the map as particles instead of a continuous surface, specify renderMode:particles and optionally adjust the particleSize. It may be nice to fix the camera position if you use particle mode, because particles are always the same size regardless of how close/far the camera is from them. So when viewed from afar, we see a dense cloud, but when zoomed in, individual particles become hard to see as they are still small but now widely spaced.
Another setting to mind is particleDepthTest. To be honest I'm not 100% sure what this does/means, but the short story is if this is False, and you try to have particles on top of another object they will not render properly. However setting it to True increases the GPU demand a lot (based on the very unscientific test of how hot my laptop gets). I have chosen the default as false but you may need to set it to true. To improve performace, reduce the number of points by resizing your src.
Blurring
You should generate the heap maps properly and feed them as images to this component to display. However a poor man's way of building heatmaps is to plonk down the data in an image, then blur it. This is implemented here using Flozz's extremely convenient and nice StackBlur javascript blur library.
Health warning: Blurring the data at the client is hacky. It's slow, and if you're displaying scientific data, not so denfensible/transparent. That said, it can be a useful shortcut. To blur we can use the StackBlur javascript library. You can provide a sharp image as the src then specify a stackBlur value, and the StackBlur library will be invoked. Note it is a bit slow: in the example, blurring takes 0.6s on a modern Macbook Pro, which slows page load time. So it is better to blur the source image.
Using
D3 is required.
<script src="https://cdnjs.cloudflare.com/ajax/libs/d3/4.4.1/d3.min.js"></script>
<script src="https://cdn.rawgit.com/morandd/aframe-heatmap3d/v1.0.4/aframe-heatmap3d.js"></script>

<!-- Optional: Only needed if you want to use StackBlur. This minified file is copied from https://github.com/flozz/StackBlur  -->
<script src="https://cdn.rawgit.com/flozz/StackBlur/1.4.0/dist/stackblur.min.js"></script>
Example:
<!--  It always has a height (Y axis) of 1, so we use 'scale' to control the height -->
<a-entity aframe-heatmap3d="src: #pngEU; srcMobile: #pngEUMobile;  scaleOpacity: true; stackBlurRadius:8.5; stackBlurRadiusMobile:0.5; width: 4; height: 4;" scale="1 0.23 1">
</a-entity>
TODO
- Improve handling of load sequence, use Promises and onload events properly.
- Allow JSON input. To implement this, the user can specify a 2-dimensional array as JSON, or set of x/y/value points, which are drawn to a canvas then blurred.
- Use material component if one is specified
